background image


Cable Management Bracket kit  35 


Installation is complete. 

Summary of Contents for HP 10000 G2 Series

Page 1: ...ument is for the person who installs racks and rack products This procedure is performed only by trained personnel HP assumes you are qualified in performing installations and trained in recognizing hazards in rack products Part Number 489899 006 October 2013 Edition 6 ...

Page 2: ...e without notice The only warranties for HP products and services are set forth in the express warranty statements accompanying such products and services Nothing herein should be construed as constituting an additional warranty HP shall not be liable for technical or editorial errors or omissions contained herein ...

Page 3: ...e 17 Kit contents 17 Required tools 17 Installing foam rail gaskets 17 Installing foam rail gaskets between racks 18 Installing the floor gasket 20 Ballast kit 22 About this device 22 Kit contents 22 Required tools 22 Installing the ballast kit 22 Baying kit 25 About this device 25 Kit contents 25 Required tool 25 Installing the baying kit 25 Cable Management Bracket kit 28 About this device 28 Ki...

Page 4: ...g the ground bonding rack option kit on HP 10000 G2 Series Rack side panels 55 Installing the ground bonding rack option kit on HP 10000 G2 Series Rack fan kits 57 Installing the ground bonding rack option kit on HP 10000 G2 Series Rack 150 mm extension kits 59 Installing the ground bonding rack option kit on HP 10000 G2 Series Rack 200 mm extension kits 59 Installing the ground bonding rack optio...

Page 5: ... plate 89 Installing the solid rack base plate 90 Installing the airflow gasket 91 Installing the floor gasket 93 Installing the Top Exhaust Extension kit 93 Removing the rear doors 94 Installing the rear extension assembly 95 Installing the solid rear doors 97 Assembling the kits 98 Installing the kit assembly 101 Adjusting the kit 102 Baying options 103 Rear Extension kit 105 About this device 1...

Page 6: ... full frame rack tie down kit 121 Securing the 1200 mm full frame rack to the floor 123 Vertical PDU Mounting kit 124 About this device 124 Kit contents 124 Required tools 124 Installing the Vertical PDU Mounting kit 124 Electrostatic discharge 126 Preventing electrostatic discharge 126 Grounding methods to prevent electrostatic discharge 126 Support and other resources 127 Before you contact HP 1...

Page 7: ...afety requirements and guidelines for manual material handling Get help to lift and stabilize the product during installation or removal especially when the product is not fastened to the rails When the component weighs more than 22 5 kg 50 lb at least two people must lift the component into the rack together If the component is loaded into the rack above chest level a third person must assist in ...

Page 8: ...iate for your installation site If you require a U S plenum rated CL2P cable contact your local HP authorized reseller to obtain any of the following options 149363 B21 20 foot plenum cable 149364 B21 40 foot plenum cable Rack baying option kits The number of baying kits needed to join a series of racks is one less than the number of racks in the suite Each baying kit supplies parts to bay two cab...

Page 9: ...able configurations Fan 110V 220V kit on page 42 257414 B21 Enhances natural convection cooling by increasing the airflow in the rack Filler Panel kit on page 45 AF072A Enables you to control airflow by covering empty locations in your rack Front Door kit on page 46 AF009A Enables you to add a door to the front of your rack Ground Bonding kit on page 49 AF074A Reduces the level of electromagnetic ...

Page 10: ... B21 Holds rack components inside the rack Side Panel kit on page 116 AF054A Provides enclosures for the sides of a rack Tie Down kit on page 119 AF076A Increases the stability of free standing racks Vertical PDU Mounting kit on page 124 H6L32A Allows HP PDU vertical models to be mounted in the rack ...

Page 11: ... x 12 flat HD screw M4 external washer M4 x 10 pan HD screw M6 x 12 pan HD screw M4 plain washer M4 nut M6 external washer 8 8 2 12 2 6 10 Extra hardware might be included for your convenience Required tools The following tools are required for installation No 2 Phillips screwdriver No 3 Phillips screwdriver Preparing the sliding shelf rail assemblies for installation Each sliding shelf rail assem...

Page 12: ...M4 x 12 flat HD screws and M4 external washers 5 Repeat steps 1 through 4 for the right rail with fixed brackets Installing the sliding shelf rail assemblies WARNING To reduce the risk of personal injury or damage to the equipment be sure to secure mounted rack components when moving the rack You must install the sliding shelf rail assemblies before installing the sliding shelf Follow these steps ...

Page 13: ...he top of the component installed below the desired position for the sliding shelf IMPORTANT When using the template on the rear of the rack frame mark the rack at the top of the template to help align the next rack component 2 Align and secure the rear of the left sliding shelf rail assembly to the rear of the rack frame with two M6 x 12 pan HD screws and M6 external washers ...

Page 14: ...ve the sliding shelf into the rack while tilting the front of the shelf up Align the rear notches on the sliding shelf over the rear tabs on the sliding shelf rail assemblies 2 Push the sliding shelf down onto the rear tabs to align the front notches on the sliding shelf with the front tabs on the sliding shelf rail assemblies 3 Lower the front of the sliding shelf over the tabs on the front of th...

Page 15: ...ble management arm to the sliding shelf with the flat side of the cable management arm mounting bracket flush with the sliding shelf 6 Secure the cable management arm to the sliding shelf using two M4 x 12 flat HD screws and M4 external washers with two M4 nuts on the inside of the shelf NOTE The cable management arm attaches to the rear of the sliding shelf on either the right or left side ...

Page 16: ...tion is complete Using the 100 Kilo Sliding Shelf Use the handle on the front of the sliding shelf to slide it in and out of the rack When sliding the shelf back into the rack there may be resistance Apply pressure as needed to fully move the shelf into the rack IMPORTANT Be sure to secure all rack mount system components when moving the shelf out of the rack ...

Page 17: ...center Kit contents Item Quantity 600 mm 24 in perforated floor gasket or 800 mm 31 in perforated floor gasket 1 1 Foam rail gasket roll 4 Extra hardware might be included for your convenience Required tools No tools are required for this procedure Installing foam rail gaskets IMPORTANT This option kit is only compatible with HP racks that are 600 mm 24 in or 800 mm 31 in wide 1 Cut the foam rail ...

Page 18: ... vertical frame Installing foam rail gaskets between racks CAUTION The foam rail gasket must be installed into the rack before two or more racks can be bayed together For additional information on baying racks see the HP Baying Rack Option Kit If installing the foam rail gasket between racks that have a baying kit installed the baying bracket must be removed before the foam rail gasket can be inse...

Page 19: ... Follow steps 1 through 3 to install the foam rail gasket into a rack that will be bayed using a 24 in baying bracket If the rack will be bayed using a 600 mm baying bracket rotate the foam rail gasket 90 degrees before inserting it into the space between the racks 4 Gently push the foam rail gasket into the space between the racks until it is flush with the vertical frame ...

Page 20: ...al See the HP Baying Rack Option Kit for specific information on baying racks Installing the floor gasket 1 Depending on the size of your rack cut the floor gasket at the perforation to reduce the length from 800 mm 31 in to 600 mm 24 in ...

Page 21: ...w Optimization kit 21 2 Remove the protective tape from the bottom edge of the floor gasket and apply it to the bottom of the rack with the adhesive strip facing the front of the rack Installation is complete ...

Page 22: ...ginal rack hardware kit One of the following screwdrivers o Flathead screwdriver o T 25 Torx driver Installing the ballast kit HP recommends installing a single ballast assembly as close to the bottom of the rack as possible Occasionally more than one ballast kit might be necessary In these cases install the first ballast assembly as close to the bottom of the rack as possible and move up the rack...

Page 23: ...ut insertion tool included in your original rack hardware kit 2 Count 16 holes up the rack starting at the bottom cage nuts and install the two top cage nuts using the cage nut insertion tool 3 Align the screw holes of the ballast assembly with the installed cage nuts ...

Page 24: ...Ballast kit 24 4 Insert the M6 screws into one side of the ballast assembly to secure it to the rack 5 Repeat step 4 to secure the other side of the ballast assembly to the rack Installation is complete ...

Page 25: ...g brackets 6 600 mm baying brackets 6 T 30 Torx screws 15 Extra hardware might be included for your convenience Required tool You will need a T 30 Torx driver Installing the baying kit WARNING To reduce the risk of personal injury or damage to the rack and equipment the racks must be positioned and secured together according to these instructions Failure to do so could result in an unstable instal...

Page 26: ...the racks 3 Position the racks side by side ensuring that the feet of the racks are on solid flooring no cracks or openings 4 Attach three baying brackets either 24 inch or 600 mm depending on the floor layout to the front and rear of each rack set using two T 30 Torx screws in each bracket or ...

Page 27: ...eed to remove the rear extensions Attach three baying brackets to the rear extensions using two T 30 Torx screws in each bracket 5 Bay any additional racks 6 Attach side panels to each end of the bayed racks and reattach the front and rear doors Installation is complete ...

Page 28: ...nt D ring bracket clips 10 Cable management D ring bracket clamps 10 Cross over brackets 2 12 7 cm 5 in hook and loop cabling strap 10 20 3 cm 8 in hook and loop cabling strap clips 10 M6 cage nuts 11 M6 x 16 mm Torx screws 11 M5 5 mm x 10 mm Torx screws 9 1 4 turn plastic latches 6 Extra hardware might be included for your convenience Required tools The following tools are required for installati...

Page 29: ...1 4 turn plastic latch on either side of the 1U cable management bracket 2 Align the 1U cable management bracket to the screw holes in the desired location of the rack 1 3 Turn the 1 4 turn plastic latch on either side of the 1U cable management bracket clockwise until it locks in place 2 ...

Page 30: ...le management bracket to the screw holes in the desired location of the rack 1 3 Turn the two 1 4 turn plastic latches on either side of the 2U cable management bracket clockwise until they lock in place 2 Installing the cable management D ring bracket The cable management D ring bracket can be installed in either a front mount or a side mount depending on your rack configuration ...

Page 31: ...ement D ring bracket in a front mount Front mount on page 31 3 Install the cable management D ring bracket in a side mount Side mount on page 32 Front mount 1 Using a cage nut insertion tool install an M6 cage nut into the desired location on the front of your rack 2 Align the cable management D ring bracket with the previously installed M6 cage nut 1 ...

Page 32: ... cable management D ring bracket with the screw hole in the desired location on the side of your rack 1 2 Using a T 25 Torx driver insert one M5 5 x10 mm Torx screw to secure the cable management D ring bracket to the rack 2 Installing the cross over bracket 1 Align the cross over bracket with the appropriate screw holes in the desired location across the back of the rack 1 ...

Page 33: ...les for the cross over bracket are located on the side of the rear rack screw column towards the inside of the rack 2 Using a T 25 Torx driver insert two M5 5 x 10 mm Torx screws on either side of the cross over bracket and secure to the rack frame 2 ...

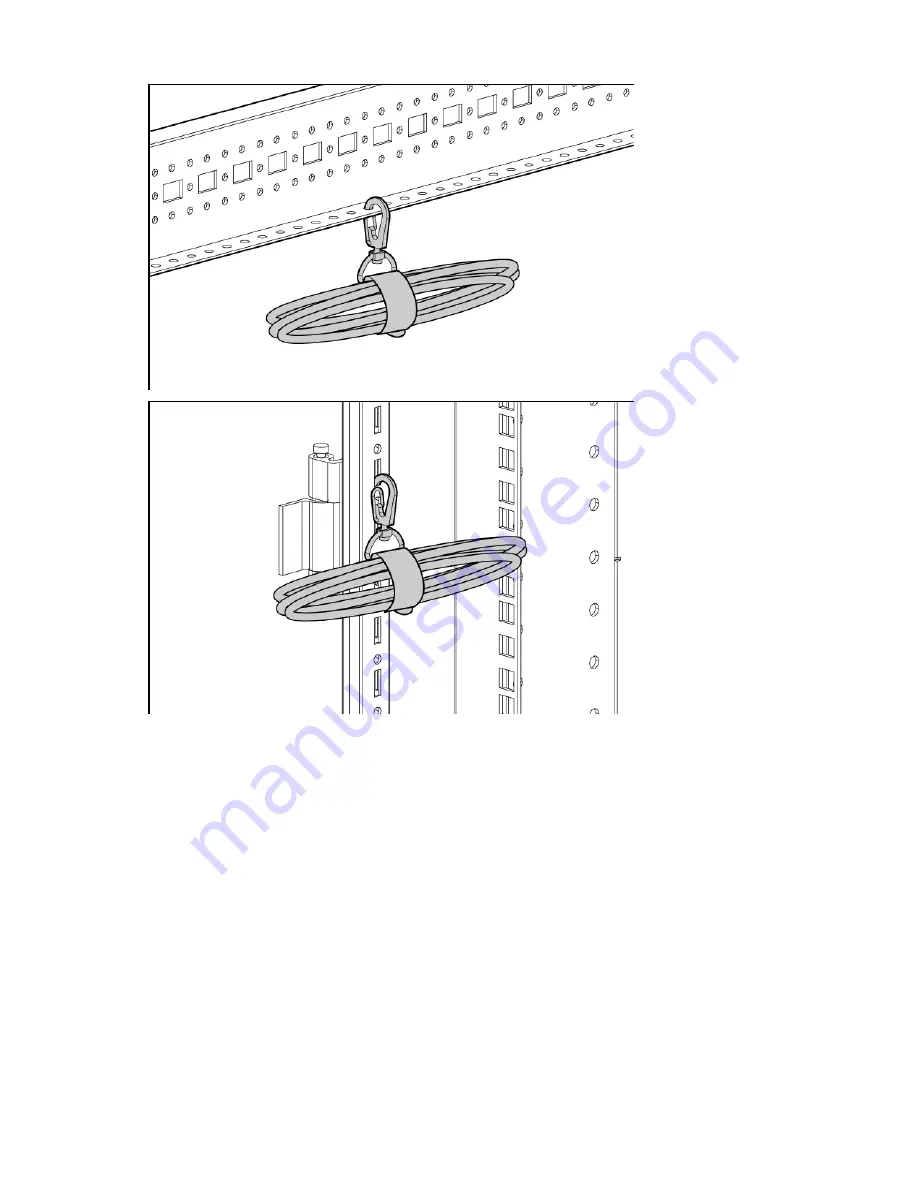
Page 34: ...e Management Bracket kit 34 Installing the hook and loop cabling straps Attach the clip to the rack in any of the following positions then route and secure your cables with the hook and loop cabling straps ...

Page 35: ...Cable Management Bracket kit 35 Installation is complete ...

Page 36: ...ng on which kit you order this kit includes the following items Item Quantity 600 mm cable management tray 1 600 mm cable trough 8 Wire for trough 16 Cover 8 or Item Quantity 800 mm cable management tray 1 800 mm cable trough 1 Wire for trough 2 Cover 1 or Item Quantity Cable trough inner tray 1 Cable trough outer tray 1 Extra hardware might be included for your convenience Required tool You will ...

Page 37: ...Cable Management Tray kit 37 Installing the cable management tray 1 Attach the wire for the trough to the cable management tray 2 Remove the two screws from the rack top ...

Page 38: ...Cable Management Tray kit 38 3 Install the cable management tray on top of the rack using the same two screws you removed in step 2 4 Route the cables through the cable management tray ...

Page 39: ...Cable Management Tray kit 39 5 Hook and slide the cover into place Installing the cable management inner and outer trays 1 Attach the cable management outer tray to the cable management tray ...

Page 40: ...Cable Management Tray kit 40 2 Slide the inner tray into the outer tray and adjust them to the desired length 3 Attach the cable management inner tray to the cable management tray ...

Page 41: ...Cable Management Tray kit 41 4 Route the cables through the cable management tray Ground bonding stud location ...

Page 42: ...is kit might contain extra hardware for your convenience Required tools You will need a T 30 Torx driver Installing the fan NOTE The rack top covers might be different but the installations are identical 1 Using a T 30 Torx driver remove the four T 30 Torx screws securing the rack top cover to the rack and remove the rack top cover Retain the screws 2 Align the fan assembly so that the power cord ...

Page 43: ...Fan 110V 220V kit 43 3 Insert the fan assembly into the top of the rack and secure using the four T 30 Torx screws from step 1 4 Connect the power cord to the fan assembly ...

Page 44: ...ole in the rack rail and push the tie wrap in to lock it in place Encircle the power cord with the tie wrap by inserting the free end of the tie wrap into the hole on the other end of the tie wrap pulling the tie wrap tight and cutting off excess length Installation is complete ...

Page 45: ...n extra hardware for your convenience Required tools No tools are required for this procedure Installing the filler panel 1 Position the filler panel in the desired rack location 2 Snap the filler panel into place CAUTION Always use filler panels to fill all remaining empty front panel U spaces in the rack This arrangement ensures proper airflow Using a rack without filler panels results in improp...

Page 46: ...ries rack You can also install this option kit on HP 10000 series racks of the same size Kit contents Item Quantity Front door 1 Keys 2 Hinge brackets 2 Lock catches 2 This kit might contain extra hardware for your convenience Required tools The following tools are required for installation T 25 Torx driver Phillips screwdriver ...

Page 47: ...e is measured from the bottom of the rack to an indicated hinge bracket or lock catch fastening hole Hinge bracket mounting distance from the bottom of the rack Position number 36U 42U 1 1598 5 mm 62 9 in 1856 mm 73 1 in 2 98 5 mm 3 9 in 98 5 mm 3 9 in Lock catch mounting distance from the bottom of the rack Position number 36U 42U 3 569 5 mm 22 4 in 698 5 mm 27 5 in 4 1127 5 mm 44 4 in 1256 5 mm ...

Page 48: ...ide the bottom door hinge onto the hinge bracket on the rack frame 2 Lift the top hinge pin up and slide the upper door hinge into place 3 Release the top hinge pin to secure the front door to the rack 4 Close the front door Installation is complete ...

Page 49: ...contents Item Quantity 15 24 cm 6 in grounding straps 6 15 24 cm 6 in grounding straps with a connector on one end 6 36 83 cm 14 5 in grounding straps 8 36 83 cm 14 5 in grounding straps with a connector on one end 6 M8 internal serrated lock washer 20 M8 hex nut 20 M5 5 T 25 Torx screw 12 M6 x 10 mm Torx screw 1 M8 x 20 mm bolt 1 M8 Belleville toothed washer 1 M5 Belleville toothed washer 1 This ...

Page 50: ...away from the rack c Lift the door up and out of the bottom hinge 2 Insert an M6 T 25 Torx screw through one end of a 15 24 cm 6 in grounding strap and insert it in the second hole below the upper front door hinge on the vertical frame member of the rack Tighten the screw 3 Replace the rack front door ...

Page 51: ...and secure it to the system chassis rail 2 Place the other end of the same grounding strap over the grounding lug on the front door 3 Place an M8 internal serrated lock washer and an M8 hex nut over the grounding lug on the front door and tighten From the system chassis rail to the right rear door 1 Insert a T 25 Torx screw through the end of a 36 83 cm 14 5 in grounding strap and secure it to the...

Page 52: ...ing strap over the grounding lug on the left rear door 3 Place an M8 internal serrated lock washer and an M8 hex nut over the grounding lug on the left rear door and tighten From the left rear door to the left rear door cable access panel 1 Place one end of a 15 24 cm 6 in grounding strap over the grounding lug on the left rear door 2 Place an M8 internal serrated lock washer and an M8 hex nut ove...

Page 53: ...ding strap over the grounding lug on the rack top 3 Place an M8 internal serrated lock washer and an M8 hex nut over the grounding lug on the rack top and tighten From the grounding lug on the rack top to the grounding lug on the perforated panel 1 Place one end of a 36 83 cm 14 5 in grounding strap over the grounding lug on the rack top 2 Place an M8 internal serrated lock washer and an M8 hex nu...

Page 54: ...lace one end of a 15 24 cm 6 in grounding strap over the grounding lug on the perforated panel or fan kit 2 Place an M8 internal serrated lock washer and an M8 hex nut over the grounding lug on the perforated panel or fan kit and tighten 3 Place the other end of the same grounding strap over the grounding lug on the egress slot 4 Place an M8 internal serrated lock washer and an M8 hex nut over the...

Page 55: ...lling the ground bonding rack option kit on HP 10000 G2 Series Rack side panels From the middle system chassis rail to the bottom side panel 1 Connect a 36 83 cm 14 5 in and a 15 24 cm 6 in grounding strap with connectors together 2 Insert a T 25 Torx screw through the end of the 36 83 cm 14 5 in grounding strap and secure it to the middle system chassis rail 3 Place the end of the 15 24 cm 6 in g...

Page 56: ...rail 3 Place the end of the 15 24 6 in grounding strap over the grounding lug on the middle side panel 4 Place an M8 internal serrated lock washer and an M8 hex nut over the grounding lug on the middle side panel and tighten 5 Repeat steps 1 through 4 for the other middle side panel From the middle system chassis rail to the top side panel 1 Connect a 36 83 cm 14 5 in and a 15 24 cm 6 in grounding...

Page 57: ...ther top side panel Installing the ground bonding rack option kit on HP 10000 G2 Series Rack fan kits From the grounding lug on the rack top to the grounding lug on the fan kit 1 Place one end of a 15 24 cm 6 in grounding strap over the grounding lug on the rack top 2 Place an M8 internal serrated lock washer and an M8 hex nut over the grounding lug on the rack top and tighten 3 Place the other en...

Page 58: ... slot 1 Place one end of a 36 83 cm 14 5 in grounding strap over the grounding lug on the fan kit 2 Place an M8 internal serrated lock washer and an M8 hex nut over the grounding lug on the fan kit and tighten 3 Place the other end of the same grounding strap over the grounding lug on the egress slot 4 Place an M8 internal serrated lock washer and an M8 hex nut over the grounding lug on the egress...

Page 59: ...nd of the same grounding strap over the grounding lug on the extension kit 3 Place an M8 hex nut over the grounding lug and tighten Installing the ground bonding rack option kit on HP 10000 G2 Series Rack 200 mm extension kits From the extension kit to the bottom rack side panel 1 Insert a T 25 Torx screw through the end of the 36 83 cm 14 5 in grounding strap and secure it to the bottom side pane...

Page 60: ... tighten 4 Repeat the previous steps for the opposite side of the rack From the extension kit to the top rack side panel 1 Insert a T 25 Torx screw through the end of the 36 83 cm 14 5 in grounding strap and secure it to the top side panel 2 Place the other end of the same grounding strap over the grounding lug on the extension kit ...

Page 61: ...sher and an M8 hex nut over the grounding lug on the side panel of the extension kit and tighten 3 Repeat the previous steps to secure the other end of the same grounding strap to the grounding lug on the bottom panel of the extension kit From the egress panel grounding lug to the bottom panel grounding lug 1 Place the 36 83 cm 14 5 in grounding strap over the grounding lug on the egress panel of ...

Page 62: ... HP 10000 Series Racks Attach the appropriate grounding straps to the following locations From the system chassis rail to the front door 1 Insert a T 25 Torx screw through one end of a 36 83 cm 14 5 in grounding strap and secure it to the system chassis rail 2 Remove the inside front door panel screw 3 Place an M5 Belleville toothed washer and the other end of the grounding strap over the front do...

Page 63: ...end of the same grounding strap over the grounding lug on the right rear door 3 Place an M8 internal serrated lock washer and an M8 hex nut over the grounding lug on the right rear door and tighten From the system chassis rail to the left rear door 1 Insert a T 25 Torx screw through the end of a 36 83 cm 14 5 in grounding strap and secure it to the system chassis rail 2 Place the other end of the ...

Page 64: ...r and an M8 hex nut over the grounding lug on the left rear door and tighten 3 Place the other end of the same grounding strap over the grounding lug on the cable access panel 4 Place an M8 internal serrated lock washer and an M8 hex nut over the grounding lug on the cable access panel and tighten From the system chassis rail to the rack top 1 Insert a T 25 Torx screw through on end of a 15 24 cm ...

Page 65: ...ounding lug on the rack top and tighten 3 Place the other end of the same grounding strap over the grounding lug on the perforated panel 4 Place an M8 internal serrated lock washer and an M8 hex nut over the grounding lug on the perforated panel and tighten From the grounding lug on the perforated panel or fan kit to the grounding lug on the egress slot 1 Place one end of a 15 24 cm 6 in grounding...

Page 66: ...ng lug on the egress slot and tighten From the rack to a building facility contact your building supervisor for more information The following figure illustrates parts for this step Reference Item 1 48 26 cm 19 in mounting rail the mounting hole is located at the top or bottom of the rail 2 M8 hex nut 3 M8 Belleville toothed washer 4 Facility ground not included with this kit 5 M8 x 20 bolt ...

Page 67: ...g on the side panel 4 Place an M8 internal serrated lock washer and an M8 hex nut over the grounding lug on the side panel and tighten 5 Repeat steps 1 through 4 for the other side panel Installing the ground bonding rack option kit on HP 10000 Series Rack fan kits From the grounding lug on the rack top to the grounding lug on the fan kit 1 Place one end of a 15 24 cm 6 in grounding strap over the...

Page 68: ... slot 1 Place one end of a 36 83 cm 14 5 in grounding strap over the grounding lug on the fan kit 2 Place an M8 internal serrated lock washer and an M8 hex nut over the grounding lug on the fan kit and tighten 3 Place the other end of the same grounding strap over the grounding lug on the egress slot 4 Place an M8 internal serrated lock washer and an M8 hex nut over the grounding lug on the egress...

Page 69: ... single rack mountable component that exceeds 99 8 kg 220 lb you must use the heavy duty stabilizer Kit contents Item Quantity Heavy duty front stabilizer mount 1 Heavy duty stabilizer feet 2 M8 x 16 mm bolt 8 M8 x 30 mm bolt 2 M8 flat washer 10 This kit might contain extra hardware for your convenience Required tools The following tools are required for installation Ratchet with sockets Adjustabl...

Page 70: ...rs securing the front stabilizer mount to the front caster plate c Insert and partially tighten two M8 x16 mm bolts with washers on each side of the caster plate skirt securing the front stabilizer mount to the front caster plate d Tighten the bolts from step b e Tighten the bolts from step c ...

Page 71: ...8 x 30 mm bolt and washer on each foot 2 5 Fully seat each stabilizer foot to the front stabilizer mount and tighten the bolts from step 4 6 Lower the rack so that the full weight of the rack rests on the rear leveling feet and the front stabilizer feet WARNING To reduce the risk of personal injury or damage to the equipment be sure that The rear leveling feet are extended to the floor The full we...

Page 72: ...hook and loop cabling strap clips to manage your cable configurations Kit contents Item Quantity 12 7 cm 5 in hook and loop cabling strap clip 20 20 3 cm 8 in hook and loop cabling strap clip 20 30 5 cm 12 in hook and loop cabling strap clip 10 This kit might contain extra hardware for your convenience Required tools No tools are required for this procedure ...

Page 73: ...Hook and Loop Cabling Strap Clip kit 73 Installing the hook and loop cabling strap clips Route and secure your cables with the hook and loop cabling strap clips ...

Page 74: ...Hook and Loop Cabling Strap Clip kit 74 ...

Page 75: ...Hook and Loop Cabling Strap Clip kit 75 Installation is complete ...

Page 76: ... the risk of personal injury fire or damage to the equipment do not exceed the recommended voltage for the rack WARNING The fluorescent lamp contains mercury Therefore at end of life the fluorescent lamp may require special handling WARNING To reduce the risk of personal injury or damage to the equipment be sure that The leveling feet are extended to the floor The full weight of the rack rests on ...

Page 77: ...Light kit 77 Installing the 110V 220V Light 1 Remove the fluorescent lamp cover 2 Insert two screws securing the light to the rack frame ...

Page 78: ...Light kit 78 3 Insert the fluorescent lamp pins into the light socket 1 and gently turn the fluorescent lamp toward the rack 2 until the lamp locks into place 4 Replace the fluorescent lamp cover ...

Page 79: ...Status 1 On Turns on the light 2 Off Turns off the light 3 Standby mode Turns on the light when the rack door is open and turns off the light when the rack door is closed Connecting the power cord to the 110V 220V light Connecting devices to the 110V 220V light ...

Page 80: ...ed output 10 A 250 VAC Illuminant F14W 133 T8 Coolwhite Protection class 1 Degree of protection IP20 IEC 529 EN 60 529 Power consumption approximately 27 VA Current consumption 0 08 A at 240 V 0 012 A at 230 V 0 175 A at 100 V Operating temperature 25 C to 50 C Type of start Warm start Candle power 700 lm Illumination approximately 90 1X measured by 1 m distance Test standard UL153 Portable Lamps ...

Page 81: ...ual life 6000 h Life test according to IEC EN 60081 Annex C Operating conditions Value Cap rim temperature Nominal value maximum 125 C Lamp ambient temperature Nominal value minimum 20 C Ballast impedance Single operation Series operation 285 127 525 220 566 230 612 240 ΩN 507 220 540 230 580 240 ΩN Starter Single operation Series operation FS 11 FS 22 COP 22 FS 22 COP 22 Burning position Any Star...

Page 82: ...t 50 Hz operation lamp aged for 100 h Material disposal This HP product contains the following material that might require special handling at end of life Mercury in the user replaceable fluorescent lamp Disposal of mercury might be regulated because of environmental considerations For disposal or recycling information contact your local authorities or the Electronic Industries Alliance EIA http w...

Page 83: ...Stabilizer feet 2 M8 x 20 mm bolt 8 M8 flat washer 8 This kit might contain extra hardware for your convenience Required tools The following tools are required for installation Ratchet with sockets Adjustable wrench Installing the stabilizer NOTE HP recommends using the side feet provided with this kit to stabilize stand alone racks from the side If you are stabilizing racks that are secured toget...

Page 84: ...it 84 2 Insert and partially tighten four bolts with washers securing the front foot to the front caster plate 3 If you are using the side feet align the side feet with the holes on the caster plate skirt and front foot ...

Page 85: ...85 4 Insert and partially tighten two bolts with washers securing the side feet if installed and front foot to the caster plate skirt 5 Tighten the bolts from step 2 6 Tighten the bolts from step 4 Installation is complete ...

Page 86: ...rflow gasket enabling you to convert your existing HP rack to accommodate the rack air duct assembly AF030A HP 10642G2 Top Exhaust Rack This factory custom to order rack arrives with a solid top and bottom rack plate preinstalled on the rack If you are converting your current HP rack to accommodate the HP 10000 G2 Rack Air Duct you must install the AF029A kit prior to installing the AF028A kit If ...

Page 87: ...ase rack plate o Base plate 2 o Egress slot plate 2 o M5 5 self tapping screw 4 o 6 mm plastic push fastener 2 o 10 mm plastic tree fastener 2 Solid rear rack doors 2 Airflow rail foam gasket 2 600 mm plastic floor gasket 1 AF030A HP 10642G2 Top Exhaust Rack Factory custom to order HP 10642G2 rack with a solid top rack plate and a solid bottom rack plate Required tools The following tools are requ...

Page 88: ...t Follow these instructions to convert your existing HP rack to accommodate the kit 1 Remove the perforated rear doors of your rack 2 Remove the perforated rack top plate and install the solid rack top plate Installing the solid rack top plate on page 89 3 If necessary remove any installed components from the bottom two U spaces 4 Install the solid rack base plate Installing the solid rack base pl...

Page 89: ...river remove the upper and lower rear door lock catches by removing the two screws from each of the upper and lower rear door lock catches Retain the door lock catches and screws for reinstallation NOTE Install the solid rear rack doors after you have installed the AF028A kit Installing the solid rack top plate 1 Using a T 30 Torx screwdriver remove the four M 12 bolts at each corner of the perfor...

Page 90: ...se plate 1 From the rear of the rack insert the left side plate into the rack and set the plate on the lip of the rack frame 1 NOTE When you insert the sheet metal screws to secure the base plates you can either use the top hole or the side hole depending on your space allotment 2 Using a T 25 Torx screwdriver insert and tighten one M5 5 self tapping screw at the rear left corner and one M5 5 self...

Page 91: ... to the rack frame 4 5 From the rear of the rack align the two egress cover plates with the egress slot at the rear of the rack 1 6 Secure the egress cover slot a Insert two 10 mm plastic tree fasteners into the two rear holes through the caster plate 2 b Insert two 6 mm plastic push fasteners into the two front holes through the base plate 3 Installing the airflow gasket 1 Using scissors cut the ...

Page 92: ...e vertical frame on both sides of the rack with the closed cell side of the airflow rail gasket facing the front of the rack 4 Gently push the airflow rail gasket into the space until it is flush with the vertical frame For more information see the HP Airflow Optimization Kit Installation Instructions AF090A ...

Page 93: ...adhesive strip facing the front of the rack Installation is complete Installing the Top Exhaust Extension kit Follow these instructions to install the AF028A Top Exhaust Extension Kit either to an AF030A Top Exhaust Rack or after you have installed the AF029A kit to an existing HP retrofit rack 1 Remove the rear doors and door hinges from the rear of your rack 2 Install the rear extension assembly...

Page 94: ...hinge brackets by pulling up the top hinge pin and pulling down the bottom hinge pin 1 2 Lift the rear doors off the hinge brackets and then remove the doors from the rack 2 3 Using a T 30 Torx screwdriver remove the M6 flathead screw securing each hinge bracket to the rack 1 and then remove all of the hinge brackets from the rack 2 Retain the hinge brackets and screws for reinstallation ...

Page 95: ...doors after you have installed the AF028A kit Installing the rear extension assembly 1 Install the side assemblies of the rear extension assembly a Align the right side assembly with the rack frame 1 b Hook the extension into the rack frame at the three hook locations at the top middle and bottom of the rack c Using a T 25 Torx screwdriver insert and tighten one M5 5 self tapping screws into each ...

Page 96: ...ng a T 25 Torx driver insert and tighten two M6 machine screws into the rear screw holes 2 c Using a T 25 Torx driver insert and tighten two M6 machine screws into the front screw holes 3 3 Install the bottom assembly of the rear extension assembly a Align the bottom assembly with the installed side assemblies 1 making sure to set the metal tab at the front of the assembly over the rear rack frame...

Page 97: ...3 Installing the solid rear doors 1 Using a T 25 Torx driver insert and tighten two screws into each of the upper and lower rear door lock catches 2 Install the hinges brackets a Align the eight hinge brackets that you removed from the rear of your rack to the designated locations on the rear extension assembly 1 ...

Page 98: ...igning them with the hinge brackets on the rear extension assembly 1 4 Push down the hinge pins and then insert the hinge into the holes on the rear door 2 Assembling the kits 1 Assemble the lower duct a Align the hooks of the side panels with the slots of the front and back panels 1 b Slide the six hooks into the slots and then slide the panel down until it locks in place 2 ...

Page 99: ...anel down until it locks in place 2 c From the inside of the assembly insert two M6 cap screws in the middle of the assembly Using an adjustable wrench secure the screws from outside the assembly with an M6 star washer an M6 flat washer and a nut 3 d Repeat steps a through c for the other side panel 3 Install the draw latch straps to the upper duct assembly a Slide the draw latch strap around the ...

Page 100: ... the draw latch strap to the upper duct assembly 2 d Repeat steps a through c for the second draw latch strap 4 With the draw latch straps in the loose position slide the upper duct down over the lower duct 5 Lock the draw latch straps NOTE The two 510 mm gaskets sit on the inside edges of the two 520 mm gaskets ...

Page 101: ...lation or removal Use step stools to install the product to the top of the rack Do not lift the air duct over your head 1 Using a T 30 Torx screwdriver remove the two rear M 12 bolts from the top plate of the rack Retain the bolts for future use 2 Align the open slots of the lower air duct to the mounting holes on the top of the rack 3 Slide the air duct toward the front of the rack until the fron...

Page 102: ...lled the air duct to the top of your rack 1 Loosen both draw latch straps 1 2 Raise the upper duct until it reaches the ceiling opening and the gasketing is pressed firmly against the ceiling 2 3 Tighten and lock both draw latch straps to hold the upper duct in place 1 4 To lock the air duct in the raised position a Mark through the pre drilled hole on the upper duct so you know where the hole sho...

Page 103: ...t rack You cannot bay an HP 10000 G2 Rack Air Duct rack to a standard rack You must install the included gaskets to your HP 10000 G2 Rack Air Duct rack prior to baying to ensure that the air continues to be channeled up the air duct and not out the sides of the bayed rack To install the gasket strips to your rack 1 Remove the liner backing from each of the four gasket strips 2 Attach the two 876 m...

Page 104: ...Rack Air Duct kit 104 For more information see Baying kit on page 25 ...

Page 105: ...ntents Item Quantity Rear extension assembly Left side assembly Right side assembly Top assembly Bottom assembly 1 M5 5 self tapping screw 8 M6 machine screw 8 Rear extension cord 3 Cable management bracket 6 This kit might contain extra hardware for your convenience Required tools The following tools are required for installation T 25 Torx driver T 30 Torx driver Removing the rear doors 1 Open th...

Page 106: ...ckets and then remove the doors from the rack 2 3 Using a T 30 Torx screwdriver remove the M6 flathead screw securing each hinge bracket to the rack 1 and then remove all of the hinge brackets from the rack 2 Retain the hinge brackets and screws for reinstallation ...

Page 107: ...the side assemblies of the rear extension assembly a Align the right side assembly with the rack frame 1 b Hook the extension into the rack frame at the three hook locations at the top middle and bottom of the rack c Using a T 25 Torx screwdriver insert and tighten one M5 5 self tapping screws into each of the three hook locations to secure the side assembly to the rack frame 2 d Repeat steps a th...

Page 108: ... 25 Torx driver insert and tighten two M6 machine screws into the front screw holes 3 3 Install the bottom assembly of the rear extension assembly a Align the bottom assembly with the installed side assemblies 1 making sure to set the metal tab at the front of the assembly over the rear rack frame 2 b Using a T 25 Torx driver insert and tighten four M6 machine screws into each corner hole 3 ...

Page 109: ...ng the rear doors 1 Using a T 25 Torx driver insert and tighten two screws into each of the upper and lower rear door lock catches 2 Install the hinges brackets a Align the hinge brackets that you removed from the rear of your rack to the designated locations on the rear extension assembly 1 ...

Page 110: ...he hinge brackets on the rear extension assembly 1 4 Push down the hinge pins and then insert the hinge into the holes on the rear door 2 Installing the cable management brackets 1 Position the cable management bracket so that one side is attached to the inside of the rack frame while the other side is attached to the inside of the extension kit 2 Slide the cable management bracket into place 1 ...

Page 111: ...n kit 111 3 Using a T 25 Torx driver insert and tighten one M5 5 self tapping screw into each side of the bracket to secure the cable management bracket to the rack frame and extension kit 2 Installation is complete ...

Page 112: ... shelf 1 Cage nut 2 M6 screw 2 Quick release tie down straps 2 This kit might contain extra hardware for your convenience Required tools The following tools are required for installation Phillips screwdriver Cage nut insertion tool Installing the server utility shelf Always plan the rack installation so that the heaviest item is on the bottom of the rack Install the heaviest item first and then co...

Page 113: ...ation b Insert the tip of the insertion tool through the perforation and then hook the top lip of the cage nut c Pull the cage nut through the square rail perforation until the top lip snaps into position 3 Firmly hold the shelf and then insert the shelf into the rack tilting the shelf slightly so that the rear teeth on the shelf clear the rear of the rack 4 Straighten the shelf and then insert th...

Page 114: ...Server Utility Shelf kit 114 5 Align each cage nut assembly with the mounting holes on the inside front of the rack 6 Secure the shelf to the rack with two M6 screws using a Phillips screwdriver ...

Page 115: ...Server Utility Shelf kit 115 7 Secure servers to the shelf using the quick release tie down straps Installation is complete ...

Page 116: ... kit enables you to attach side panels to HP 10000 G2 Series Racks Kit contents Item Quantity Top side panel 2 Middle side panel 2 Bottom side panel 2 Key 2 This kit might contain extra hardware for your convenience Required tools No tools are required for this procedure ...

Page 117: ...Side Panel kit 117 Installing the side panels 1 Install the top and bottom side panel by sliding the brackets on the side panel behind the tabs on the rack frame ...

Page 118: ...Side Panel kit 118 2 Install the middle side panel by locking the side panel locks securing it to the rack 3 Repeat steps 1 and 2 for the other side of the rack Installation is complete ...

Page 119: ...ollowing tools are required for installation Ratchet with sockets Adjustable wrench Kit contents Item Quantity Front tie down bracket 1 Rear tie down bracket 1 M8 x 20 mm bolt 8 M8 flat washer 8 M8 spring clip 4 This kit might contain extra hardware for your convenience Installing the tie down kit This procedure is for all 10000 G2 Series racks except for Rack SKUs AF092A and AF094A To install the...

Page 120: ... down with the holes on the rear caster plate 1 5 Insert the four spring clips 2 and then partially tighten four bolts with washers 3 securing the rear tie down to the rear caster plate 6 Tighten the bolts from step 3 7 Tighten the bolts from step 5 8 Secure the rack to the floor Securing the rack to the floor on page 121 Installation is complete ...

Page 121: ...2 Series Rack 1200mm Full Frame Pack tie down kit is designed for greater stability in seismic environments This tie down kit is for Rack SKUs AF092A and AF094A only Required tools The following tools are required for installation Ratchet with sockets Adjustable wrench 1200 mm full frame rack tie down kit contents Item Quantity Front tie down bracket 1 Rear tie down bracket 1 M8 x 20 mm bolt 12 M8...

Page 122: ...ten four bolts with washers securing the front tie down to the front caster plate 4 Align the rear tie down with the holes on the rear caster plate 1 5 Insert the six bolts with washers 2 securing the rear tie down to the rear caster plate 6 Tighten the bolts from step 3 7 Tighten the bolts from step 5 8 Secure the rack to the floor Securing the 1200 mm full frame rack to the floor on page 123 Ins...

Page 123: ...ration indicates where to drill the holes to secure the 1200 mm full frame rack to the floor The distances are measured from the holes on the tie downs Have your building structural engineer drill the holes Then secure the rack to the floor by inserting a bolt with a washer into each hole ...

Page 124: ...ted in HP 10000 G2 Series Racks and in the HP V142 Rack Kit contents Item Quantity Top bracket 1 Bottom bracket 1 Phillips self tapping screw 4 8 32 Torx machine screw 2 Required tools The following tools are required for installation Phillips screwdriver 8 32 screwdriver Installing the Vertical PDU Mounting kit 1 Install the brackets HP basic PDU ...

Page 125: ...Vertical PDU Mounting kit 125 HP monitored PDU 2 Install the PDU The installation is complete ...

Page 126: ...atic sensitive component or assembly Grounding methods to prevent electrostatic discharge Several methods are used for grounding Use one or more of the following methods when handling or installing electrostatic sensitive parts Use a wrist strap connected by a ground cord to a grounded workstation or computer chassis Wrist straps are flexible straps with a minimum of 1 megohm 10 percent resistance...

Page 127: ...hnical support registration number if applicable Product serial number Product model name and number Product identification number Applicable error messages Add on boards or hardware Third party hardware or software Operating system type and revision level HP contact information For United States and worldwide contact information see the Contact HP website http www hp com go assistance In the Unit...

Page 128: ... abbreviations 128 Acronyms and abbreviations KVM keyboard video and mouse PDU power distribution unit RKM rackmount keyboard monitor TMRA recommended ambient operating temperature UPS uninterruptible power system ...

Page 129: ...oviding documentation that meets your needs To help us improve the documentation send any errors suggestions or comments to Documentation Feedback mailto docsfeedback hp com Include the document title and part number version number or the URL when submitting your feedback ...

Reviews: