background image

E

Cleaning

Procedures

The

Cleaning

Kit

A

full

cleaning

kit

contains

the

following

items:

Isopropyl

alcohol

This

is

usually

available

from

pharmaceutical

suppliers

or

chemists

.

If

possible

,

use

alcohol

supplied

for

medical

purposes

,

rather

than

impure

alcohol

or

alcohol

with

additives

.

Caution

Do

not

use

other

solvents

as

some

can

damage

plastic

materials

and

claddings

.

F

or

example

,

A

cetone

dissolves

the

adhesives

used

in

ber

optic

devices

.

W

arning

Never

drink

this

alcohol

as

this

can

lead

to

blindness

or

other

serious

damage

to

your

health.

Cotton-swabs

Use

swabs

such

as

Q-tips

or

other

cotton-swabs

.

These

are

typically

available

from

local

distributors

of

medical

or

hygiene

products

(such

as

supermarkets

or

pharmacies).

Note

If

you

are

cleaning

connector

interfaces

or

adapters

,

the

diameter

of

the

cotton

swab

is

important.

Cotton

swabs

for

babies

normally

have

a

smaller

diameter

.

Caution

Do

not

use

foam

swabs

,

as

these

can

leave

lmy

deposits

on

the

surface

you

are

cleaning.

Store

your

cotton-swabs

carefully

and

never

reuse

them.

Dust

and

dirt

from

the

air

or

from

previous

cleaning,

can

scratch

or

dirty

your

optical

device

.

Soft-tissues

These

are

available

from

most

stores

and

distributors

of

medical

and

hygiene

products

(such

as

supermarkets

or

pharmacies).

Use

multi-layer

tissues

made

from

non-recycled

cellulose

.

These

are

more

absorbent

and

softer

than

other

types

and

they

do

not

scratch

the

surface

of

your

device

.

Caution

Store

your

soft-tissues

carefully

and

never

reuse

them,

as

dust

and

dirt

from

the

air

or

from

previous

cleaning

can

scratch

and

dirty

your

optical

device

.

Cleaning

Procedures

E-1

Summary of Contents for HP 81551MM

Page 1: ...d Programming Manual HP 81551MM Lightwave Multimeter Source Module SERIAL NUMBERS This manual applies to all instruments ABCDE HP Part No 81551 90011 Printed in the Federal Republic of Germany Second Edition E1294 ...

Page 2: ...ial Number Edition 2 applies directly to all instruments Edition 1 1st May 1990 81551 90011 E0590 Edition 2 1st November 1990 81551 90011 E1190 1st August 1991 81551 90011 E0891 1st December 1994 81551 90011 E1294 ...

Page 3: ...r defect is apparent or if an instrument does not pass the operator s checks notify the nearest Hewlett Packard o ce W arning To avoid hazardous electrical shock do not perform electrical tests when there are signs of shipping damage to any portion of the outer enclosure covers panels etc Line Power Requirements The HP 81551MM operates when installed into the HP 8153A Lightwave Multimeter mainfram...

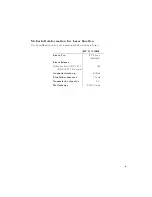
Page 4: ...i cations for these modules are as follows HP 81551MM Laser Type FP Laser InGaAsP Laser Class According to IEC 825 1 3A not USA EN 60825 1 Europe According to 21 CFR 1040 10 1 USA Output Power 2dBm Beam Diameter 50 m Numerical Aperture 0 2 Wavelength 850610nm iv ...

Page 5: ...ie Spezi kationen f ur die Lasereinsch ube sind wie folgt HP 81551MM Laser Typ FP Laser InGaAsP Laser Klasse Entsprechend IEC 825 1 3A EN 60825 1 Europa Ausgangsleistung 2dBm Strahldurchmesser 50 m Numerische Apertur 0 2 Wellenl ange 850610nm v ...

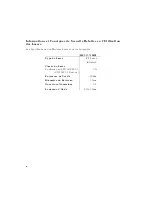
Page 6: ...Lasers Les Sp eci cations des Modules Laser sont les Suivantes HP 81551MM Type de Laser FP Laser InGaAsP Classe du Laser Conforme au STD IEC 825 1 3A EN 60825 1 Europe Puissance de Sortie 2dBm Diam etre du Faisceau 50 m Ouverture Num erique 0 2 Longueur d Onde 850610nm vi ...

Page 7: ...D 2 Test Failure D 2 Instrument Speci cation D 2 Performance Tests D 2 Output Power and Stability Tests D 3 Output Power Test D 3 Attenuation Function Test D 4 Modulation Function Test D 4 Stability Test D 4 E Cleaning Procedures The Cleaning Kit E 1 Other Cleaning Tools E 3 Preserving Connectors E 4 Cleaning Instrument Housings E 4 Cleaning Procedures E 5 Cleaning Cable Connectors E 5 Cleaning Co...

Page 8: ...Figures D 1 Performance Test Setup D 3 Tables C 1 HP 81551MM Speci cations C 1 Contents 2 ...

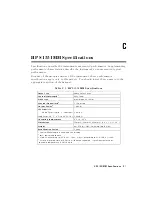
Page 9: ...r Central Wavelength1 850610nm Fiber type multimode 50 125 m Spectral Bandwidth2 1 5nm rms Output Power2 2dBm CW Stability Short Term 15min T constant 60 01dB Long Term 6h T 0 C to 55 C61K 60 06dB Operating temperature 0 C to 55 C Dimensions 75mm H 32mm W 335mm D 2 8 21 3 213 2 Weight net 0 7kg 1 5lbs shipping 1kg 2 2lbs Recalibration Period 1 year 1 Central Wavelength is shown on the display 2 rm...

Page 10: ...puts are pulse shaped with a duty cycle of 50 Output Attenuation The output can be attenuated from 0 to 6dB in steps of 0 1dB Stability The value of the long term CW stability doubles with just one minute warmup time laser enabled Spectral Bandwidth FWHM The spectral bandwidth is typically twice the speci ed RMS value C 2 HP 81551MM Speci cations ...

Page 11: ...ipment Required Equipment required for the performance test is listed below Any equipment that satis es the critical speci cations of the equipment given in the list may be substituted for the recommended models Instrument Accessory Recommended Model Power Meter Standard HP 8153A Mainframe with HP 81533A Optical Head Interface Module with HP 81520A Optical Head Multimeter Mainframe HP 8153A Connec...

Page 12: ...HP 81551MM can be tested Appendix C also lists some supplemental characteristics of the HP 81551MM and should be considered as additional information Any changes in the speci cations due to manufacturing changes design or traceability to the National Bureau of Standards will be covered in a manual change supplement or revised manual the speci cations listed in such a change supercede any previousl...

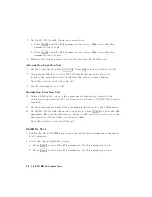
Page 13: ...cable connectors and detector windows are clean 2 Turn instruments on enable the laser output of the HP 81551MM and allow instruments to warm up for at least 20 minutes 3 On the power meter a Set to the wavelength displayed for the HP 81551MM source channel b Make sure that the CAL parameter on the power meter is set to zero c With the connector adapter on the optical head coverd with a plastic ca...

Page 14: ... 0dB Modulation Function Test 10 Using a BNC cable connect the power meter transducer output to the oscilloscope input and set the oscilloscope as follows 0 5V DIV DC coupled 1ms DIV 11 On the power meter switch the autoranging o and select the 0dBm range 12 On the HP 8153A with the module under test press 4Param5 to select the AUX parameter Monitor the frequency change on the oscilloscope as you ...

Page 15: ...ring the measurement 5 Select the MENU mode on the power meter a Press 4Record5 to select STABILTY b Press 4Edit5 and select the T_TOTAL parameter Set the T_TOTAL parameter to 15 minutes c Press 4Edit5 and then 4Exec5 to run the stability application 6 When the stability test has completed press 4More5 to select the SHOW application Press 4Edit5 and then 4Next5 4Prev5 to display the DIFF result Di...

Page 16: ...551MM Page 1 of 3 Test Facility Report No Date Customer Tested By Model HP 81551MM Source Module Serial No Ambient temperature C Options Relative humidity Firmware Rev Line frequency Hz Special Notes D 6 HP 81551MM Performance Tests ...

Page 17: ...8153A 2 Opt Head Interface Module HP 81533A 3 Optical Head 850nm HP 81520A 4 Lightwave Multimeter DUT HP 8153A 5 Connector Interface HP 81000AI N A N A 6 Connector Adapter HP 81000AA N A N A 7 Multimode Fiber HP 81501AC N A N A 8 BNC to BNC Cable P N 8120 1840 N A N A 9 Oscilloscope 10 11 12 13 14 15 16 17 18 HP 81551MM Performance Tests D 7 ...

Page 18: ...um Measurement No Test Description Spec Result Spec Uncertainty 1 Output Power Test Output Power 2dBm 0 1dB 2 Attenuation Function Test Passed P Failed F 3 Modulation Function Test Passed P Failed F 4 Stability Tests Stability 15min 0 01dB 0 01dB Stability 6h 0 06dB 0 06dB D 8 HP 81551MM Performance Tests ...

Page 19: ...kets or pharmacies Note If you are cleaning connector interfaces or adapters the diameter of the cotton swab is important Cotton swabs for babies normally have a smaller diameter Caution Do not use foam swabs as these can leave lmy deposits on the surface you are cleaning Store your cotton swabs carefully and never reuse them Dust and dirt from the air or from previous cleaning can scratch or dirt...

Page 20: ...ial that your compressed air is free of dust water and oil Only use clean dry air If you do not it can lead to lmy deposits or scratches When using compressed air from a can Hold the can upright A slant can cause propellant to escape with the compressed air and dirty your optical device Spray the rst couple of seconds into the air as the rst stream of compressed air can contain condensation or pro...

Page 21: ...rrode or be damaged Do not use hot water as this can lead to mechanical stress that can damage your optical device Ensure that your liquid soap has no abrasive properties or perfume in it as these can scratch or damage your optical device Do not use normal washing up liquid as it can leave behind an iridescent lm Premoistened cleaning wipes These are available from HP The part number is HP 92193N ...

Page 22: ...ack on or close the shutter cap if the equipment is not going to be used immediately Keep the caps on the equipment always when it is not in use All of Hewlett Packard s lightwave instruments and accessories are shipped with either laser shutter caps or dust caps If you need additional or replacement dust caps contact your Hewlett Packard sales o ce Immersion Oil and Other Index Matching Compounds...

Page 23: ...m you can use an infrared sensor card Hold the card approximately 5 cm from the output of the connector The invisible emitted light is projected onto the card and becomes visible as a small circular spot Preferred Procedure 1 Clean the connector by rubbing a new dry cotton swab over the surface using a small circular movement 2 Blow away any remaining lint with compressed air Procedure for Stubbor...

Page 24: ...s the core and the bristles of the pipe cleaner are hard and can damage the interface Do not use pipe cleaners on optical head adapters as the hard core of normal pipe cleaners can damage the bottom of an adapter Preferred Procedure 1 Clean the interface by pushing and pulling a new dry pipe cleaner into the opening Rotate the pipe cleaner slowly as you do this 2 Then clean the interface by rubbin...

Reviews: