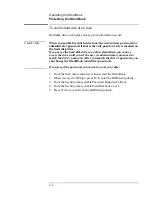
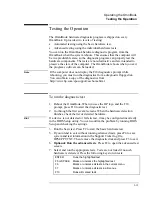
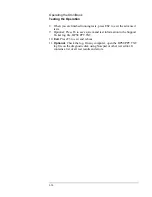
background image

Operating the OmniBook 

Configuring the OmniBook with the BIOS Setup Utility 

2-6 

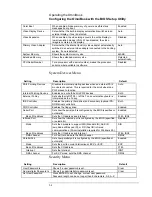
Power Button Mode 

Sets the action of the blue power button when pressed for less 
than 4 seconds. 

Suspend 

Lid Switch Mode 

Sets the action when the OmniBook lid closes. 

Turn off LCD 

Resume on Serial Ring 

Sets whether the system resumes from Suspend if a ring signal 
is received. 

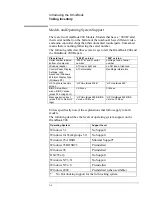
Enabled 

Resume on Time of Day 

Sets whether the system resumes from Suspend at a defined 
time of day. 

Disabled 

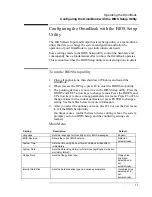
Resume Time 

Sets the 24-hour time when the system resumes from Suspend 
if enabled. 


Auto Suspend on Undock* 

Sets whether the OmniBook suspends after undocking. 

When Lid 
Closed 

Auto Turn-on on Dock* 

Sets whether the OmniBook turns on after docking. 

Enabled 

* For Windows 2000, only these settings are used. All other settings in this menu are ignored. 


Boot Menu 

Setting Description 

Default 

+Removable Device 
+Hard Disk 
CD-ROM/DVD Drive 

Shows the order of boot devices. Move the entries to change 
the order. If the computer has more than one device in one of 
the “+”categories, you can select the one that’s scanned. 

1. Removable 
Device 
2. Hard Disk 
3. CD-
ROM/DVD drive 


Summary of Contents for HP OmniBook 900

Page 1: ...HP OmniBook 900 Corporate Evaluator s Guide ...

Page 2: ...r translation of those programs without prior written permission of Hewlett Packard Co is also prohibited This product incorporates copyright protection technology that is protected by method claims of certain U S patents and other intellectual property rights owned by Macrovision Corporation and other rights owners Use of this copyright protection technology must be authorized by Macrovision Corp...

Page 3: ...nsed to you under the Microsoft End User License Agreement EULA contained in the Microsoft documentation The following License Terms govern the use of the software Use Customer may use the software on any one computer Customer may not network the software or otherwise use it on more than one computer Customer may not reverse assemble or decompile the software unless authorized by law Copies and Ad...

Page 4: ...sent of Hewlett Packard Termination Hewlett Packard may terminate this software license for failure to comply with any of these terms provided Hewlett Packard has requested Customer to cure the failure and Customer has failed to do so within thirty 30 days of such notice Updates And Upgrades Customer agrees that the software does not include updates and upgrades which may be available from Hewlett...

Page 5: ...o update the OmniBook BIOS 2 7 Starting and Stopping the OmniBook 2 8 To start and stop the OmniBook 2 8 To reset the OmniBook 2 9 Managing Battery Power 2 10 To save battery power 2 10 To set time outs 2 11 To get the most from your battery 2 11 To create a Hibernate partition OmniBook 900 2 12 To create a Hibernate partition OmniBook 900 B 2 13 Software System Resources 2 14 Protecting the OmniB...

Page 6: ...nstall PC Card support for retail Windows 98 First Edition OmniBook 900 4 9 To enable infrared support for retail Windows 98 4 9 To disable automatic CD ROM detection 4 10 Installing Pointing Device Support 4 10 To install the full pointing stick capabilities 4 11 To install full touch pad capabilities 4 12 Installing patches for Windows 98 first edition 4 13 To Install the IDE Patch 4 13 To Insta...

Page 7: ... support 5 15 To install hot swap support 5 15 Installing Intel SpeedStep Technology Applet 5 16 To install the Intel SpeedStep Technology Applet 5 16 Installing OmniBook Docking System Support 5 17 To install the OmniBook Docking System support 5 17 Installing Cards 5 18 To install a 3Com 3C589D EtherLink III PC Card 5 18 To install a 3Com 3C575 Fast EtherLink XL CardBus PC Card 5 18 Using Window...

Page 8: ...Cards 6 17 To install a 3Com 3C589D EtherLink III PC Card 6 17 To install a 3Com 3C575 Fast EtherLink XL CardBus PC Card 6 18 Using the OmniBook Docking Solutions 7 1 Operating the Docking Solutions 7 2 To install a docking tray 7 2 To dock the OmniBook 7 3 To undock the OmniBook 7 4 To manually undock the OmniBook 7 4 To set an undock password 7 5 Using the OmniBook Docking System 7 5 Using the D...

Page 9: ... 8 13 To get repair assistance 8 15 Hewlett Packard Limited Warranty Summary 8 15 Removing OmniBook Passwords 8 16 To remove the password 8 16 Using Electronic Serial Numbers 8 18 To ensure serial number security 8 18 To correct an incorrect serial number 8 19 ...

Page 10: ......

Page 11: ...1 Introducing the OmniBook ...

Page 12: ...formation on system resources technical specifications solutions to common problems and a list of support resources The OmniBook comes with Your choice of preinstalled operating systems Windows 95 OSR2 5 and Windows 98 which support hot docking Plug n Play infrared wireless data transfer and hot swapping of accessories such as the floppy disk or CD ROM drive Windows NT 4 0 with Service Pack 4a Ser...

Page 13: ...er describes What s included in the OmniBook box Models and OS support Available OmniBook accessories Included in the OmniBook box HP OmniBook 900 External module bay Floppy disk drive AC adapter HP F1454A and power cord OmniBook Lithium Ion battery The OmniBook User s Handbook Quick Start sheet OmniBook Recovery CD Includes Windows recovery and operating system drivers Microsoft Windows manual ...

Page 14: ...ttings click Advanced Windows 95 98 or Display Type Windows NT ATI information NeoMagic information HP TopTools Identity screen HP OmniBook 900 B HP OmniBook 900 BIOS Setup Main menu BIOS Version press F2 during boot CK Mx xx CI Mx xx Message during boot press ESC to clear HP logo HP OmniBook 900 B BIOS Version CK Mx xx HP OmniBook 900 BIOS Version CI Mx xx Unless specifically noted the explanatio...

Page 15: ... are provided on the hard disk drive and Recovery CD No Support Hewlett Packard does not test the operating system on the OmniBook No drivers are provided Buying OmniBook accessories Buy OmniBook accessories online For the latest accessories and options visit us at http www hp com omnibook As new accessories become available you ll find them listed at that website At the time of this printing HP o...

Page 16: ...C Cards various SmartCard various Auto airline adapter HP F1455A AC adapter HP F1454A External Battery Charger HP F1706A OmniBook carrying cases HP F1606 1608A Refer to the Features and Specifications chapter for more detailed accessory information ...

Page 17: ...2 Operating the OmniBook ...

Page 18: ... easy to carry the OmniBook is infused with the quality and attention to detail that are the hallmark of Hewlett Packard This chapter includes Configuring the OmniBook with the BIOS Setup Utility Starting and Stopping the OmniBook Managing Battery Power Software System Resources Protecting the OmniBook Testing the Operation ...

Page 19: ...ange menus Press the DOWN and UP arrow keys to move among parameters in a menu Press F5 or F6 to change values for the current parameter or press ENTER to change a setting See the tables below for more information 4 After you select the options you want press F10 or use the Exit menu to exit the BIOS Setup utility If settings cause a conflict between devices during reboot the system prompts you to...

Page 20: ...th External Fn Key Sets whether left CTRL left ALT on an external keyboard is interpreted as the Fn key Enabled IDE Controller Enables the primary hard drive and secondary optional CD ROM drive controllers Both FDD Controller Enables the floppy drive Enabled Serial Port Sets how the serial port is configured by the BIOS specified or automatic Enabled Base I O address Sets the I O address and inter...

Page 21: ...standard power mode power options you set in Power Management Control Panel override corresponding settings in the Power menu If you re using Windows 2000 only the settings marked with are used and other settings in the Power menu are ignored Setting Description Default Power Management Mode Disables time outs selects a combination of time outs or allows customized time outs Max Power Savings Smar...

Page 22: ... Disabled Resume Time Sets the 24 hour time when the system resumes from Suspend if enabled Auto Suspend on Undock Sets whether the OmniBook suspends after undocking When Lid Closed Auto Turn on on Dock Sets whether the OmniBook turns on after docking Enabled For Windows 2000 only these settings are used All other settings in this menu are ignored Boot Menu Setting Description Default Removable De...

Page 23: ... capabilities of the OmniBook Updates will be available from HP Electronic Support Services at http www hp com omnibook support index htm C A U T I O N Because a BIOS update replaces the previous version it is very important you carefully follow these instructions Otherwise the OmniBook may be damaged The BIOS update process resets the configuration settings in the BIOS Setup utility except for th...

Page 24: ...twork connections Press the blue power button to display your current session Instant On Press Fn F12 or allow time out from suspend Hibernate Mode Saves maximum power Saves current session to disk shuts down May restore network connections Press the blue power button to restart and restore your previous session Click Start Shut Down recommended or Press and hold the blue power button until the di...

Page 25: ...reset the OmniBook and restart Windows 1 If possible shut down Windows 2 Press and hold the blue power button until the display shuts down or if this fails Insert a pen or straightened paper clip into the system off button located on the left side of the OmniBook 3 After the computer shuts down press the blue power button to turn it on ...

Page 26: ...he battery runs down completely while writing data to the drive or if the battery in a PC RAM card is also low The OmniBook uses Advanced Power Management APM to conserve battery power You can take steps to optimize your battery operating time This section describes how to Save battery power Set time outs Get the most from your battery Create the hibernation partition To save battery power Follow ...

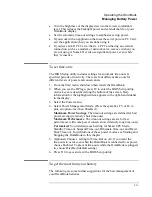
Page 27: ...ys are described along the bottom of the screen Help information for the highlighted item appears in the right hand sidebar in the display 3 Select the Power menu 4 Select Power Management Mode Press the spacebar F5 or F6 to pick an option other than Disabled Maximum Power Savings The time out settings are defined for best power savings relatively short time outs Maximum Performance The time out s...

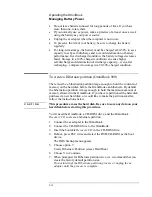
Page 28: ...contents of memory on the hard disk before the OmniBook can hibernate By default the hibernation partition is large enough to hold the maximum amount of memory allowed in the OmniBook If you have repartitioned the hard disk purchased a new hard disk or would like to make the partition smaller follow the instructions below C A U T I O N This procedure erases the hard disk Be sure to save any data o...

Page 29: ...ure to save any data on your hard disk before starting this procedure You ll need the OmniBook a CD ROM or DVD drive and the OmniBook Recovery CD to create a hibernate partition 1 Connect the ac adapter to the OmniBook 2 Connect the CD ROM DVD drive to the OmniBook 3 Insert the bootable Recovery CD into the CD ROM DVD drive 4 Reboot press ESC twice when you see the HP OmniBook logo 5 Select the CD...

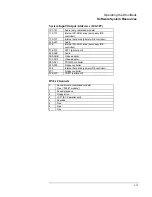
Page 30: ...t 5 Audio 6 Floppy drive 7 LPT1 ECP parallel port 8 Real time clock 9 Video Controller unmarked models Free 900 B models 10 USB and CardBus assigned by Windows driver Video Controller 900 B models 11 Free 12 Pointing device 13 Numeric data processor 14 Internal hard disk primary IDE controller 15 Internal CD ROM drive secondary IDE controller Unmarked models have no 900 after the serial number 900...

Page 31: ...2F Audio 376 Internal CD ROM drive secondary IDE controller 378 37F LPT1 printer port 388 38B Audio 3B0 3BB Video adapter 3C0 3DF Video adapter 3E0 3E1 PCMCIA controller 3F0 3F5 Floppy controller 3F6 Internal hard disk primary IDE controller 3F7 Floppy controller 3F8 3FF COM1 serial port DMA Channels 0 Sound Record unmarked models Free 900 B models 1 Sound playback 2 Floppy drive 3 LPT1 ECP parall...

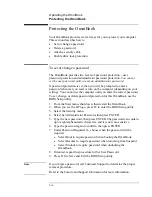
Page 32: ...his OmniBook use the BIOS Setup utility 1 From the Start menu shut down then restart the OmniBook 2 When you see the HP logo press F2 to enter the BIOS Setup utility 3 Select the Security menu 4 Select Set Administrator Password then press ENTER 5 Type the new password then press ENTER The password can contain up to eight alphanumeric characters and it is not case sensitive 6 Type the password aga...

Page 33: ...press ENTER 6 Press ENTER at the Enter New Password prompt 7 Press ENTER at the Confirm New Password prompt 8 Press Continue 9 Press F10 to Save and Exit the BIOS Setup utility To attach a security cable Your OmniBook has a built in connector that allows you to secure the OmniBook with a cable The Kensington MicroSaver lock system works with this connector and is available at many computer stores ...

Page 34: ...nother OmniBook you cannot access the drive until you set the user or administrator password to match the drive s password After you match the drive s password you can change the OmniBook and drive password If you forget the password you cannot recover your data 1 From the Start menu shut down then restart the OmniBook 2 When you see the HP logo press F2 to enter the BIOS Setup utility 3 From the ...

Page 35: ...un the diagnostic test 1 Reboot the OmniBook When you see the HP logo and the F10 prompt press F10 to start the diagnostic test 2 Go through the first several screens When the hardware detection finishes check the list of detected hardware Hint If a device is not detected or fails its test it may be configured incorrectly in the BIOS Setup utility You can confirm the problem by running BIOS Setup ...

Page 36: ...tests 9 Optional Press F4 to save system and test information in the Support Ticket log file HPSUPPT TXT 10 Exit Press F3 to exit and reboot 11 Optional Check the log On any computer open the HPSUPPT TXT log file on the diagnostic disk using Notepad or other text editor It contains a list of all test results and errors ...

Page 37: ...3 Using the Recovery CD ...

Page 38: ...CD provides the OmniBook specific drivers to configure your custom system The drivers for the operating system s that shipped on your OmniBook are located both on the Recovery CD and the hard disk drive under OMNIBOOK DRIVERS The OmniBook specific drivers for all supported operating systems are located on the OmniBook website at http www hp com omnibook This website contains the latest updates of ...

Page 39: ...mniBook 900 OmniBook Recovery CD C A U T I O N This procedure will format the hard disk drive If possible back up any files you would like to save before recovering 1 Important Back up all data from your hard disk The following steps delete all data from the disk 2 Plug in the ac adapter 3 Connect the CD ROM drive to the OmniBook Insert the Recovery CD in the CD ROM drive 4 Shut down and restart t...

Page 40: ...he CD ROM drive 4 Reboot press ESC twice and select the CD ROM as the boot device 5 When the menu appears choose either Recover Windows 95 or Recover Windows 98 6 When prompted select Y to erase the hard disk and continue 7 When prompted select a file system FAT16 or FAT32 8 The default file system is FAT32 9 After the hard drive is erased and partitioned the OmniBook reboots press ESC twice and s...

Page 41: ... CD ROM drive to the OmniBook 3 Insert the bootable Recovery CD in the CD ROM drive 4 Reboot press ESC twice and select the CD ROM as the boot device 5 When the menu appears choose Recover Windows NT 6 When prompted select Y to erase the hard disk and continue 7 After the hard drive is erased and partitioned the OmniBook reboots press ESC twice and select the CD ROM as the boot device 8 The recove...

Page 42: ......

Page 43: ...4 Using Windows 98 ...

Page 44: ...lls a retail version of Windows 98 and configures the appropriate device drivers Requirements OmniBook 900 OmniBook 900 CD ROM or DVD ROM drive Windows 98 CD ROM OmniBook drivers for Windows 98 Location On the OmniBook hard drive and the OmniBook 900 Recovery CD the drivers are in OMNIBOOK DRIVERS WIN98 On the OmniBook 900 B Recovery CD the drivers are in OMNIBOOK DRIVERS W98 ...

Page 45: ...oftware installation It is recommended you repartition your hard disk before installing retail Windows 98 Follow the instructions below to repartition your hard disk 1 Connect a CD ROM drive to the external module bay 2 Use the FDD cable to connect the floppy drive module directly to the parallel port of the OmniBook and then reboot the OmniBook 3 Insert the first Recovery CD of the set into the C...

Page 46: ...d Volume Label and press ENTER 9 Insert the first Recovery CD of the set wait for the CD ROM drive to be ready and type SYS C 10 Insert the Windows 98 Installation CD ROM 11 Type the following commands to copy the Windows 98 files to the C drive C MD WINDOWS MD WINDOWS OPTIONS MD WINDOWS OPTIONS CABS Copy G WIN98 C WINDOWS OPTIONS CABS COPY A DOS HIMEM SYS C COPY CON C CONFIG SYS DEVICE C HIMEM SY...

Page 47: ...er any changes when the system displays the Time Zone screen The Windows 98 Setup Wizard will now configure the Control Panel programs on the start Menu Windows help and MS DOS program settings Afterwards Windows will automatically reboot 20 After Windows 98 reboots enter a Windows Password and confirm 21 Hardware detection will occur Upon completion reboot the machine To install video support for...

Page 48: ...f prompted restart the computer with the new color settings and Click OK 19 Click Yes to Restart the computer To install audio support for retail Windows 98 OmniBook 900 B If you ve installed a retail version of Windows 98 you ll need to install audio support This driver is located on the OmniBook s hard drive or on the OmniBook 900 B Recovery CD in OMNIBOOK DRIVERS W98 AUDIO 1 From the audio driv...

Page 49: ...directory of the audio drivers OMNIBOOK DRIVERS WIN98 AUDIO DISK1 and click OK 9 Click Next to accept the NeoMagic MagicMedia 256AV Audio 10 Click Next 11 Click Finish 12 Click Close 13 Double click the Unknown device under Other devices 14 Click on the Driver tab then click Update Driver 15 Click Next 16 Select Display a list of all the drivers in a specific location so you can select the driver ...

Page 50: ... System Properties window and open a DOS window 5 Go to the OMNIBOOK DRIVERS W98 1ST_EDN W98 PCCARD directory on the Recovery CD and run PCCARDQ EXE If D is the drive letter of your CD ROM drive type D CD OMNIBOOK DRIVERS W98 1ST_EDN W98 PCCARD PCCARDQ EXE 6 Copy an updated PCMCIA configuration to the Windows system by typing CD W98ONLY COPY PCMCIA INF C WINDOWS INF Y COPY PCMCIA INF C WINDOWS OPT...

Page 51: ...the Recovery CD and click OK 4 Shutdown and restart the OmniBook To enable infrared support for retail Windows 98 If you ve installed a retail version of Windows 98 and you wish to use infrared you ll need to enable infrared support 1 Reboot the OmniBook 2 When you see the HP logo press F2 to enter the BIOS Setup utility 3 Go to the System Devices menu 4 Set the Infrared Port to Enabled 5 Set the ...

Page 52: ...g Pointing Device Support Two pointing devices pointing stick and touch pad are built into your OmniBook The default pointing device driver PS 2 Mouse support the basic features of both the pointing stick and the touch pad This section describes how to Install the full pointing stick capabilities Install the full touch pad capabilities Both pointing devices use the click buttons which work like th...

Page 53: ... Press F10 to save and exit Install pointing stick support The pointing stick driver is on the OmniBook 900 Recovery CD in OMNIBOOK DRIVERS WIN98 TRACKPNT The pointing stick driver is on the OmniBook 900 B Recovery CD in OMNIBOOK DRIVERS W98 TRACKPNT 1 From Control Panel double click System then Device Manager 2 Open PS 2 Compatible Mouse Port under Mouse 3 Click Driver the Update Driver 4 Click N...

Page 54: ... 4 Highlight Internal Pointing Devices and select Touch Pad 5 Press F10 to save and exit Install touch pad support on the OmniBook 900 1 From the Start menu click Run 2 Enter OMNIBOOK DRIVERS WIN98 TOUCHPAD Setup exe on the Recovery CD and click OK 3 Click Agree at the License Agreement 4 Click Express Setup 5 Click Finish to restart the computer 6 After reboot Click Yes to install the Touchpad 7 ...

Page 55: ...t your CD ROM is located on D To Install the IDE Patch This patch prevents a problem in the Device Manager that occurs if you insert a large 8gb secondary hard disk drive into the notebook module bay Without the patch a warning will occur on the secondary IDE channel in the Hardware Manager as well as messages about the drive operating in MS DOS mode 1 Open an MS DOS Window and type the following ...

Page 56: ... file attachments with extremely long names 1 From the Start menu click Run 2 From the Recovery CD run D OMNIBOOK DRIVERS W98 1st_EDN W98 PATCHES OUTLOOK OEUPD EXE 3 Enter C TEMP when prompted for an extraction directory If prompted click yes to create the directory 4 Open a DOS window and type the following COPY C TEMP INETCOMM DLL C WINDOWS SYSTEM Y COPY C TEMP MSIMNUI DLL C PROGRA 1 OUTLOO 1 Y ...

Page 57: ...dual speed Pentium III processor This section describes how to Install the Intel SpeedStep Technology Applet To install the Intel SpeedStep Technology Applet The Intel SpeedStep files are located on the hard drive under OMNIBOOK DRIVER SPEEDSTP and on the Recovery CD under OMNIBOOK DRIVER SPEEDSTP 1 Open Windows Explorer 2 Double click SETUP EXE in the SpeedStep directory 3 When prompted click NEX...

Page 58: ...ick OK 3 When prompted to install the CMD Bus Master IDE Driver click Yes 4 When prompted to restart click No 5 Open a DOS window and type the following D CD OMNIBOOK DRIVERS W98 DOCKING COPY HWP2280 INF C WINDOWS INF Y CD SCSI COPY SYMC8XX INF C WINDOWS INF Y COPY SYMC8XX MPD C WINDOWS SYSTEM IOSUBSYS Y 6 Close the DOS window and shut down the OmniBook 7 Insert the OmniBook in the OmniBook Dockin...

Page 59: ...ick Run 2 Enter OMNIBOOK DRIVERS WIN98 DOCKING IDE SETUP from the Recovery CD and click OK 3 When prompted to install the CMD Bus Master IDE Driver click Yes 4 Click Yes to Restart the computer 5 After the OmniBook restarts shutdown Windows 98 6 Insert the OmniBook in the OmniBook Docking System 7 Start Windows 98 8 Windows 98 will build a Docking Hardware profile 9 Windows will ask you for severa...

Page 60: ...ardware Wizard 3 Click Next to Search for the best driver for your Device Recommended 4 Click Next 5 Click Next to accept the driver 6 Click Finish 7 Click Yes to restart the computer To install a 3Com 3C575 Fast EtherLink XL CardBus PC Card Requirements OmniBook 900 with Windows 98 installed 3Com 3C575 Fast EtherLink XL CardBus PC Card 1 While Windows 99 is running insert the PC Card 2 Click Next...

Page 61: ...5 Using Windows 95 ...

Page 62: ...ls Windows 95 OSR 2 5 and configures the appropriate device drivers Requirements OmniBook 900 OmniBook 900 CD ROM or DVD ROM drive Windows 95 CD ROM OmniBook drivers for Windows 95 Location OmniBook hard drive and on the Recovery CD in OMNIBOOK DRIVERS WIN95 On the OmniBook 900 B Recovery CD the drivers are in OMNIBOOK DRIVERS W95 ...

Page 63: ... drive Accessory Module support for Windows 95 Install Accessory Module hot swap support for Windows 95 Install Docking System support for Windows 95 Requirements OmniBook 900 with Floppy CD ROM drives Omnibook 900 Floppy Disk Cable for external use through parallel port Part No F1473A Blank formatted floppy disk Windows 95 OSR 2 x CD ROM OmniBook drivers for Windows 95 Location On the OmniBook ha...

Page 64: ...DISK on the OmniBook 900 B type CD OMNIBOOK BOOTDISK 7 Type MAKESUPP 8 Enter A as the Floppy drive 9 Enter Y to continue 10 Press any key to continue 11 Enter N when complete 12 Close the MS DOS Prompt Format the hard drive 1 With the OmniBook 900 turned off insert the CD ROM drive into the module bay and connect the floppy with the floppy cable F1473A to the parallel port of the Omnibook Restart ...

Page 65: ...the specified directory 8 Choose Portable on the Setup Options screen then click Next 9 Enter the Product Identification Number then click Next The Product Identification Number is located on the Certificate of Authenticity that you received with your version of Windows 95 10 Enter the appropriate User Information then click Next 11 Do not detect any CD ROM drive Network Sound MIDI or Video Captur...

Page 66: ...e devices from the Other devices category Click OK in the Confirm Device Removal dialog box 27 Remove the Standard Dual PCI IDE Controller from the Hard disk controllers Click OK in the Confirm Device Removal dialog box 28 When prompted to restart Windows 95 click No 29 Remove the Standard IDE ESDI Hard Disk Controller from the Hard disk controllers Click OK in the Confirm Device Removal dialog bo...

Page 67: ...IVERS W95 AUDIO 1 From Control Panel double click System then click Device Manager 2 Remove the PCI Multimedia Audio Device under Other Devices Click OK in the Confirm Device Removal dialog box 3 Click on the Refresh button to redetect the Multimedia Audio Device 4 Click Next in the Update Device Driver Wizard 5 Click Other Locations 6 Enter the directory of the audio drivers under location and cl...

Page 68: ... PCMCIA INF file from the PCCARD 950CONLY on the Recovery CD to C WINDOWS INF 3 Click Yes to overwrite any files 4 From Control Panel open System then Device Manager 5 Remove both PCI CardBus Bridge devices under Other Devices Click OK in the Confirm Device Removal dialog box each time 6 Click on the Refresh button to redetect the Texas Instruments PCI TI 1225 Cardbus Controller 7 Click Yes to res...

Page 69: ...ed for the Generic Ir Serial Port driver disk click Next 7 Click Other Locations 8 Enter the directory of the infrared drivers on the Recover CD FASTIR and click OK 9 Click Finish 10 When prompted for a disk click OK 11 When prompted for the smcser inf file browse to the location of the FASTIR drivers and click OK 12 Go to IRDA on the Recovery CD and run SETUP 13 Click Next to run the Add Infrared...

Page 70: ...m Control Panel double click System then click Device Manager 8 Remove the PCI Universal Serial Bus Device under Other Devices 9 Click OK in the Confirm Device Removal dialog box 10 Click on Refresh to redetect the USB controller 11 Shutdown and restart the OmniBook To disable automatic CD ROM detection Windows 95 will automatically detect and respond when you insert a CD However this prevents the...

Page 71: ... Euro Update 6 Click Yes to accept the license agreement 7 When the installation is finished click OK 8 When prompted click Yes to restart the computer To install Windows 95 Y2K Update Microsoft has created a software patch that makes Windows 95Year 2000 compliant You must have installed Internet Explorer 4 01 SP2 before installing the Y2K Update The Y2K Patch is located on the OmniBook 900 B Reco...

Page 72: ...y The following describes the pointing device driver options available on the OmniBook Basic PS 2 Mouse Driver Supports the basic features of both or either pointing devices PS 2 TrackPoint Driver Supports the enhanced features of the pointing stick and the basic features of the touch pad Touch pad Driver Supports the enhanced features of the touch pad no support for the pointing stick To install ...

Page 73: ... 2 Mouse driver supports only basic touch pad features To activate full touch pad capabilities you have to Disable the pointing stick Install touch pad support Disable the pointing stick 1 From the Start menu shut down then restart the OmniBook 2 When you see the HP logo press F2 to enter the BIOS Setup utility 3 Select the System Devices menu 4 Highlight Internal Pointing Devices and select Touch...

Page 74: ...ws 95 Installing Pointing Device Support 5 14 9 Select the feature for the middle button clicking both buttons together and click next 10 Click Next 11 Click Finish 12 Click OK to close the Mouse Properties window ...

Page 75: ...iBook 900 B Recovery CD ROM in the OMNIBOOK DRIVERS W95 PATCHES ESDI_506 1 Open a MS DOS Prompt 2 Copy the update from the Recovery CD or the web to C WINDOWS SYSTEM IOSUBSYS COPY D OMNIBOOK DRIVERS W95 PATCHES ESDI_506 C WINDOWS SYSTEM IOSUBSYS Confirm with Y when you are prompted to overwrite the ESDI_506 PDR file 3 Restart the computer To install hot swap support HP has made available software ...

Page 76: ...dual speed Pentium III processor This section describes how to Install the Intel SpeedStep Technology Applet To install the Intel SpeedStep Technology Applet The Intel SpeedStep files are located on the hard drive under OMNIBOOK DRIVER SPEEDSTP and on the Recovery CD under OMNIBOOK DRIVER SPEEDSTP 1 Open Windows Explorer 2 Double click SETUP EXE in the SpeedStep directory 3 When prompted click NEX...

Page 77: ...to C WINDOWS INF 2 Insert the OmniBook in the OmniBook Docking System 3 Windows 95 will build a Docking Hardware profile Click OK when it finishes 4 If prompted for the IDE drivers click OK and browse to DOCKING IDE directory on the Recovery CD and click OK when the inf appears 5 When prompted to restart the computer click No 6 Continue to click No when prompted to restart 7 From Control Panel dou...

Page 78: ...3Com driver disk then click Next 5 Click Finish 6 A dialog box displays Windows 95 Can t Find The Necessary Driver 7 Even though the disk may still be in drive A enter A when the path dialog box appears then click OK 8 If prompted enter the path C WINDOWS OPTIONS CABS then click OK 9 Shut down and restart Windows 95 To install a 3Com 3C575 Fast EtherLink XL CardBus PC Card Requirements OmniBook 90...

Page 79: ...K 7 If asked for the path to the Windows 95 cab files enter the path C WINDOWS OPTIONS CABS Press Enter 8 From Control Panel double click Network then click Identification 9 Enter your computer name workgroup and description 10 If necessary click the Configuration tab and add new protocols 11 Click OK to close the Network Properties window 12 Click Yes to restart the OmniBook Your 3Com 3C575 Fast ...

Page 80: ......

Page 81: ...6 Using Windows NT 4 0 ...

Page 82: ... 4 0 does not support dynamic allocation of resources PC Cards must be inserted into the unit before booting PC Card sockets are not enabled after resuming PC Cards are inoperable after a true suspend then resume cycle Rebooting restarts the sockets The operating system s clock is stopped when suspended and does not re synchronize with the hardware clock when resuming When users resume NT s clock ...

Page 83: ...network card you are using The application notes are available on the OmniBook website http www hp com omnibook To prepare for software installation OmniBook 900 B It is recommended you repartition your hard disk before installing Windows NT 4 0 If you are installing retail Windows NT 4 0 over the HP OmniBook Windows 95 98 image you must repartition the hard disk The HP OmniBook Windows 95 98 imag...

Page 84: ...rd disk and create a hibernate partition 9 Enter Y to accept the HD partition size To install a retail version of Windows NT 4 0 1 Insert the Windows NT Workstation CD in the CD ROM drive 2 Reboot press ESC twice when you see the HP OmniBook logo 3 Select the CD ROM DVD as the boot device 4 At the Welcome Screen press Enter to begin 5 Press Enter to accept the IDE CD ROM mass storage device 6 If p...

Page 85: ...e is used by other computers on the network to access your computer 21 Enter an Administration password twice then click Next This password is used to administer User IDs and Windows NT security 22 Choose No do not create an emergency repair disk then click Next Important It is more useful to create a repair disk after installation is complete and after you have installed your drivers and other ap...

Page 86: ... this Service Pack at a later time 6 When prompted click Restart to reboot To install video support for retail Windows NT 4 0 OmniBook 900 B If you ve installed a retail version of Windows NT 4 0 you ll need to install video support The driver is located on the OmniBook 900 B Windows NT Recovery CD in OMNIBOOK DRIVERS NT4 VIDEO 1 From the Start menu click Run 2 From the Recovery CD run OMNIBOOK DR...

Page 87: ...il after Windows NT has restarted 9 Click Close in the Display Properties window 10 Click Yes to restart the computer 11 When Windows NT restarts it displays a message that a new graphics driver has been installed When you see this message click OK 12 Select 800 x 600 resolution click Test then click OK 13 If the graphic is correctly displayed click Yes otherwise click No and change the setting 14...

Page 88: ...e sound driver To disable automatic CD ROM detection Windows NT 4 0 will automatically detect and respond when you insert a CD However this prevents the OmniBook from automatically turning off after a period of inactivity if the CD ROM drive is present To disable this feature 1 From Start Menu click Run 2 Enter REGEDT32 then click OK 3 Select the HKEY_LOCAL_MACHINE window and go to SYSTEM CurrentC...

Page 89: ...Using Windows NT 4 0 Installing Retail Windows NT 4 0 6 9 4 Double click on the nt4_euro exe 5 Click OK 6 When prompted click Yes to restart the computer ...

Page 90: ... 4 0 OmniBook Mobile Enhancements Location OmniBook hard drive or OmniBook 900 Recovery CD in OMNIBOOK DRIVERS APM and PCCARD On the OmniBook 900 B Recovery CD the drivers are in OMNIBOOK DRIVERS NT4 APM and PCCARD To install APM for Windows NT 4 0 The driver is located on the OmniBook 900 Recovery CD in OMNIBOOK DRIVERS APM On the OmniBook 900 B Recovery CD the driver is in OMNIBOOK DRIVERS NT4 A...

Page 91: ... standard Windows NT drivers Plug and Play for supported network PC Cards Automatic configuration of PC Cards utilizing advanced Wizard technology to allocate system resources Suspend Resume functions and simplified administration of PC Cards when integrated with Phoenix APM 1 From the Start menu click Run 2 Go to the Phoenix Card Executive directory and run Setup exe 3 Click the button to begin t...

Page 92: ...ly The following describes the pointing device driver options available on the OmniBook Basic PS 2 Mouse Driver Supports the basic features of both or either pointing devices PS 2 TrackPoint Driver Supports the enhanced features of the pointing stick and the basic features of the touch pad Touch pad Driver Supports the enhanced features of the touch pad no support for the pointing stick To install...

Page 93: ...nting stick Install touch pad support Disable the pointing stick 1 From the Start menu shut down then restart the OmniBook 2 When you see the HP logo press F2 to enter the BIOS Setup utility 3 Select the System Devices menu 4 Highlight Internal Pointing Devices and select Touch Pad 5 Press F10 to save and exit Install touch pad support on the OmniBook 900 1 From the Start menu click Run 2 Browse t...

Page 94: ...Using Windows NT 4 0 Installing Pointing Device Support 6 14 ...

Page 95: ...edStep Technology Applet The Intel SpeedStep files are located on the hard drive under OMNIBOOK DRIVER SPEEDSTP and on the Recovery CD under OMNIBOOK DRIVER SPEEDSTP 1 Open Windows Explorer 2 Click the View Menu then Options 3 Select Show all files and uncheck Hide file extensions for known file types then click OK 4 Copy PRPCLDR EXE from the SpeedStep directory to the WINNT System32 directory 5 D...

Page 96: ...View menu then Options 3 Select Show all files and uncheck Hide file extensions for known file types then click OK 4 Copy the DOCKING directory to C TEMP 5 From the Control Panel double click SCSI Adapters then click Drivers 6 Click Add 7 Click Have Disk 8 Enter C TEMP DOCKING IDE WINNT and click OK 9 Click OK to accept the CMD 64xx 32 Bit IDE Adapter 10 Enter C TEMP DOCKING IDE WINNT and click Co...

Page 97: ...x1000 Memory 0xD4000 Note These procedures assume that Phoenix CardExecutive is installed and Windows NT Networking has not been installed For more information on installing PC Cards in Windows NT visit our web site at www hp com omnbook 1 Connect the CD ROM drive to the OmniBook and restart Windows NT 4 0 2 Insert the PC Card 3 When the PCMCIA Card Not Configured window appears select Install sys...

Page 98: ...orking has not been installed For more information on installing PC Cards in Windows NT visit our web site at www hp com omnibook 1 Start Windows NT 4 0 2 Insert the PC Card 3 When the PCMCIA Card Not Configured window appears select Install system provided driver for this card and click OK 4 Insert the Windows NT Installation CD in the CD ROM drive enter the correct directory and click OK 5 Click...

Page 99: ...7 Using the OmniBook Docking Solutions ...

Page 100: ...t External keyboard connector External PS 2 mouse connector Three audio jacks for Speaker out Line in and Microphone in AC adapter jack 2 universal serial bus USB ports 60W AC adapter included The OmniBook Mini Dock provides all the same features of the Port Replicator but adds the following Two Type III PC Card slots with CardBus support PC Card Eject Lock The OmniBook Docking System provides ful...

Page 101: ...apter describes procedures to expand the capabilities of your OmniBook including Operating the Docking Solutions Using the Docking Solutions under Windows 95 98 Using the Docking Solutions under Windows NT 4 0 ...

Page 102: ...ng products see the User s Guide that shipped with your dock To install a docking tray Your dock requires a tray that accommodates your specific OmniBook model Install this tray prior to connecting the OmniBook to the dock 1 Select the tray labeled for your OmniBook 2 Slide the rear of the tray into the dock as shown on the dock label 3 Push down firmly on both sides of the tray until it snaps int...

Page 103: ...arranty Refer to the warranty statement for your product 1 If you re using Windows NT click Start Shut Down 2 Plug the power cord into the ac adapter then into an ac outlet Plug the ac adapter into the dock 3 Place the OmniBook on the dock platform with the rear of the computer facing the dock s docking connector 4 Position your fingers on the platform grips as shown below Use your thumbs to push ...

Page 104: ...the OmniBook If you cannot undock the OmniBook using the undock button for example you have no ac power or battery power you can manually undock the OmniBook Manual undocking overrides password protection 1 Save your work and turn off your OmniBook If you are using Windows 95 be sure to use the shut down option from the Start menu 2 If you are using a Kensington MicroSaver lock to secure your dock...

Page 105: ...word and type your password then Save and Exit Setup Using the OmniBook Docking System The OmniBook floppy module will not function in the Docking System module bay It will function correctly in the OmniBook module bay This includes the floppy drive in a combo module although the CD ROM or DVD ROM drive in a combo module will function correctly Batteries cannot be charged in the OmniBook Docking S...

Page 106: ...ocking System will create a separate profile each time you insert your OmniBook into a new Docking system for the first time Each Docking System requires a separate docking profile since each Docking System may contain different PCI Cards and or SCSI IDE devices The following table describes the possible docking hardware profiles with OmniBook Docking Solutions Docking Solution Docking hardware pr...

Page 107: ...B OEM Service Release 2 5 but may still occur 1 Double click My Computer Control Panel System 2 Click the Device Manager tab and find the device you installed 3 Select the card then click Remove 4 When the Confirm Device Removal box appears select Remove From Specific Configuration 5 If the Remove From Specific Configuration is not an option then Windows 95 has configured the card correctly Choose...

Page 108: ...Card in the dock or the Docking System you must create a docked hardware profile 1 Double click the System option in the Control Panel 2 Click the Hardware Profiles tab 3 Click the original configuration profile then click Copy and enter a name for your docked configuration and click OK 4 Click Properties on the Hardware Profiles tabs 5 Check This is a portable computer on the General tab and clic...

Page 109: ...8 Features and Support Information ...

Page 110: ...dress or phone number listed in the Support and Service booklet or in OmniBook Support in the online OmniBook Library Please have your OmniBook with you To clean the OmniBook You can clean the OmniBook with a soft cloth dampened either in clean water or in water containing a mild detergent Do not use an excessively wet cloth nor allow water inside the case Do not use any abrasive cleaners especial...

Page 111: ...elerator with 2 5 MB video RAM 1x AGP graphics capability Models with 900 B after serial number ATI Mobility M graphics accelerator with 4 MB video RAM 2x AGP graphics capability Power Rechargeable 6 cell lithium ion battery with LED charge level gauge 11 1 Vdc Battery life up to 3 4 hours typical varies with type of usage and model Fast battery recharge 80 in 1 hour 100 in 1 5 2 hours Low battery...

Page 112: ...yboard mouse 4 Mbps IrDA compatible infrared port Expandability One Type III or two Type II 16 32 bit PC Card slots 3 3 and 5 V support CardBus enabled External plug in module bay for accessory modules Optional port replicator mini dock and docking system Software Microsoft Windows 95 98 Windows 2000 or Windows NT 4 0 Windows 95 98 2000 compatible Plug and Play Windows NT 4 0 and PC Card Plug and ...

Page 113: ...Graph NM2200 NMG5 Audio NeoMagic MagicGraph NM2200 NMG5 and NeoMagic Audio NMA2 CardBus TI PCI 1225 Keyboard controller National PC87570 Super I O SMC 769 Models with 900 B after serial number CPU Intel Mobile Pentium III processor South Bridge PIIX4M Video ATI Mobility M Audio ESS ES1978 Maestro 2E and ESS ES1921 CardBus TI PCI 1225 Keyboard controller National PC87570 Super I O SMC 869 ...

Page 114: ...th 32 Bit CardBus support Docking System 2 PC Card slots with 32 Bit CardBus support 2 PCI half height slots Expansion Docking System 1 Desktop 5 bay with built in IDE SCSI II interface 1 Notebook module bay requires Docking module bay adapter Security Kensington Microsaver lock slot DMI accessible electronic serial number Undocking password Emergency power failure undocking Notebook and dock PC C...

Page 115: ...e Lithium ion battery Lithium ion battery charger 6 4 GB internal hard disk drive replacement OmniBook 900 Shared Accessories F1474A F1653A F1746A F1472A F1473A F1470A F1468A 24X CD ROM drive module 4X DVD drive module Second 10GB HD drive module 1 44 MB floppy drive module Floppy drive cable for external use LS 120 SuperDisk drive module Docking bay module adapter ...

Page 116: ...rcom 56 Kbps Global Modem PC Card Xircom 56 Kbps Global Modem PC Card HP Mobile ProtectTools Smart Card Kit v2 0 128 bit for use in U S and Canada HP Mobile ProtectTools Smart Card Kit v2 0 40 bit for use outside U S and Canada Smart Card 5 pack Kensington Microsaver Notebook Lock Defcon 1 Notebook Alarm Replacement power cord U S Canada Taiwan Replacement power cord Europe Replacement power cord ...

Page 117: ... OmniBook Library Online OmniBook Notes For late breaking information available after the manuals were completed see OmniBook Notes Start Programs OmniBook Library The introductory Microsoft manual for Windows 95 or Windows NT This is shipped with your OmniBook and contains information about using the standard features of Windows 95 or Windows NT 4 0 OmniBook website http www hp com omnibook http ...

Page 118: ...ry or hard disks connecting devices changing the configuration BIOS Setup Utility recovery system resources including memory maps interrupt settings I O addresses and troubleshooting OmniBook User s Handbook Location C OMNILIB HPBOOK EXE and www hp com omnibook Audience End User Content Basics of operating the OmniBook OmniBook Notes Location C OMNIBOOK OMNIBOOK DOC Audience End User Corporate IT ...

Page 119: ...ards in each operating system Each card has an application note that describes how to configure it in HP OmniBooks Approved and Tested Solutions List Location www hp com omnibook Audience Corporate IT and Resellers Integrators Content Shows each 3rd party product and whether or not it passed or failed in each operating system on each OmniBook Corporate Evaluator s Guide Location www hp com omniboo...

Page 120: ...c support services See the next topic below for a listing of services Customer Support Centers See the second topic below for a listing of contacts Electronic Support Services HP OmniBook World Wide Web Download technical information drivers and software from the web at http www hp com omnibook HP PC Peripheral Self Help and Direct Help Tools Visit the web at http www hp com cpso support guide hom...

Page 121: ...he support providers listed above or an HP Service Center The support provider will provide you with repair charges and processes in your area Customer Support Centers HP Customer Support Centers will assist you for free you are responsible for the telephone charges during the term of the warranty During the free assistance period HP will assist with questions about HP will not be able to help wit...

Page 122: ...man 0180 52 58 143 Greece 301 689 6411 Hungary 36 1 252 4505 Netherlands Dutch 020 606 8751 Ireland English 01 662 5525 Italy Italian 02 264 10350 Norway Norwegian Swedish 22 11 6299 Poland 4822 37 50 65 Portugal 01 441 7199 Russia 7095 797 3500 Spain Spanish 902 321 123 Sweden Swedish 08 619 2170 Switzerland German French 0848 80 11 11 Turkey 90 212 224 59 25 UK English 0171 512 52 02 English non...

Page 123: ... duties taxes freight or fees to the service location Out of Warranty Contact one of the support providers or an HP Service Center The support provider will provide you with repair charges and processes in your area or will refer you to a repair center Hewlett Packard Limited Warranty Summary The following table summarizes Hewlett Packard s limited warranty The OmniBook Support and Service booklet...

Page 124: ...here purchased Date of purchase A written password removal request should have the following information Date of request Requester s name address and telephone number From whom was the OmniBook acquired company store gift etc The OmniBook model number such as OmniBook 900 The OmniBook s serial number The requester s signature no typed or electronic signatures If available a secondary signature sup...

Page 125: ...ok unlocks The user s original password is erased Technical Support can then guide you through the process of entering a new password If the passwords do not match repeat the previous sequence until the correct master password is entered The password removal program for the HP OmniBook PCs is protected as HP Company Confidential information This program may not be copied backed up printed or distr...

Page 126: ...ic serial numbers set in manufacturing Service If an OmniBook motherboard is replaced the HP authorized repair facility must program the electronic serial number before returning the unit to the customer OmniBook motherboard Configuration If for some reason the electronic serial number is not set the OmniBook will prompt with the following message and wait for a key press when powered on for the f...

Page 127: ...ct electronic serial number the customer can run the ESN and it will do the following 1 Ask the user to verify the serial number is correct 2 If the user answers no it will give the user a pass number The user must call HP customer support and give the pass number 3 The HP customer support representative will give the user a password that will remove the current serial number 4 Restart the system ...

Page 128: ......

Page 129: ...g power 2 10 BIOS resources 2 14 serial number 8 19 updating 2 7 BIOS Setup utility 2 3 Boot menu 2 6 deleting passwords 2 17 Exit menu 2 7 external display settings 2 4 Main menu 2 3 Power menu 2 6 Security menu 2 5 setting passwords 2 16 setting time outs 2 11 System Devices menu 2 4 boot device order 2 6 Boot menu BIOS 2 6 C Card Executive 6 11 CD ROM drive autodetecting a CD 4 9 5 10 6 9 chann...

Page 130: ...tes 8 11 hardware profile 7 8 7 9 hardware specifications 8 5 hibernate creating partition 3 3 mode 2 8 time out 2 6 2 11 I I O addresses 2 15 infrared drivers Windows 95 5 8 5 10 drivers Windows 98 4 9 infrared port mode 2 4 installing 3Com 3C589D EtherLink III PC Card 6 15 3Com Fast EtherLink XL 6 16 docking tray 7 3 Service Pack 3 6 6 Windows 95 factory build 3 3 3 4 Windows 95 retail 5 2 Windo...

Page 131: ... menu BIOS 2 6 product specifications 8 2 protection file 2 18 hard drive 2 18 Kensington lock 2 17 password 2 16 PS 2 devices selecting 2 4 R RAM system resource 2 14 rebooting boot device 2 6 recovering original software 3 3 repair 8 15 S saving battery power 2 10 security hard drive lock 2 18 Kensington lock 2 17 passwords 2 16 2 17 removing passwords 8 16 serial number 8 18 Security menu BIOS ...

Page 132: ...ick tray docking 7 3 U undocking 7 5 User s Handbook online 8 9 V video drivers Windows 95 5 6 Windows 98 4 5 Windows NT 4 0 6 7 W warranty 8 15 website 8 9 Windows reinstalling 3 3 Windows 95 documentation 8 9 factory build 3 3 3 4 Windows 95 retail infrared drivers for 5 8 5 10 installing 5 2 PC Card drivers for 5 8 video drivers 5 6 Windows 98 retail infrared drivers for 4 9 installing 4 2 PC C...

Page 133: ......
Page 134: ...troducing the OmniBook 2 Operating the OmniBook 3 Using the Recovery CD 4 Using Windows 98 5 Using Windows 95 6 Using Windows NT 4 0 7 Using the OmniBook Docking Solutions 8 Features and Support Information ...

Reviews: