CAUTION: If installing a processor with a faster speed, update the system ROM before installing the
processor.
To download firmware and view installation instructions, see the
Hewlett Packard Enterprise Support
CAUTION: THE CONTACTS ARE VERY FRAGILE AND EASILY DAMAGED. To avoid damage to the socket
or processor, do not touch the contacts.
2.
Power down the server (
3.
Remove all power:
a. Disconnect each power cord from the power source.
b. Disconnect each power cord from the server.
4.
Remove the server from the rack (
Remove the server from the rack).
5.
Remove the access panel (
6.
Remove the dust cover from the processor socket you intend to upgrade.
7.
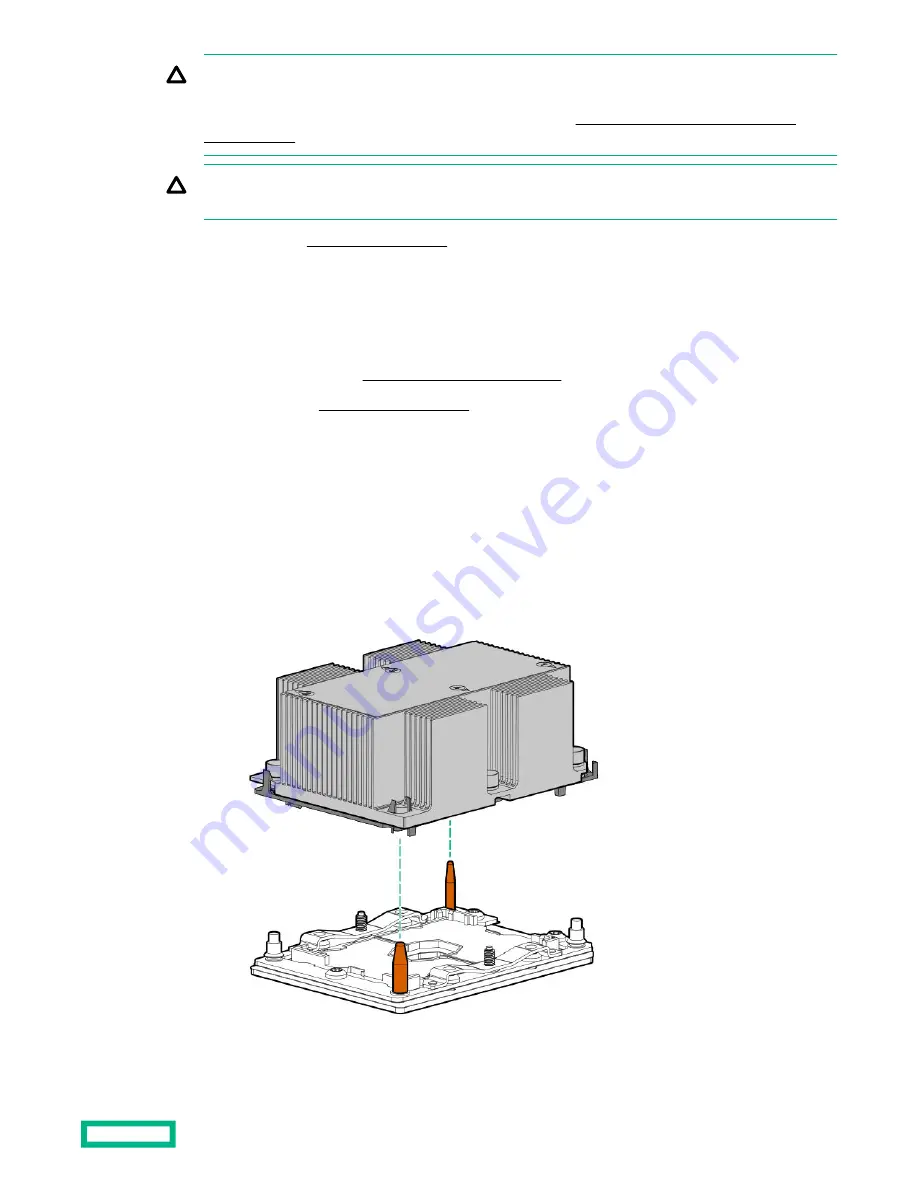
Install the processor heatsink assembly:
a. Locate and align the Pin 1 indicator on the processor carrier and the socket.
b. Align the processor-heatsink module with the heatsink alignment pins and gently lower it down until it sits
evenly on the socket.
The heatsink alignment pins are keyed. The processor will only install one way.
Your heatsink may look different than the one shown.
Hardware options installation
118
Summary of Contents for HPE ProLiant DX360 Gen10
Page 7: ...Regulatory information 183 Documentation feedback 184 Acronyms and abbreviations 185 7 ...
Page 44: ...Operations 44 ...
Page 101: ... Full length Hardware options installation 101 ...
Page 107: ... 10 SFF SAS SATA NVMe Combo 4 LFF Hardware options installation 107 ...
Page 150: ...2 SFF backplane to P816i a controller 10 SFF NVMe backplane to NVMe riser Cabling 150 ...
Page 151: ...2 SFF NVMe backplane to primary riser 1 SFF rear backplane to system board SATA Cabling 151 ...


