36
Adjusting the Television
3.
Go to the
Brightness
menu. Adjust to the highest setting that still gives the darkest black for black areas. You
can view black objects or shadowed areas.
4.
Go to
Contrast
. Adjust to the highest setting that does not wash out fine detail in bright areas. You can view
bright clouds or textured white areas.
5.
Go to
Advanced color
>
Gamma
. Adjust to the setting that gives the best overall midrange brightness. This
should have minimal effect on blacks and whites.
6.
Go to
Advanced color
>
Color temperature
. Adjust to the setting where whites and colors look best.
7.
Go to
Advanced color
>
Vibrant Black
and adjust the setting (LED television only). The Vibrant Black™
contrast enhancer setting improves the contrast in dark images.
8.
Go to
Advanced color
>
Brightness boost
and adjust the setting (Lamp television only). Off enables the
most natural colors. On enables the brightest picture.
9.
Go to
Noise reduction
. Adjust the setting to create the best display.
10. Go to
Color saturation
. Adjust to the setting where colors look most natural.
11. Go to
Advanced color
>
Tint
. Adjust to the setting where colors look most natural.
12. Repeat all steps if necessary.
Adjusting Other Picture Settings
The on-screen menu provides many settings that enable you to fine-tune the picture.
1.
Press
Menu
. Use the arrow buttons to select the
Advanced Picture
menu and press OK.
2.
Change the picture settings as needed.
Adjusting Sound Settings
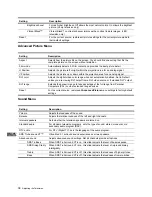
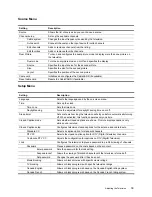
To get descriptions for all available sound adjustments, see “Sound Menu” on page 38.
Customizing Your Channels and Sources
Adding or Deleting a Channel
You can manually add or delete channels in the list of channels for the antenna or cable input, which enables you to
add a new channel that becomes available or hide a channel you want to omit when browsing channels.
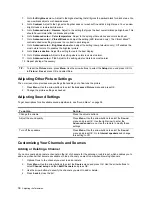
1.
Optional: tune to the channel you want to add or delete.
2.
Press
Menu
. Use the arrow buttons to select the
Source
menu and press OK. Use the arrow buttons to
select
Channel setup
and then
Edit Channels
and press OK.
3.
Use the arrow buttons to specify the channels you want to add or delete.
4.
Press
back
to close the list.
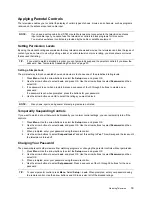
TIP:
To reset the
Picture
menu, press
Menu
. Use the arrow buttons to select the
Setup
menu and press OK. Go
to
Picture
>
Reset
, press OK, and select
Yes
.
To do this...
Do this...
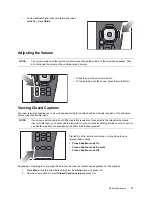
Change the volume
Press the volume buttons.
Adjust the sound quality
Press
Menu
. Use the arrow buttons to select the
Sound
menu and press OK. Use the right arrow to enter the
Advanced sound
menu. Use the remote to modify these
settings.
Turn off the speakers
Press
Menu
. Use the arrow buttons to select the
Sound
menu and press OK. Go to
Internal speakers
and change
this setting to Off.
ID5220_ID5280.book Page 36 Thursday, July 13, 2006 6:50 PM
Summary of Contents for ID5226N
Page 1: ...HP High Definition DLP TV User s Guide IDB5220N ID5226N ID5286N ...
Page 8: ...viii ...
Page 16: ...xvi ...
Page 20: ...xx ...
Page 64: ...44 Fixing Problems ...
Page 69: ...TV DLP haute définition HP Guide de l utilisateur IDB5220N ID5226N ID5286N ...
Page 76: ...viii ...
Page 84: ...xvi ...
Page 88: ...xx ...
Page 132: ...44 En cas de problème ...
Page 137: ...TV DLP de alta definición de HP Guía del usuario IDB5220N ID5226N ID5286N ...
Page 144: ...viii ...
Page 152: ...xvi ...
Page 156: ...xx ...
Page 200: ...44 Solución de problemas ...


