146 Chapter 10 PIP
ENWW
d
Rotate the drum clockwise and at the same time unrolling the PIP underlayer until
the PIP holder slit is above the jig surface.
e
Fold the PIP underlayer sheet between the metal and plastic of the mounting strip
over the jig and set the sheet edge parallel to the jig surface.
f
Make sure that the jig just touches the PIP underlayer.
g
Peel the protective coating straight, starting at the jig top edge to about 10 cm
from the end.
h
One person should hold the PIP underlayer unrolled straight.
i
A second person should rotate the handwheel very slowly clockwise to apply the
PIP underlayer to the entire drum surface.
• The layer should pass between the drum surface and the jig.
• Turn the drum one complete rotation.
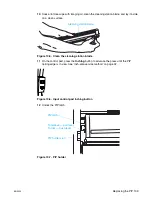
Figure 10-19. Mounting the PIP underlayer
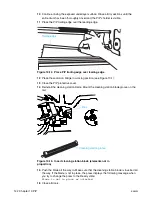
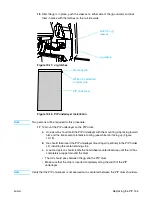
Figure 10-20. Installing the PIP underlayer
PIP drum
PIP groove
PIP underlayer
installation jig
Layer roll with
transparent
protective coating
(mylar) on top
PIP drum
PIP underlayer
installation jig
PIP underlayer
top without
transparent
protective coating
Summary of Contents for Indigo press 3050
Page 1: ...HP Indigo press 3050 User guide English version ...
Page 2: ...hp indigo press 3050 user guide ...
Page 13: ...12 Chapter 1 Preface ENWW ...
Page 23: ...22 Chapter 2 Getting started ENWW ...
Page 41: ...40 Chapter 4 HP Indigo press 3050 basics ENWW Figure 4 5 Related topics ...
Page 53: ...52 Chapter 5 The main windows ENWW ...
Page 83: ...82 Chapter 6 Operating the press ENWW ...
Page 91: ...90 Chapter 7 Operator routines ENWW Figure 7 7 Inner front wall O O O O ...
Page 99: ...98 Chapter 7 Operator routines ENWW ...
Page 136: ...ENWW 135 10PIP This chapter contains the following sections z Overview z Replacing the PIP ...
Page 189: ...188 Chapter 11 Paper transport ENWW ...
Page 219: ...218 Chapter 15 Scorotron ENWW ...
Page 257: ...256 Chapter 17 Pre transfer erase PTE ENWW ...
Page 271: ...270 Chapter 19 Chiller ENWW ...


