


Appendix C
Utilities
iLO MP
207
Step 7.
Choose a supported terminal type.
The preferred type is VT100.
Step 8.
Click
Apply
.
This option is not highlighted if the terminal type you want is already selected.
Step 9.
Click
OK
.
Configure an IP Address
To configure the iLO MP LAN static IP address, perform the following steps:
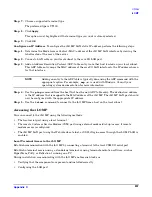
Step 1.
Determine the Media Access Control (MAC) address of the iLO MP LAN interface by viewing the
label located at the rear of the server.
Step 2.
Connect a LAN cable on your local subnet to the core I/O LAN port.
Step 3.
Add an Address Resolution Protocol (ARP) table entry to another host located on your local subnet.
This ARP table entry maps the MAC address of the core I/O LAN interface to the IP address chosen
for that interface.
NOTE
Adding an entry to the ARP table is typically done using the ARP command with the
appropriate option. For example,
arp -s
is used with Windows. Consult your
operating system documentation for more information.
Step 4.
Use the
ping
command from the host that has the new ARP table entry. The destination address
is the IP address that is mapped to the MAC address of the iLO MP. The iLO MP LAN port should
now be configured with the appropriate IP address.
Step 5.
Use the
telnet
command to connect to the iLO MP from a host on the local subnet.
Accessing the iLO MP
You can connect to the iLO MP using the following methods:
•
The local serial port using a local terminal
•
The remote Customer Service Modem (CSM) port using external modem (dial-up) access, if remote
modem access is configured
•
The iLO MP LAN port using the Web interface, telnet, or SSH, if login access through the iLO MP LAN is
enabled
Local Terminal Access to the iLO MP
Establish communication with the iLO MP by connecting a terminal to the local CSM I/O serial port.
Establish a terminal session using a standalone terminal or using terminal emulation software, such as
HyperTerm, Putty, or Reflection 1 running on a PC.
During installation, communicating with the iLO MP enables such tasks as:
•
Verifying that the components are present and installed correctly
•
Configuring the LAN port


