

Chapter 6
Replacing Parts
108
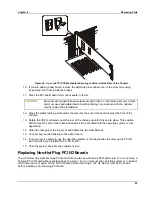
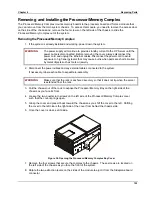
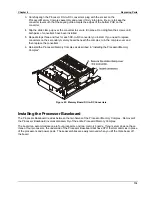
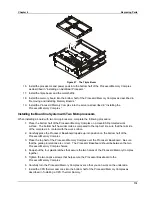
Installing an Additional Processor
This section provides the instructions for installing an additional processor. If only two processors are to
reside in the server, both processors must reside on the top half of the Processor/Memory Complex.
CAUTION
The processor is sensitive to static electricity and can be easily damaged by
improper handling. Do the following when handling the accessory kit:
•
Leave the processor in the anti-static container until you are ready to install it.
•
Wear an anti-static wrist strap and use a static-dissipating work surface or
grounding mat connected to the chassis when handling components.
•
Before you remove a processor from the anti-static container, touch a grounded,
unpainted metal surface on the HP Server to discharge static electricity.
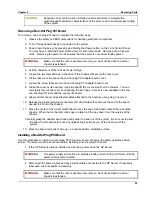
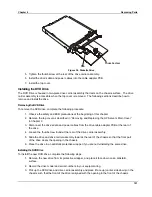
Complete the following steps to install an additional processor:
1. Unpack the processor shipping box and check the contents against its packing list.
2. If the HP Server is already installed and operating, shut down the NOS according to directions
in your NOS documentation.
3. Press the power switch on the HP Server's control panel when prompted by the operating
system. Normally, this completes the shutdown procedure.
WARNING
Power supplies will continue to provide standby current to the HP Server until the
power cables are disconnected.
4. Disconnect the AC power cord.
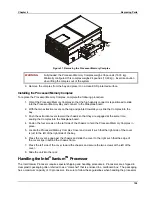
WARNING
Make sure that the rack is anchored securely, so it will not tip when the server
chassis is extended.
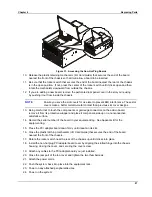
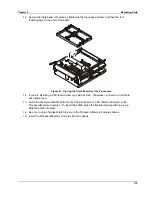
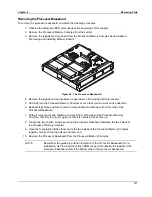
5. Pull the chassis out of the rack.
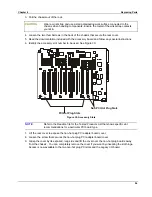
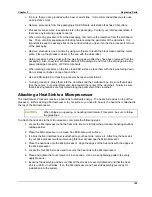
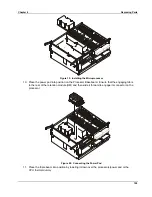
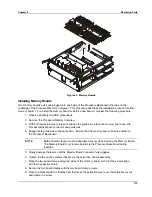
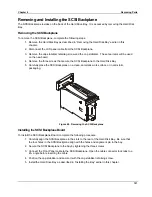
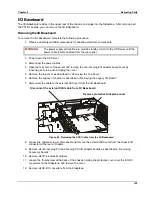
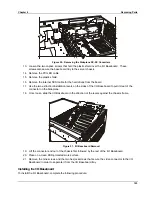
6. Remove the Processor/Memory Complex.
7. Ensure the processor speed of the second processor (CPU 2) is the same as the existing
processor before installing the second processor.
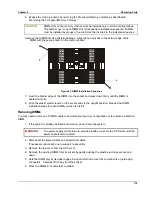
8. Make sure that the metal ejector pin in the LIF socket is flush in the socket.
9. Position the microprocessor inside the four posts on the Processor Baseboard, pins toward the
rear and over the LIF socket. Gently press the processor into position.
Summary of Contents for Integrity rx4610
Page 1: ...hp server rx4610 Service Manual Online Version 1 0 Last Updated June 2001 ...
Page 8: ...8 ...
Page 16: ...Chapter 1 General Information 8 ...
Page 38: ......
Page 86: ......
Page 144: ...Chapter 6 Replacing Parts 136 ...


