79
6 Replacing
Parts
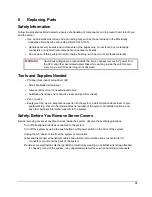
Safety Information
Follow the procedures listed below to ensure safe handling of components and to prevent harm to both you
and the server:
•
Use an anti-static wrist strap and a grounding mat, such as those included in the Electrically
Conductive Field Service Grounding Kit (HP 9300-1155).
•
Handle accessory boards and components by the edges only. Do not touch any metal-edge
connectors or any electrical components on accessory boards.
•
Do not wear clothing subject to static charge build-up, such as wool or synthetic materials.
WARNING
Hazardous voltages are present inside the server. Always remove AC power from
the CPU and other associated assemblies while working inside the unit. Serious
injury may result if this warning is not observed.
Tools and Supplies Needed
•
Phillips (cross-head) screwdriver (#2).
•
Small flat-bladed screwdriver.
•
Jumper-removal tool or needle-nosed pliers.
•
Antistatic wrist strap and conductive foam pad (recommended).
•
Pen or pencil.
•
Equipment log: as you integrate new parts into the system, add information about them to your
equipment log. Record the model and serial number of the system, all installed options, and
any other pertinent information specific to the system.
Safety: Before You Remove Server Covers
Before removing covers at any time to work inside the system, observe these safety guidelines.
Turn off all peripheral devices connected to the system.
Turn off the system by using the push-button on/off power switch on the front of the system.
Unplug the AC power cords from the system or wall outlet.
Label and disconnect all peripheral cables and all telecommunication lines connected to I/O
connectors or ports on the back of the system.
Provide some electrostatic discharge (ESD) protection by wearing an antistatic wrist strap attached
to chassis ground of the system—any unpainted metal surface—when handling components.
Summary of Contents for Integrity rx4610
Page 1: ...hp server rx4610 Service Manual Online Version 1 0 Last Updated June 2001 ...
Page 8: ...8 ...
Page 16: ...Chapter 1 General Information 8 ...
Page 38: ......
Page 86: ......
Page 144: ...Chapter 6 Replacing Parts 136 ...

