


Chapter 6
Replacing Parts
84
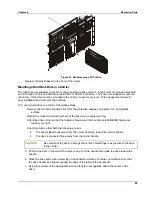
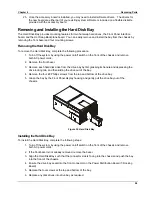
1. Lift the latch on the fan-access door and open the door.
NOTE
Verify the connector orientation prior to installing the new fan.
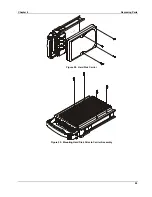
2. Slide the new fan into place with the connector oriented to engage the socket inside of the fan
enclosure.
3. Push the fan assembly firmly into the enclosure to seat the connector.
4. Close the fan-access door and engage the latch by pushing it downward.
5. Slide the chassis back into the rack.
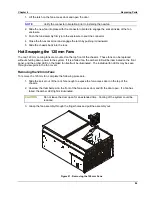
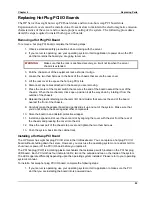
Hot Swapping the 120 mm Fans
The two 120 mm cooling fans are mounted on the top front of the chassis. These fans can be replaced
without shutting down power to the system. If it is a failed fan, the amber LED will be illuminated on the front
panel, and the amber LED on the failed fan itself will be illuminated. The individual fan LEDs may be seen
through view-ports in the fan covers
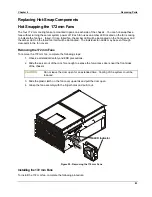
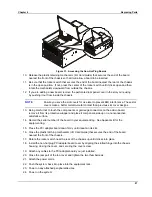
Removing the 120 mm Fans
To remove the 120mm fan, complete the following procedure:
1. Slide the server out of the rack far enough to expose the fan-access door on the top of the
chassis.
2. Unscrew the thumbscrew on the front of the fan-access door and lift the door open. If a fan has
failed, the amber LED light is illuminated.
CAUTION
Do not leave the door open for an extended time. Cooling of the system could be
reduced
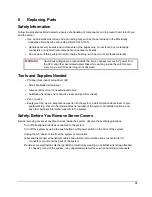
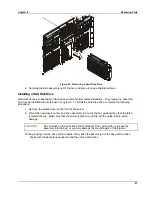
3. Grasp the fan assembly through the finger holes and pull the assembly out.
Figure 21. Removing the 120 mm Fans
Summary of Contents for Integrity rx4610
Page 1: ...hp server rx4610 Service Manual Online Version 1 0 Last Updated June 2001 ...
Page 8: ...8 ...
Page 16: ...Chapter 1 General Information 8 ...
Page 38: ......
Page 86: ......
Page 144: ...Chapter 6 Replacing Parts 136 ...


