background image

Creating (Burning) CDs

125

About Removing Files in RecordNow!

When removing files in RecordNow!, it is important 
to note:

When you remove a recorded file from a data 
DVD+R or CD-R, the disc space is lost and 
can’t be used for new recordings.

You can’t remove music files from previously 
recorded music CDs, but you can remove 
music files from the file selection window in 
RecordNow! before you record the files to 
your disc.

You must use a blank CD to create a 
music CD.

If you delete files from the file selection 
window in RecordNow! before the disc is 
recorded, available disc space is not affected. 
If you remove a file from a DVD+R or CD-R 
after the disc is recorded, available disc 
space is lost.

Removing Files from a Recorded Data Disc

RecordNow! can’t erase files from recordable 
(record once) DVDs or CDs, but files that have been 
previously recorded can be removed. When you 
remove a recorded file from a data DVD+R or CD-R, 
the disc space is lost and can’t be used for new 
recordings.

To remove data files from a recorded DVD or CD:

1

Click 

Start

, choose 

All Programs

CD 

(DVD) Recorder

RecordNow!

, and then 

click 

RecordNow!

 again.

2

Select the 

Data Projects

 tab.

3

Insert the disc from which you 
want to remove files. If an Auto Play window 
opens, click 

Cancel

.

4

Click 

Data Disc

.

5

You must have at least one file on 
your data disc to re-record it. Select 
the file you want to remove, and 
then click the 

Remove

 icon in the 

upper-right corner. 

6

Click 

Yes

.

7

Click the 

Burn

 icon to save your 

data disc without the files you 
removed.

8

Click 

Done

 when the recording is 

complete.

Summary of Contents for Media Center m1000 - Desktop PC

Page 1: ...HP Media Center PC Software Guide ...

Page 2: ...ated to another language without the prior written consent of HP Hewlett Packard Company P O Box 4010 Cupertino CA 95015 4010 USA 2002 2004 Hewlett Packard Development Company L P All rights reserved Hewlett Packard is a registered trademark of Hewlett Packard Company in the United States of America and other countries regions This product incorporates copyright protection technology that is prote...

Page 3: ...grams for Viewing on the Desktop 50 About Recording Errors 51 Resolving Recording Conflicts 52 Deleting a Scheduled Program or Series 53 Deleting a Recorded Program or Series 53 Blocking Unwanted TV Programs and Movies 54 Setting Movie DVD or TV Ratings 54 Setting Caption Display 55 Displaying Teletext 55 Safeguarding Recorded TV Programs 56 Managing Hard Disk Drive Space 60 Playing Music Files 63...

Page 4: ...ith RecordNow 120 Storing Files on a DVD or CD 122 Copying a DVD or CD 124 Erasing a DVD or CD 124 About Removing Files in RecordNow 125 Removing Files from a Recorded Data Disc 125 Archiving Files on a DVD or CD 126 About Image Files 126 Saving an Image 126 Burning an Image 127 About Recording Video Files 127 Disc Labels 127 Creating Recovery CD DVDs for the PC 127 Compatibility Information 129 C...

Page 5: ...r Windows software programs It s possible to browse through your pictures watch videos play music and even record TV while using other Windows programs When using the remote control and the Media Center program you can Watch record and play back television programs Pause rewind and fast forward TV programs Watch an instant replay Play back your digital videos View your digital pictures or play the...

Page 6: ...nector on your PC and is placed where you can point the remote control at it The remote sensor control cable is securely plugged into the remote sensor and attached to your cable or satellite set top box if present The PC has a properly configured and working Internet connection The PC is properly connected to your TV signal source Opening Media Center To open the Media Center program Press the St...

Page 7: ... Media Center use the arrow buttons on the remote control and then use the OK button to enter your selection If you have media playing such as music or television it appears in an inset window in the lower left corner To switch from watching your media in the inset window to watching it in full screen mode use the arrows on the remote control to select it and then press OK ...

Page 8: ...tal pictures or play a slide show print photos M Watch record and play back live TV programs N Play music files or music CDs O Watch DVD movies P Change Media Center program settings Other menus not shown Online Spotlight link to the Media Center Web site for the latest information about your Media Center PC and software More Programs link to other programs Once you open these programs they appear...

Page 9: ... Options if it is present 3 Click Regional and Language Options 4 Click the Regional Options tab 5 In Standards and formats select your language and country region for example English Canada from the drop down list 6 Select your location from the drop down list 7 Click Apply and then click OK Media Center Setup The first time you open Media Center a setup wizard opens Use the setup wizard to test ...

Page 10: ...active test to make sure the remote control is working with the remote sensor Before performing this test Make sure the remote control has two AA alkaline batteries installed Make sure the remote control sensor is plugged into a USB port on the PC Make sure you point the remote control at the remote sensor Make sure the LED on the remote control and the remote sensor blinks when a button is presse...

Page 11: ...uide you need to connect to the Internet and then select Settings from the Media Center Start menu select TV Guide and then select Get Guide data b Test your connection to the Internet by selecting the Test button To set this up later or change your settings you can select Settings from the Media Center Start menu select General and then select Set up Internet connection n If you choose to manuall...

Page 12: ...box is connected to your computer The remote sensor control cable is connected properly d Choose a working TV signal to use with Media Center e Select how you change channels f Select your set top box brand g Select a remote control code h Test channel changing i Set the IR signal speed j The Guide is automatically downloaded when you complete all onscreen instructions To set this up later select ...

Page 13: ... by using the Start menu To display the desktop select the Minimize icon by using the arrow buttons on the remote control or by using the mouse You can also resize the window to display Media Center and a part of the desktop To return to Media Center use the mouse to click the Media Center icon on the taskbar Menu bar icon Action Open Media Center main menu Open Media Center Help files in a separa...

Page 14: ...r as the primary CD playing program 1 Close Media Center 2 Insert a CD into the drive A message appears asking you what you want Windows to do 3 Select Play Audio CD using Media Center 4 Check the Always do the selected action check box and then click OK Using Shortcut Buttons Remote control You can use the remote control shortcut buttons such as TV My TV Music My Music Pictures My Pictures and Vi...

Page 15: ...ppear To open available files select the Contents tab and then click the next to the topic To view text about a topic select the topic The text appears on the right side of the window Select the Index tab and then scroll down the list of topics or type a descriptive word and click the Display button To view a topic double click it Select the Search tab and then type a descriptive word Click the Li...

Page 16: ... the Television Program Guide view recording errors set hard disk drive storage space and set recording defaults Music to select visualizations or song information to display when playing a song Radio to organize or delete pre set radio stations DVDs to select a language for subtitles audio tracks and menus of your DVDs You can select audio settings for your speakers and program remote buttons for...

Page 17: ...lay Place the computer in and out of standby mode Remote control cannot Navigate the Windows desktop or control other computer programs outside of Media Center Be used as a VCR DVD player or stereo remote control Turn the computer on or off shut down PC Turn a TV that is connected to your computer on or off 3 2 1 6 5 4 9 8 7 0 JKL TV VIDEOS STOP FWD GUIDE SKIP CHANNEL PAGE DVD MENU RECORDED TV MUS...

Page 18: ... all Media Center windows Advances to the next picture in a slide show L Live TV is a shortcut to the full screen view of live TV It also moves to the current point in a live TV program after pausing live TV M More Info displays available information about a selected media file Allows you to rotate a picture in My Pictures N Volume increases and decreases sound O Mute turns computer sound off The ...

Page 19: ...TV in full screen mode pressing OK switches back to the previous channel watched Press again to toggle back It acts the same way as a Jump button on some TV remote controls Z Recorded TV opens the Recorded TV window AA Start opens Media Center to the main Start menu BB Channel Page up and down changes TV channel or moves page up and down depending on available options It also moves to next DVD cha...

Page 20: ...remote sensor 2 To start Media Center and to open the Media Center Start menu press the Start button 3 If this is your first time using the remote control the Media Center setup wizard opens Follow the onscreen instructions to complete the remote control setup steps Or If you have completed the Media Center setup wizard the Media Center Start menu opens Use the arrow keys on the remote control to ...

Page 21: ...ns the My Music window where you can browse and play music CDs and your music files Pictures Opens the My Pictures window where you can search for sort and view pictures and slide shows that are stored in the My Pictures or the Shared Pictures folder in Windows Explorer You can also view your pictures on other media such as a digital camera or a memory card Videos Opens the My Videos window where ...

Page 22: ... monitor and sound turned on unless you manually turn them off before the scheduled recording Media Center cannot record TV programs if the computer is turned off Remote control LED and the remote sensor LED Under the Standby button is an LED that blinks when the remote control is sending a signal to the remote sensor The remote sensor displays a red LED when you press a button on the remote contr...

Page 23: ...ia When Stop is pressed while you are watching TV the Media Center pause buffer continues to record in the background REW Rewinds selected media Press REW again to increase the rewinding speed Moves the video backward Moves live TV program to the beginning of the 30 minute pause buffer Moves the Television Program Guide back 3 hours Pause Pauses selected media Press Pause and then FWD repeatedly t...

Page 24: ... watching live TV press OK to go to the previous channel Press OK again to toggle back to the original channel you were watching Live TV Moves a TV program forward to the end of the pause buffer and resumes playing live TV When you pause a TV program you can use the Live TV button to move forward to live TV Opens Media Center and then begins playing live TV in full screen mode Recorded TV Opens th...

Page 25: ...els for live TV or moves to the next chapter of a DVD movie Mute Turns off the PC sound The word Mute appears in the window when it is turned on Numeric keypad Changes channels and enters text Enters text in the Media Center search feature Each time you press a number key a different character appears When you find the character you want press the Enter button or wait a few seconds Clear Deletes t...

Page 26: ...22 HP Media Center PC Software Guide ...

Page 27: ...er PC and other PCs that have a USB port Store large media files and personal files Transfer files between PCs Play media files Back up your files Locating the Drive After Installation After you install the HP Personal Media Drive into the PC you can find the drive in My Computer The HP Media Center PC automatically assigns a drive letter which may change unless you assign a drive letter See Assig...

Page 28: ...rive letter Z 6 Click Change and select a letter and then apply the changes by clicking OK Storing Files The best way to transfer files to the HP Personal Media Drive is to drag them from your local hard disk drive to your HP Personal Media Drive This allows you to place files in specific folders so that they can be viewed in Media Center Refer to the following procedures for more detailed instruc...

Page 29: ... appear in the Windows Media Player library and in the Media Center My Music window when your drive is connected to the PC When you disconnect the drive your music files may still appear in the Windows Media Player Library and Media Center My Music window To refresh your PC open and close Windows Media Player or Media Center If that doesn t work restart the PC Viewing Picture Files You can view yo...

Page 30: ...lick My Computer and then double click the HP Personal Media Drive icon 2 Create a personal videos folder by right clicking in the folder and choosing New and then Folder Type a name for your personal videos folder 3 Drag or copy your video files into this created folder 4 Open the My Videos folder on your local hard disk drive by clicking Start My Documents and then double clicking My Videos 5 Ri...

Page 31: ... shows to your local hard disk drive and then copy the files over to your HP Personal Media Drive If you decide to change your recording path to the HP Personal Media Drive listed below are some important things to consider The TV recording path does not default back to your local hard disk drive after the HP Personal Media drive is disconnected This means scheduled recordings may not be recorded ...

Page 32: ... to avoid losing data Change the recording pathway back to your local hard disk drive See Changing the TV recording path to the local hard disk drive on page 29 5 Close Media Center 6 Restart your PC You must perform this last step or errors can result when recording to your drive 7 Disconnect your HP Personal Media Drive safely See Disconnecting the HP Personal Media Drive Safely on page 29 Chang...

Page 33: ... Drive safely 1 Close Media Center and all other programs that may be accessing your HP Personal Media Drive Make sure the activity LED is off 2 Double click the Safely Remove Hardware icon in the system tray at the bottom of the desktop If this icon is hidden click the arrows on the taskbar to display it The Safely Remove Hardware window opens 3 Double click USB Mass Storage Device to locate your...

Page 34: ...requirements to view recorded TV programs on other PCs To play back recorded TV files dvr ms files that were recorded on your HP Media Center PC onto another non Media Center PC the PC must have the following items installed Windows XP Operating System Windows XP Service Pack 1 Windows Media Player 9 Software to play DVDs The audio and video codec file that allows Windows Media Player to play reco...

Page 35: ...nternet can be placed in your My Pictures folder on your primary hard disk drive Click Start My Documents and then double click My Pictures folder My Pictures Music files that you download from the iTunes Music Store or copy from a commercial CD by using Windows Media Player can be placed in the My Music folder on your primary hard disk drive Click Start My Documents and then double click My Music...

Page 36: ...32 HP Media Center PC Software Guide ...

Page 37: ...grams in the Guide Check which TV programs you have scheduled to record Browse for TV programs in Search by title keyword or category Simultaneously watch a recorded program and record a live program Set Media Center to block certain channels Find your favorite television programs by organizing the Television Program Guide by different categories such as movies or sports Also view a lineup for a s...

Page 38: ...nd program information is displayed in the window 3 To watch TV in full screen mode press the Live TV button or select the TV video screen and then press OK 4 To exit full screen mode and return to the previous window press Back on the remote control 5 Press the More Info button to display the following information Channel number Channel station identifier Title of program Time period of program A...

Page 39: ...ing press REW three times To resume watching the program press Play REW allows you to go back 3 hours in the Guide To move backward in live TV by 7 seconds press Replay You can repeatedly rewind with the instant replay option but only to the beginning of the pause buffer or recorded program Allows you to go back 12 hours in the Guide Live TV To maximize the TV viewing window to full screen mode pr...

Page 40: ...y recorded portion and begins recording again after a short delay You cannot use time shifting when recording a TV program For example you can t pause a live TV program and then rewind to the beginning of the pause buffer and then begin recording You can record a TV program only from live TV In the illustration below note that the pause buffer time is highlighted in green The pause buffer began re...

Page 41: ...uide information The current lineup and or location selected for the Guide is not supported The Guide information is either missing or corrupt No data available Channel information is currently not available If you receive any of these messages then the Guide data is not available in your country or region and you cannot use Television Program Guide features Check back periodically to see if Guide...

Page 42: ...a channel and then use the arrow buttons to view up to two weeks of programming for that channel 4 Select a program and then press OK to watch or record the program w Make sure the PC has a connection to the Internet and that you have completed the Media Center setup wizard before you try to download your Television Program Guide or change the settings for your Guide ...

Page 43: ...ed from the Internet because there is no Internet connection you will see No data available next to each channel Manually downloading the Television Program Guide 1 Press the Start button on the remote control 2 Select My TV Settings Guide and then select Get Guide data 3 Select Yes The Television Program Guide starts downloading from the Internet This can take up to 30 minutes depending on the am...

Page 44: ...tructions Setting up an Internet Dial Up Connection To set up your Internet connection to bypass the Internet Service Provider interface use this procedure 1 Click Start on the taskbar and then click Control Panel 2 Click Network and Internet Connections if it is present 3 Double click Network Connections 4 In the Network Tasks area click Create a new connection 5 When the New Connection Wizard op...

Page 45: ...l 4 Use the numeric keypad on your remote control or your keyboard to enter the name of the missing channel and then select Next 5 Enter the correct channel number and then select Add 6 Repeat steps 3 through 5 to add additional channels 7 Click Done when you ve added all the channels Removing Channels from the Guide You may want to remove some channels from your Guide to prevent users from having...

Page 46: ...ear in a program title or program description and then press OK on the remote control 3 To scroll through search results use the arrow buttons to select a program and then press OK If multiple times for the program are displayed select a time and press OK 4 To begin watching the program in full screen mode select the program and then press OK If the program is not currently playing select Record o...

Page 47: ...uttons to scroll through search results and to select a program Then press OK 4 Select the program in the window and then press OK on the remote control to begin watching the program in full screen mode If the program is not currently playing you can select Record or Record Series and then press OK n Recorded TVs Schedules window displays a list of programs scheduled to record in the future beginn...

Page 48: ... The Record icon also appears next to the program in the Guide while you are recording The Record icon disappears when the recording is complete The Record icon in the taskbar If a program is currently being recorded the Record icon also appears in the taskbar If you move your mouse over the icon Media Center displays which program is currently being recorded You can right click the icon to open M...

Page 49: ...ame time When Media Center is scheduled to start a recording a warning appears that says FM radio stops when the TV recording starts If you do not select Cancel recording Media Center automatically stops radio and begins recording TV Standby mode and scheduled recordings You should always close Media Center before you manually place the PC in standby mode to avoid file corruption and other recordi...

Page 50: ...rch You can find a program to record based on a keyword such as an actor or director name program title or a category select models only To record a current or future program or series using Search 1 Press the Start button on the remote control select My TV and then select Search 2 Select Title Keyword or Categories For Title and Keyword searches enter your descriptive search words Media Center st...

Page 51: ...gin recording before the scheduled beginning and after the scheduled ending of the program To manually record a program or series from Recorded TV 1 Press the Start button on the remote control select My TV Recorded TV and then select Add Recording 2 Select Channel and time 3 Enter the channel number using the numeric keypad on the remote control 4 Select the or buttons and then press OK on the re...

Page 52: ...f the last two weeks Recorder storage to change the amount of recording space on your hard disk drive or change the settings that affect the recording storage space Recording defaults to change the general recording settings that affect how and when your programs are recorded 5 Select Set up TV signal to configure your TV signal to work with Media Center 6 Select Audio to select settings for sound...

Page 53: ...e a recorded program or series of programs and check for any recording errors To play a recorded program 1 Press the Start button on the remote control select My TV and then select Recorded TV 2 To organize all of your previously recorded programs select Sort by date Sort by name or Sort by category 3 To begin watching the program select the recorded program you want to watch and then press the OK...

Page 54: ...d TV folder 4 Double click your Microsoft Recorded TV program file A thumbnail picture of your recorded TV program is displayed by default 5 To view your recorded TV program use the playback controls n To play recorded TV programs in Windows Media Player a PC requires Windows XP operating system Windows Media Player 9 A special Media Center codec file that may be available through Windows Update f...

Page 55: ...n For more information about troubleshooting the recording conflicts refer to Media Center Help Recording error Description of error Redundant Program already exists in Recorded TV library or has been recorded and deleted in the past eight weeks Missed PC was turned off during scheduled recording time Conflict Another program was scheduled to record at the same time Canceled You selected Don t rec...

Page 56: ...n be recorded If one recording partially overlaps another Media Center records to the end of the first and then begins recording the second After you resolve a recording conflict the conflict icon continues to appear for the program that is not scheduled to record so you can return to the conflict and reverse it if needed If you are watching TV while recording a program you can watch only the chan...

Page 57: ...dow and press OK on the remote control Or To remove the entire series from the recording schedule select Series Cancel Series and then press OK Deleting a Recorded Program or Series To free up hard disk drive space you may need to delete a program or series that has been recorded 1 Press the Start button on the remote control select My TV and then select Recorded TV All the programs you have recor...

Page 58: ...ed TV programs is not selected 6 If desired you can select the Maximum allowed TV rating setting select a rating and then click OK Selecting this setting does not cause an error Setting Movie DVD or TV Ratings Select models only 1 Press the Start button on the remote control 2 Select Settings General and then select Parental control 3 Enter your four digit code 4 Select Movie DVD ratings or TV Rat...

Page 59: ...lect Audio 3 Click or next to the Caption display to select On to view speech as text in a TV program containing the captioning signal On when muted to display speech in a muted TV program Off to disable caption display Displaying Teletext Select models only To display the Teletext toolbar 1 While watching TV in full screen mode press the More Info button on the remote control to display the infor...

Page 60: ...d TV programs previously recorded to your hard disk drive copied to DVD or copied to other media When you perform a system recovery or replace the hard disk drive in your PC you lose the special code You can safeguard your capability to play recorded TV programs by making a backup CD and using it as described in the procedures provided here Make the backup CD now before you need it so that you can...

Page 61: ...ram 3 Close Media Center 4 Open the Microsoft Backup utility Click Start on the taskbar choose All Programs Accessories System Tools and then click Backup The Backup or Restore Wizard opens 5 Click the Advanced Mode link near the middle of the window 6 At the top of the Backup Utility window click Tools and select Options 7 Click the Exclude Files tab n The code key files and backup CD you make ca...

Page 62: ...d click the System State box so a check mark appears 14 At the bottom of the window beneath Backup media or file name click Browse Because a diskette is too small to save the backup file on you will need to save the file to the desktop portion of the hard disk drive before writing the file to CD If the message Insert a disk into drive A appears click Cancel 15 The Save as window opens In the Save ...

Page 63: ...created drag the file to the Recycle Bin on the desktop This deletes the copy of the file that was on the hard disk drive Using the code key backup CD after a system recovery 1 Insert the backup CD you made into a drive The drive window opens and shows the disc contents Or If the window doesn t open automatically click Start My Computer and then right click the drive icon to view the contents of y...

Page 64: ...run software programs and store data files If your hard disk drive becomes full it may affect the PC speed and performance You may need to free up storage space to record more programs or to optimize the performance of your PC There are several things you can do to optimize and increase your hard disk drive space The PC comes with a hard disk drive Depending on your model the hard disk drive has 8...

Page 65: ...ble for recorded TV programs in Default Settings Select between 5 and 90 percent The default is set at 75 percent Or Select Recording defaults to change your recording storage settings for example you can increase the available disk space Select Fair as the default recording quality The better the quality of the recording the more space the file takes Select Until I watch as the Keep setting for e...

Page 66: ...click the Settings button 6 Move the Disk space to use slider to a lower setting to save disk space 7 Click OK Deleting recorded TV programs 1 Click Start on the taskbar and then click My Computer 2 Double click Shared Documents and then double click Recorded TV 3 Right click recorded TV files and then select Delete Uninstalling software programs that are not needed 1 Click Start 2 Click Control P...

Page 67: ...ownload album information such as artist name song title length of song album name label year and cover art Play a music playlist with a slide show Copy music tracks from a CD to your Windows Media Library Display visualizations when playing music CDs Buy music online from the Now Playing page in My Music The Internet browser opens the Windows Media Web site where you can listen to and buy music b...

Page 68: ...te a music library by copying tracks from CDs or adding music files from the Internet Organize digital music files by album artist playlist or genre Edit information about music files such as the song title music type or artist name Share music files with others Listen to a radio station on the Internet Play DVD and VCD movies Delete files from your music library n Media Center can find and play o...

Page 69: ... the left c Select the tracks you want to copy by placing a check in the box next to the track d Select Copy Music in the menu bar You can select to copy your music files as MP3 files or as Windows Media Audio files wma 5 Click the Media Library tab to see where your new audio files have been placed You can rename files by right clicking the file selecting Edit and then typing a new name or genre ...

Page 70: ...es not recognize all of your audio files try copying the files directly into Windows Media Player Refer to Windows Media Player Help for more information The music files can now be found and played in the My Music window in the Media Center You may need to close and open Media Center for the added music files to appear in My Music Using supported music file types You can play the following types o...

Page 71: ...n window 4 Select Copy CD The first time you copy a music CD you must select your copy protection option and then follow any onscreen instructions 5 Select Yes to begin copying tracks to your music library This process may take several minutes depending on the length of your music tracks 6 Click OK n Each time you add music files outside of Windows Media Player you must use the Tools menu to add m...

Page 72: ...ic CD using Media Center If you insert a music CD when Media Center is not open a message appears asking what you want to do You can select Windows Media Player as your default audio player If you have another program set as the default audio player Windows opens this program and begins playing the CD 1 Press the Start button on the remote control 2 Insert a music CD into the CD drive the CD plays...

Page 73: ...aylists Songs or Genres to display a list of all items in that category In these windows you will have other options depending on the category you select Or Select Search Use the numeric keypad buttons on the remote control or your keyboard to enter a descriptive word song title or artist name and display a list of all the titles that match your entry n To display CD information such as song title...

Page 74: ...lbum Artist and Genre lists You can also play a single song from a playlist 1 In the My Music window select Songs The list displays all the songs in your media library 2 Use the arrow buttons to select a song and then press OK or Play on the remote control to play it n When copying music tracks a check mark appears next to the track after it has been copied to the music library n You can select Vi...

Page 75: ...y played Finding and Playing an Album 1 In the Media Center Start menu select My Music and then select Albums 2 To organize all of the albums available select View by list or View by cover 3 To select an album use the arrow buttons and then press OK on the remote control You can also select Shuffle to rearrange the music tracks on the album Play to play the album selected The Now Playing window op...

Page 76: ...emote control Creating a Playlist A playlist is a customized list of digital music files Using playlists you can group various digital music files together and determine the order in which you want the files to play You can create a playlist that includes several tracks from various CDs or even a playlist that contains background music for a slide show Use Windows Media Player to create playlists ...

Page 77: ...OK Repeat this step until all of your files are added You can now play your playlist in Media Center Selecting a Visualization To select which visualization to display when you play a song 1 Press the Start button on the remote control select My Music 2 Select Settings 3 Select Select Visualizations 4 Select the visualizations you want by placing a check mark next to each one 5 Select Save 6 Selec...

Page 78: ...74 HP Media Center PC Software Guide ...

Page 79: ...us you can organize your pictures by assigning a date keyword or place For more information about using HP Image Zone Plus see Using HP Image Zone Plus in Media Center on page 84 Working with digital images You can connect a digital image source such as a digital camera or a digital video camera directly to the PC or through a docking station Digital picture files you copy or download from the dev...

Page 80: ...lder and it is a Media Center menu item which allows you to view and search for your digital images by using the remote control or the keyboard and mouse It provides all the tools you need for viewing organizing editing printing sharing and protecting your digital images My Pictures Menu in Media Center My Pictures Folder in Windows Explorer ...

Page 81: ...ows Explorer Creating picture folders in My Pictures 1 Click Start on the taskbar and then click My Pictures to open the My Pictures folder in Windows Explorer 2 Select the File menu select New and then click Folder Type a name for your personal picture folder 3 Locate your picture files and move them to the My Pictures folder in Windows Explorer a Click Start My Computer and then select the drive...

Page 82: ...re file types You can view the following types of image files in Media Center Only supported image file types are displayed in My Pictures Unsupported files are skipped in a slide show Folder icons appear even if the images inside them cannot be displayed Corrupted and unsupported image file types display a generic image icon but cannot be displayed in Media Center Some file types are supported on...

Page 83: ...s you want to sort If you want to sort all your pictures do not select a folder 3 Select Sort by date or select Sort by name Viewing pictures as a slide show 1 Press the Start button on the remote control 2 Select My Pictures 3 Select the folder of pictures you want to view as a slide show and then press OK 4 Select Play slide show and then press OK 5 Press the More Info button to display picture ...

Page 84: ...ture settings Each user can set his or her own picture settings 1 Press the Start button on the remote control 2 Select Settings You may need to select the scroll arrows on the Start menu to view Settings 3 Select Pictures 4 Select an option Press the OK button on the remote control to select a specific setting 5 When you have selected all of your picture settings select Save Turning on or off pho...

Page 85: ...ed eye or Contrast and then press OK 7 After you select the options you want to fix select Save The picture is displayed with the new settings Rotating pictures If your picture appears horizontally or vertically and you want to change the orientation you can change it in Media Center 1 Press the Start button on the remote control 2 Select My Pictures 3 Select the picture you want to rotate 4 Press...

Page 86: ...eed to set up your printer before you can print from Media Center Follow any onscreen instructions Setting up your printer 1 Connect your printer to the PC and install the printer drivers for your printer if necessary Follow the instructions that came with your printer 2 Click Start on the taskbar and then click Printers and Faxes 3 Right click your printer icon and then click Set as Default A che...

Page 87: ...ce where your pictures are located 2 Select the files you want to copy by pressing the Ctrl key and then selecting each picture 3 Select Copy to CD from Windows Explorer in the area Picture tasks The CD recording program opens 4 Follow the onscreen instructions to complete recording your pictures to CD For more information about creating picture CDs see Creating Burning Data CDs Using Windows XP o...

Page 88: ... Image Zone Plus program window with the features highlighted HP Image Zone Plus Window A Go to My Pictures is toggle switch to the My Pictures directory in Windows Explorer B Mode tabs are used to view images edit images and create projects with your images C View tab are used to view all images folders and albums D Help is a link to HP Image Zone Plus help topics E Work area or Gallery shows sel...

Page 89: ... your pictures See Modifying a date assigned to your pictures on page 87 Assigning a keyword to your pictures on page 88 and Assigning a place to your pictures on page 88 3 You can edit your images from this window too See Editing Pictures in HP Image Zone Plus on page 91 4 When you have finished organizing your images open Media Center to view play a slide show and search for your photos by the l...

Page 90: ...r choose All Programs Pictures Photos and then click HP Image Zone Plus The HP Image Zone Plus window opens 2 When the catalog message appears click OK to index the PC images and place them in the HP Image Zone Plus catalog 3 At the top of the gallery window click the My Images tab B and then click View All C below it to see all of the images in the catalog You can also click View Folders or View ...

Page 91: ... Select View All and then select your pictures which you want to place into an album 4 Click the View Albums tab 5 Select My Albums Menu and then select New Album Your album appears in the View Albums tab 6 To change the title of the album just select it and type in a title You can now view your albums in Media Center Modifying a date assigned to your pictures Digital cameras assign a creation dat...

Page 92: ... to add the keyword to the Assign to all box Assigning a place to your pictures 1 Double click the HP Image Zone Plus icon on the desktop 2 Click the My Images tab and then click the View All tab under the My Images tab 3 Select your picture by clicking it You can select more than one picture if desired 4 Click By place on the left side of the window 5 Click Assign 6 Click the map to find your loc...

Page 93: ...ntrol to rotate the globe and numbers 1 through 5 to zoom in or out When you have picked a location press OK Locations which have pictures assigned to them will have a colored dot on the map Viewing Pictures in HP Image Zone Plus Viewing a slide show When viewing images you can view a slide show of all your images individual albums or pictures selected from a search 1 Press the Start button on the...

Page 94: ...ns 5 Select OK Using supported picture file types HP Image Zone Plus supports the following types of image files video files and audio files Only supported image file types are displayed in My Pictures Unsupported files are skipped in a slide show Corrupted and unsupported image file types display a generic image icon but cannot be displayed in Media Center Some file types are supported only if ap...

Page 95: ...dit 5 Click the Edit tab 6 Select an editing tool on the left side of the window and make the edits to your picture For more information about the editing tools click Help and then select Edit Help 7 When you have made your edits click Save to save the edits to the picture or click Save As to create an edited version of the original image Updating edited picture files in Media Center After you mak...

Page 96: ...o Setting up your printer on page 82 Other Features of HP Image Zone Plus Copying Pictures to CD Refer to Copying Pictures to CDs on page 83 Creating projects You can create and print projects such as photo album pages cards and flyers with HP Image Zone Plus For more information see make creative projects in Help You can create multimedia CDs with your images You can add your own audio and text o...

Page 97: ...can share your images with friends and family After you select images on the My Images tab you can post the images to the HP Instant Share Web site and send a link to the images on the Web site by e mail You can also create online albums if you want to organize your images on the Web site If available in your region you can order professional quality prints from an online service For more informat...

Page 98: ...94 HP Media Center PC Software Guide ...

Page 99: ... in Media Center Browse your videos straight from the device on which they are stored Media Center recognizes removable media from a CD or DVD drive or from a digital video camera Display your video details such as the name and date your video file was modified Sort videos by date or name View small image thumbnail and title of video file Scroll through your digital videos and folders by clicking ...

Page 100: ...y them Once you have placed all your videos into the My Videos or Shared Video folder you can rename add delete and organize them into folders To organize and store your videos click Start on the taskbar click My Documents and then double click the My Videos folder If you want to share your videos with others place them in the Shared Video folder To do this click Start on the taskbar click My Docu...

Page 101: ...r video or video folder You may need to use the scroll arrows at the bottom of the window to display all videos 5 Press the OK button on the remote control The selected video plays in full screen mode or the folder opens displaying a list of video files Use the mouse to resize the window if you want to watch your video while doing something else on your desktop 6 When the video is finished select ...

Page 102: ...n full screen mode 1 On the Media Center Start menu select My Videos 2 On the My Videos menu select My Videos Shared Video or Other media 3 Select the folder you want and then press OK Select the video file and press OK again The video plays in full screen mode 4 To exit full screen mode and return to the previous window press Back on the remote control n If your video is playing in full screen mo...

Page 103: ...r select a video file from the My Videos or Shared Video window and then press the More Info button on the remote control The information includes Video title Video description if available Date the video file was created Date the video file was modified Size of the video file in minutes If you press the More Info button while the video is playing the title and time span or size of the video is di...

Page 104: ...iles in Media Center Other file types are supported if your PC has the correct software installed File extension File type avi Video file mpeg mpg mpe mlv mp2 mpv2 Movie file wm asf Windows Media file wmv Windows Media A V file n For more information about supported video file types refer to Media Center Help menu ...

Page 105: ...menu items and control the DVD movie playback 4 To stop playing the DVD press Stop on the remote control 5 To change the window size move the mouse and click the Resize button on the taskbar of the DVD window About playing DVDs When you open Media Center and then insert a DVD into your drive there is a delay of a few seconds before the movie begins playing Even though Media Center supports closed ...

Page 106: ...he disc tray select Eject Watching DVD in the inset window or in a resized window While the DVD movie is playing press the Start button on the remote control This opens the Media Center Start menu with the DVD playing in the inset window While the DVD movie is playing move the mouse for the Resize icon to appear Select the Resize icon and then you can manually adjust the window size Playing a DVD ...

Page 107: ... the OK button on the remote control 5 When you find the one you want use the arrow buttons to select Save in the window and then press OK on the remote control 6 To return to the main Settings window press the Back button Changing DVD Audio Settings To select DVD audio settings for viewing the DVD 1 In the Media Center Start menu select Settings 2 In the Settings window select DVD 3 In the DVD Se...

Page 108: ...104 HP Media Center PC Software Guide ...

Page 109: ...by using your remote control In Radio you can Listen to FM radio stations Set up pre sets of your favorite radio stations Delete or organize your radio station pre sets Use the time shifting feature pause rewind and fast forward up to 30 minutes of radio programs n Make sure you connect the FM radio antenna to the back of the PC before selecting an FM radio station This antenna is for select model...

Page 110: ...n Media Center automatically stops radio and begins recording TV Playing FM Radio Stations 1 Connect the FM radio antenna to the back of the PC to the connector labeled FM IN 2 Press the Start button on the remote control 3 Select Radio 4 Enter a radio station number by using the numeric keypad on the remote control or your keyboard Or Select the Seek or buttons for Media Center to find the next p...

Page 111: ...ngs 4 Select the up arrows and down arrows next to each pre set station to move it to a different position Or Select the delete icon X to delete a pre set station Or Select Auto Sort to sort your pre set stations in numerical ascending or descending order 5 Select Save to save your changes 6 Select Back to return to the previous window ...

Page 112: ...108 HP Media Center PC Software Guide ...

Page 113: ...en record your recorded programs onto CDs and DVDs The recording quality determines the size of the file created for the recorded program Best is the pre set recording quality setting A two hour program recorded set to Best produces a large file that does not fit on one DVD The following table lists the recording quality and the estimated number of minutes that fit onto one DVD The InterVideo WinD...

Page 114: ...our recorded TV program from the Shared Documents Recorded TV folder or wherever you have stored the file and then click Open The WinDVD Creator window opens with your file displayed 5 To add another file click the Import button select your file and then click Open 6 Select your recorded TV program and drag it to the Storyboard section of the window 7 Click Make Movie select your settings and then...

Page 115: ...ms from the Recorded TV folder and then click Add 6 Repeat step 5 until all of your recorded TV programs are selected 7 Click the Burn icon RecordNow records your files to disc 8 Click Done when the recording is complete Watching Recorded TV Programs on DVD 1 Make sure Media Center is closed and then insert the DVD 2 When the AutoPlay window appears select Play DVD movie using InterVideo WinDVD Or...

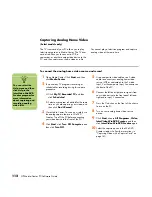
Page 116: ...alog capture feature in WinDVD Creator Turn off the PC before connecting your video device to the front of the PC 4 Click Start click Turn Off Computer and then click Turn Off 5 Use a composite video cable or an S video cable to connect your analog home video source VCR or camcorder to the S video Input_2 or the composite Input_2 connector on the front of the PC 6 Connect the left and right audio ...

Page 117: ...le layer media means you can record on two layers of one side of a DVD Double layer technology uses two thin embedded organic dye films for data storage separated by a spacer layer Each layer has different optical properties General information about double layer DVD R discs You can record 3 hours of DVD quality video or 6 hours of VHS quality video without turning over the disc This disc can hold...

Page 118: ...e market are encrypted with copy protection to prevent illegal duplication of copyrighted material This protection distorts the picture quality when copied or prevents it from being copied Copy protection for music files The first time you try to copy a music CD in Media Center or Windows Media Player a copy protection setting window appears When you burn a music CD in Windows Media Player an opti...

Page 119: ...ar For help online go to http www hp com music Playing CDs and DVDs with Windows Media Player The PC must have a DVD drive to play DVD movies 1 Insert the music CD or DVD movie into the drive The Windows Media Player window opens If the wizard window opens select Windows Media Player from the list You may have to scroll down in the window to see Windows Media Player Or If the Windows Media Player ...

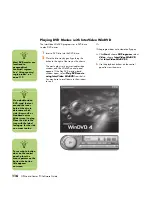
Page 120: ...n in the window to see it Or If the program does not automatically open a Click Start choose All Programs select Video choose InterVideo WinDVD click InterVideo WinDVD 4 b Use the playback buttons on the control panel to view the movie n Most DVD movies are localized to geographical countries regions See Using country region codes on page 117 n On a double sided DVD read the text around the inner ...

Page 121: ...ced over a world globe printed on the DVD packaging and disc DVDs without country region codes will play on any player or drive in any country region WinDVD is not pre set to a particular country region the country region code of the first DVD movie you play determines your DVD country region For example if you play a DVD with a country region 1 code WinDVD sets the current country region of your ...

Page 122: ...deo CD VCD into a DVD or CD drive 2 Select Play DVD movie using Windows Media Player and click OK Or If the program doesn t open click Start choose All Programs and Windows Media Player 3 Click File on the menu bar at the top and click Open If you do not see the menu bar click the small circle with the up down arrows in the upper left corner of the window 4 Click the Look In drop down arrow and se...

Page 123: ...lume level and click OK 5 Select the playlist you want to burn to the CD and then click the Burn Disc button in the upper right corner 6 Insert a blank disc into your drive 7 Click OK For more information on using iTunes click the Help menu in the iTunes menu bar For help online go to http www hp com music Creating Burning Music CDs with Windows Media Player 1 Click Start on the taskbar choose All...

Page 124: ...ow software program The CD RW DVD Writer or double layer drive is available on select models only Previously recorded files on CD RW discs must be erased before recording music files CD R discs cannot be erased 1 Click Start on the taskbar 2 Choose All Programs 3 Choose CD DVD Recorder 4 Click RecordNow and then click RecordNow again 5 If you need to erase a disc CD RW or DVD RW Insert the disc se...

Page 125: ...music CD to view the tracks on your CD Select View if you would like to look at another optical drive Or Click Find and then click either Scan for Music or Browse to find music files on your hard disk drive that you want to record 5 Select the tracks you want to record and then click Add Press and hold the Control Ctrl key to select more than one track 6 Click the Burn icon when you have added all...

Page 126: ...s may not fit on your disc Storing Files on a DVD or CD Unlike music CDs data DVDs and CDs can be recorded in multiple sessions 1 Click Start choose All Programs CD DVD Recorder RecordNow and then click RecordNow again 2 Select the Data Projects tab 3 Insert a blank or appendable CD R CD RW DVD R DVD RW or double layer DVD R select models disc into your drive and then click Data Disc If the disc i...

Page 127: ...an add new data files to a CD R and a DVD R in a later recording session until the disc is full With DVD R discs you need to select the correct setting in RecordNow to record files in a later session To do this insert your recorded DVD open RecordNow click the Options icon wrench click Data select the recording option you want and then click OK When you record files that have the same name as prev...

Page 128: ... the recording is complete Erasing a DVD or CD You can use RecordNow to erase music data or video files from rewritable DVDs and CDs leaving almost all the disc space available for new recordings If you try to record a video or music file to a rewritable disc that has files on it the recording program prompts you to erase the disc first 1 Click Start choose All Programs CD DVD Recorder RecordNow a...

Page 129: ...space is lost Removing Files from a Recorded Data Disc RecordNow can t erase files from recordable record once DVDs or CDs but files that have been previously recorded can be removed When you remove a recorded file from a data DVD R or CD R the disc space is lost and can t be used for new recordings To remove data files from a recorded DVD or CD 1 Click Start choose All Programs CD DVD Recorder Re...

Page 130: ... from the Windows Explorer to the Archive window 7 Click the Burn icon when all of your files have been added If the files do not fit on one disc File Archive asks you for additional discs 8 Click Done when recording is complete About Image Files RecordNow can take all the files from a CD or DVD and convert it into a single file called an image file You can use the image file to reproduce the orig...

Page 131: ...ity of the source files the PC speed and its graphics processing ability Refer to Recording VHS Video Files Direct to DVD on page 146 Disc Labels WARNING When labeling your DVDs do not use sticky labels They can cause the DVD to play erratically Instead write on the DVD with a felt tip pen to label it Creating Recovery CD DVDs for the PC For more information about creating Recovery CDs DVDs refer ...

Page 132: ...ve an options window does not appear You must open the program you want to use with your DVD and then perform an action For example if you insert a blank CD RW disc you see options such as Open writable CD folder using Windows Explorer Make a music CD using RecordNow Take no action The options displayed depend on what software is on the PC You can choose to have a specific action occur automatical...

Page 133: ... the files on the disc you inserted click Start My Computer and then right click the DVD Writer CD Writer drive icon and choose Explore To view the files on the disc you inserted click Start My Computer and then double click the DVD Writer CD Writer drive icon To open a particular program click Start choose All Programs and then click the program you want Compatibility Information An important fea...

Page 134: ...e quality of the recording Can be used to back up your hard disk drive files DVD R discs Can t be erased or written to again Some programs like RecordNow allow you to record data in multiple sessions until the disc is full Can t edit a DVD R that has been recorded as a DVD movie Hold up to 4 7 GB the equivalent of 7 CDs Record up to 3 hours of video files depending on the quality of the recording ...

Page 135: ...be erased and rewritten Can hold about 80 minutes of music files or up to 99 tracks Can hold 700 MB of data depending on the CD Can be used to create storage discs for your hard disk drive files Video Recording Length n CD R discs are more compatible with home and car stereos than CD RW discs Disc type Video quality setting Good Better Best 8 5 GB double layer DVD R 325 minutes 217 minutes 108 min...

Page 136: ...music Yes Yes Varies by model Varies by model CD RW Data Yes Yes No No MP3 music Yes Yes Varies by model Varies by model DVD ROM Data No Yes No No DVD movie No Yes No Yes DVD R Data Yes Yes No No DVD movie Yes Yes No Varies by model Double layer DVD Data Yes Yes No Yes DVD movie Yes Yes No Yes DVD RW Data Yes Yes No No DVD movie Yes Yes No Varies by model VCD DVD movie No Yes No Varies by model n ...

Page 137: ...hat you can do within each program Some programs listed below may not be included with your PC model Optical drive can CD ROM CD RW DVD ROM DVD RW R Double Layer Combo CD RW DVD Read CDs CD Rs and CD RWs X X X X X X Read DVDs X X X X Read data on a CD X X X X X X Play music X X X X X X Record data or music to disc for storage or backup X X X X View DVD movies X X X X Record DVD movies X X Play PC ...

Page 138: ...ne Player Play music CDs MP3s and other audio files Play DVD movies RealOne Player can play DVDs only if another DVD player program such as InterVideo WinDVD is installed Play video CDs Record music files Organize digital files into a library for recording or listening Windows Movie Maker 2 0 Import audio video and other media files from a videotape an audiotape a Web camera or a television broadc...

Page 139: ...irectly from a digital video DV camera VCR or other analog capture device Assemble movies by capturing video clips and scenes into a video project Edit your movies Cut scenes and add music and sound effects still images text video transitions and voice overs Preview movies during editing and before recording final files Create video files export them to your hard disk drive or your digital video c...

Page 140: ...136 HP Media Center PC Software Guide ...

Page 141: ...Creator and then click InterVideo WinDVD Creator again 2 Select one of the menu options Create new project Opens the Edit section for you to begin creating a new project Open existing project Brings up the Open window for you to select an existing project Create CD DVD with existing video file Brings up the Open window for you to select existing video files Capture video into hard disk Opens the C...

Page 142: ...r or Timeline mode Use the Storyboard to organize your media and add special effects such as titles transition effects audio tracks and video filters select models only Requirements for Capturing Video You can copy capture video files to your hard disk drive by using the WinDVD Creator program Among the devices supported by WinDVD Creator are capture cards digital camcorders and Web cameras Use th...

Page 143: ...folder on your hard disk drive The video clip appears in the Media Library portion of the screen 10 To play back your captured video click the file in the Media Library and click the Play button in the Preview window Capturing Web Camera Video 1 Click Start choose All Programs Video InterVideo WinDVD Creator and then click InterVideo WinDVD Creator again 2 Click the Capture video into hard disk bu...

Page 144: ...ssed and automatically saved to the My Videos folder on your hard disk drive The video clip appears in the Media Library portion of the screen 8 To play back your captured video click the file in the Media Library and click the Play button in the Preview window Capturing a Still Image 1 Pause your input device on the position for which you would like an image 2 Click the Capture Still Image button...

Page 145: ...t like the sequence of the video files drag and drop the files in the Storyboard to change the sequence Adding images 1 Click the Image Library icon 2 Click the Import or Drag and Drop button to open the My Pictures folder on your hard disk drive 3 Select the images from your hard disk drive you would like to add to your Image Library and click Open 4 Drag and drop images from the Image Library to...

Page 146: ... the audio track running for more than one video file switch from Storyboard mode to Timeline mode Drag the music track across more than one video file Adding transition effects 1 Click the Transition Effects icon 2 Drag and drop a transition effect between the two video files you would like the effect to appear in Storyboard icons Edit Clip Trims a video clip 1 Double click a video clip on the St...

Page 147: ...oard Adding video filters 1 Click the Video Filters icon select models only 2 Drag and drop a video filter to the video of your choice Authoring Your DVD The Author or Add Menu section turns your project interactive It creates a menu theme and breaks your project into chapters The menu theme can be your own images and music or a custom theme that comes with WinDVD Creator 1 If your project is alre...

Page 148: ...r menu Double click one of the five menu layouts to add it to your project Double click one of the shapes for chapter frames These shapes appear around your chapters on the menu Storyboard icons in author mode Switch between Menu and Chapter layout Add Chapter Add a chapter mark There is a minimum length of time required for each chapter Delete Chapter Delete a chapter mark TV Overscan Hide the me...

Page 149: ...f selections may differ 7 Click the right arrow and then click Start 8 Click OK Select Function Format Select one of the formats to record your project TV System Select between NTSC and PAL for your TV system The NTSC format is used in North America and the PAL format is used in European and Asian countries regions Volume Name of Disc Enter a Volume name for your disc optional Select Device Select...

Page 150: ...ot be able to preview recorded TV programs with InterVideo WinDVD Creator WinDVD Creator until the recorded TV program is converted to a VCD or DVD format However you will be able to convert the recorded program save it edit it and view it from the PC that it was recorded to 1 Locate and open your recorded TV program Click Start My Documents and then Shared Documents folder Double click the Record...

Page 151: ...s than 26 feet 8 meters away If a pressed key repeats itself or sticks unplug the remote sensor from the USB connector wait one minute and plug the remote sensor back in Try altering the lighting conditions in the room or moving the location of the remote sensor if this continues Press the Enter button on the remote control after changing a channel Point the remote control toward the remote sensor...

Page 152: ...right click My Computer and then select Properties b Click the Hardware tab and then click the Device Manager button c Click the plus sign next to Sound video and game controllers d Double click the TV tuner device e Click the Driver tab and then click the Update Driver button f Select Install from a list or a specific location and then click Next g Remove the check mark from Search removable medi...

Page 153: ... files to appear Refer to Windows Media Player Help for more information Send Don t Send error messages keep appearing If you get an error message with Send and Don t Send options close the dialog box by clicking Send or Don t Send Continue with your tasks For best performance HP recommends that you restart your PC at a convenient time To restart the PC Click Start on the taskbar click Turn Off Co...

Page 154: ... programs or other data onto recordable CDs or DVDs then delete them from your hard disk drive You can also uninstall unneeded software programs Click Start on the taskbar click Control Panel then click Add or Remove Programs You can also perform disk cleanup click Start on the taskbar choose All Programs Accessories System Tools and then click Disk Cleanup and select the C drive My DVD is vertica...

Page 155: ...p at the bottom of the list if it matches yours or set the listings manually To manually set the Guide listings open Media Center select Settings TV Guide and then select Add missing channels to add channels Select Edit Guide listings to turn off channels you don t have or to change channel numbers to the correct program information If you do not know the channel frequency information for your TV ...

Page 156: ...152 HP Media Center PC Software Guide ...
Page 157: ...ve 147 changing lineup of TV shows 48 recording quality setting for TV shows 109 TV settings 48 channels adding 41 program guide 39 removing 41 closed captioning 55 codec errors 149 computer shortcut buttons 10 connecting analog VCR or camcorder 112 converting recorded TV 146 copying pictures to CD 83 country region codes 117 creating a playlist 72 music library 65 recovery CD DVDs for the PC 127 ...

Page 158: ...ee radio G Guide see Television Program Guide H hard disk space increasing 60 Help Media Center 11 HP Image Zone Plus 84 HP Personal Media Drive 23 I image files 126 adding 141 burning 127 saving 126 In 48 Internet setting up a dial up connection 40 Internet radio 105 InterVideo WinDVD Creator 109 137 iTunes 119 creating music CD 119 features 134 playing music CDs 115 K keyboard shortcut buttons 1...

Page 159: ...V programs and movies 54 changing TV settings 48 delete a scheduled TV program 53 display teletext 55 downloading the Guide 39 icons 44 manually downloading the Guide 39 play recorded TV programs 49 protect your recorded TV programs 56 recording TV from the Guide 45 recording TV manually 47 recording TV programs 44 recording TV programs without a Guide 37 remove channels from the Guide 41 resolvin...

Page 160: ...is being recorded 44 manually 47 resolving recording conflicts 52 single shows or series canceling 44 using the Guide 45 when two scheduled for same time 45 recording VHS files direct to DVD 146 RecordNow 109 120 137 archiving files 126 creating music CD to play on your PC 121 creating music CDs 120 for car and home CD players 121 erasing a DVD or CD 124 features 135 image files 126 removing files...

Page 161: ...s 52 unable to get correct TV Program Guide 5 TV changing settings 48 recording settings 60 searching for shows by category 43 setting up TV signal 7 time shifting 36 using digital video recorder while watching 36 watching 34 TV channels adding to TV Program Guide 48 changing lineup of shows 48 removing 48 TV shows changing lineup of shows 48 changing recording quality settings 109 copying to CDs ...

Page 162: ...DVD Creator adding audio effects 142 adding images 141 adding title effects 143 adding transition effects 142 authoring your DVD 143 capturing a still image 140 capturing digital camcorder video 139 capturing video with a capture card 140 capturing videos and pictures 137 capturing Web camera videos 139 create movies 137 edit 137 editing video files 140 features 135 getting started 137 help 137 ma...

Reviews: