724
Figure 743
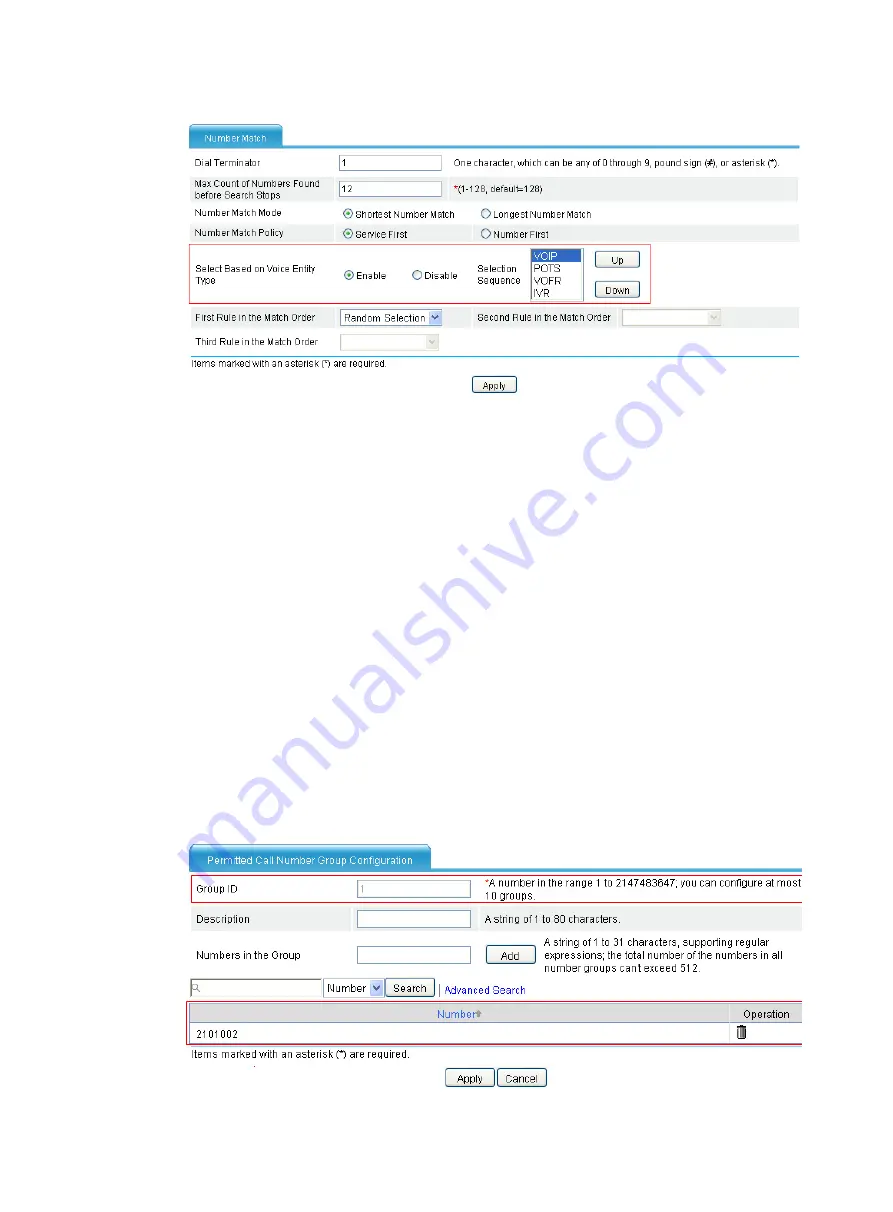
Entity type selection sequence configuration page
b.
Select
Enable
in the
Select Based on Voice Entity Type
area.
c.
Configure the order of the voice entities in the
Selection Sequence
box: the first is
VOIP
, the
second is
POTS
, the third is
VoFR
, and the last is
IVR
.
d.
Click
Apply
.
2.
Configure Router B:
# Configure a local number and two call routes.
a.
Configure a call route in the call route configuration page: The call route ID is 10, the
destination number is 010…., and the destination address is 192.168.0.71.
b.
Configure a local number in the local number configuration page: The number ID is 2101002,
the number ID is 2101002, and the bound line is 3/0.
c.
Configure the backup call route 211 for the FXO line in the call route configuration page: The
destination address is
.T
, call route type is
Trunk
, and the trunk route line is 4/0. In addition,
select the
Send All Digits of a Called Number
option in the
Called Number Sending Mode
area
when you configure the advanced settings of this call route.
# Configure call authority control.
d.
Select
Voice Management
>
Dial Plan
>
Call Authority Control
from the navigation tree, and
then click
Add
to access the permitted call number group configuration page.
Figure 744
Permitted call number group configuration page
Summary of Contents for MSR SERIES
Page 17: ...xv Documents 835 Websites 835 Conventions 836 Index 838 ...
Page 20: ...3 Figure 3 Initial page of the Web interface ...
Page 42: ...25 Figure 13 Firefox Web browser setting ...
Page 59: ...42 Figure 27 Checking the basic service configuration ...
Page 73: ...56 Figure 35 Sample interface statistics ...
Page 156: ...139 Figure 139 Rebooting the 3G modem ...
Page 168: ...151 Figure 152 Configuring Web server 2 ...
Page 174: ...157 Figure 158 Configure the URL filtering function ...
Page 242: ...225 Figure 233 Enabling the DHCP client on interface Ethernet 0 1 ...
Page 247: ...230 Figure 236 The page for configuring an advanced IPv4 ACL ...
Page 255: ...238 Figure 241 Advanced limit setting ...
Page 298: ...281 e Click Apply 2 Configure Router B in the same way Router A is configured ...
Page 400: ...383 Figure 387 Verifying the configuration ...
Page 405: ...388 ...
Page 523: ...506 Figure 530 Ping configuration page ...
Page 775: ...758 Figure 785 Configuring a jump node ...


