background image

caps lock

shift

L

M

alt

alt

shift

enter

,

.

?

/

:

;

User Guide

O

icejet Enterprise Color MFP X585/X585 Flow

www.hp.com/support/ojcolorMFPX585

Summary of Contents for Officejet Enterprise Color MFP X585 Flow

Page 1: ...caps lock shift A S D F G H J K L Z X C V B N M alt alt shift enter User Guide Officejet Enterprise Color MFP X585 X585 Flow www hp com support ojcolorMFPX585 ...

Page 2: ......

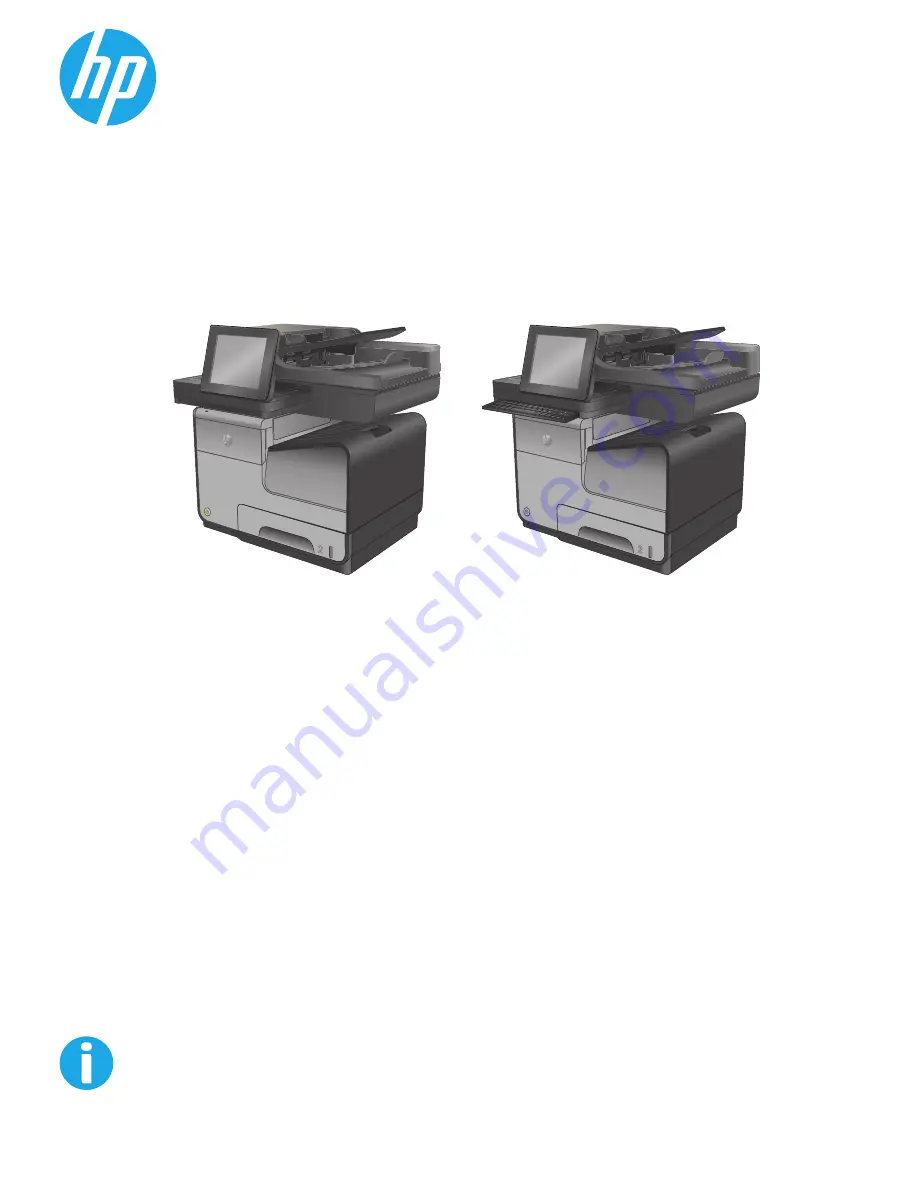
Page 3: ...HP Officejet Enterprise Color MFP X585 User Guide ...

Page 4: ...d as constituting an additional warranty HP shall not be liable for technical or editorial errors or omissions contained herein Part number B5L04 90904 Edition 1 4 2014 Trademark Credits Adobe Adobe Photoshop Acrobat and PostScript are trademarks of Adobe Systems Incorporated Apple and the Apple logo are trademarks of Apple Computer Inc registered in the U S and other countries iPod is a trademark...

Page 5: ...onfigure a tray to match print job settings 16 Configure a tray by using the control panel 17 Load Tray 1 multi purpose tray on left side of the product 18 Load Tray 2 or optional Tray 3 19 3 Parts supplies and accessories 21 Order parts accessories and supplies 22 Ordering 22 Parts and supplies 22 Accessories 22 Replace the ink cartridges 23 4 Print 27 Print tasks Windows 28 How to print Windows ...

Page 6: ...9 AirPrint 40 Print from the USB port 41 Enable the USB port for printing 41 Print USB documents 41 5 Copy 43 Make a copy 44 Copy on both sides duplex 46 Copy on both sides automatically 46 Copy on both sides manually 46 Optimize copy quality for text or pictures 47 6 Scan send 49 Set up Scan to Email 50 Use the E Mail Setup Wizard 50 Set up the Scan to Email feature via the HP Embedded Web Server...

Page 7: ...rned on with a fax accessory installed 76 After initial product hardware setup 76 Change fax configurations 77 Fax dialing settings 77 General fax send settings 78 Fax receive settings 79 Send a fax 81 8 Manage the product 83 Configure IP network settings 84 Printer sharing disclaimer 84 View or change network settings 84 Rename the product on a network 84 Manually configure IPv4 TCP IP parameters...

Page 8: ...ge is low or Cartridge is very low message displays on the product control panel 106 Change the Very Low settings 106 For products with fax capability 106 Order supplies 107 Product does not pick up paper or misfeeds 108 The product does not pick up paper 108 The product picks up multiple sheets of paper 108 The document feeder jams skews or picks up multiple sheets of paper 108 Clear jams 110 Aut...

Page 9: ...copy image quality 135 Check the scanner glass for dirt and smudges 135 Calibrate the scanner 136 Check the paper settings 137 Check the paper size and type configuration 137 Select the tray to use for the copy 137 Check the image adjustment settings 137 Optimize copy quality for text or pictures 137 Edge to edge copying 138 Clean the pickup rollers and separation pad in the document feeder 138 Im...

Page 10: ...st for solving fax problems 152 What type of phone line are you using 152 Are you using a surge protection device 152 Are you using a phone company voice messaging service or an answering machine 152 Does your phone line have a call waiting feature 153 Check fax accessory status 153 General fax problems 154 The fax failed to send 154 An Out of Memory status message displays on the product control ...

Page 11: ...lorMFPX585 Outside the US go to www hp com support Select your country region Click Troubleshooting Enter the product name and then select Search HP s all inclusive help for your product includes the following information Install and configure Learn and use Solve problems Download software updates Join support forums Find warranty and regulatory information ENWW 1 ...

Page 12: ... input Touchscreen control panel Retractable keyboard Print Prints up to 42 pages per minute ppm on A4 or Letter size paper in Professional mode up to 70 ppm in General Office mode and up to 15 ppm in Presentation mode Easy access USB printing no computer required Wireless direct accessory for touch printing from mobile devices optional on some printers Mobile printing using the following HP ePrin...

Page 13: ...pports it NOTE Microsoft retired mainstream support for Windows XP in April 2009 HP will continue to provide best effort support for the discontinued XP operating system Windows Vista 32 bit and 64 bit NOTE Windows Vista Starter is not supported by the software installer or the print driver Windows 7 SP1 or later 32 bit and 64 bit Windows 8 32 bit and 64 bit Windows 8 1 32 bit and 64 bit Windows 2...

Page 14: ...are 3 The HP Software Installer CD installs the HP PCL 6 driver for Windows operating systems along with other optional software Mac installer software is not included on the CD The CD provides steps to download the Mac installer software from www hp com Go to www hp com support select the country region and then click Drivers Software Enter a product name or number In the Download Options area cl...

Page 15: ...C V B N M alt alt shift enter 10 12 11 1 9 7 2 3 4 5 6 8 1 Document feeder scanner assembly 2 Document feeder input tray 3 Document feeder output bin 4 Output bin extension 5 Output bin 6 Output ejector flap 7 Tray 2 8 On off button 9 Ink cartridge door 10 X585z models only keyboard pull the keyboard straight out to use it ENWW Product views 5 ...

Page 16: ...11 Hardware integration pocket HIP for connecting accessory and third party devices 12 Control panel with color touchscreen display tilts up for easier viewing 6 Chapter 1 Product introduction ENWW ...

Page 17: ...or cleaning rollers 2 Left door access for clearing jams and the ink collection unit 3 Tray 1 multipurpose tray 4 Fax port fax models only 5 Cable lock slot 6 Model and serial number label 7 Interface ports 8 Formatter contains the interface ports 9 Power connection ENWW Product views 7 ...

Page 18: ... USB cable from a computer alternative to network and wireless connections 2 Ethernet port 3 Foreign interface harness FIH port 4 USB host port accepts USB storage devices for Plug and Print 5 Fax port fax models only 8 Chapter 1 Product introduction ENWW ...

Page 19: ...s to secured features After you sign out the product restores all options to the default settings 4 HP logo or Home button On any screen other than the Home screen the HP logo changes to a Home button Touch the Home button to return to the Home screen 5 Stop button Touch the Stop button to pause the current job The Job Status screen opens and then you can cancel or continue the job 6 Start button ...

Page 20: ...yboard X585z models only The X585z model includes a physical keyboard The keys are mapped to your language in the same way the virtual keyboard on the product control panel is mapped If you select a different keyboard layout for the virtual keyboard the keys on the physical keyboard are remapped to match the new settings 16 Easy access USB port Insert a USB flash drive for printing and scanning wi...

Page 21: ...all inclusive help for your product Outside the US follow these steps 1 Go to www hp com support 2 Select your country region 3 Click Troubleshooting 4 Enter the product name HP Officejet Enterprise Color MFP X585 and then select Search Find the following support Install and configure Learn and use Solve problems Download software updates Join support forums Find warranty and regulatory informatio...

Page 22: ...12 Chapter 1 Product introduction ENWW ...

Page 23: ... go to www hp com support ojcolorMFPX585 Outside the US go to www hp com support Select your country region Click Troubleshooting Enter the product name and then select Search HP s all inclusive help for your product includes the following information Install and configure Learn and use Solve problems Download software updates Join support forums Find warranty and regulatory information ENWW 13 ...

Page 24: ...kjet printers or multiuse Use paper or print media made for inkjet printers Hewlett Packard Company cannot recommend the use of other brands of media because HP cannot control their quality NOTE Based on HP internal testing using a range of plain papers HP highly recommends using papers with the ColorLok logo for this product For details go to www hp com go printpermanence Use the following guidel...

Page 25: ...er that is approved for use in inkjet printers Print on the correct side of this type of paper Do not attempt to duplex print on this type of paper Do not use glossy or coated paper designed for use in laser products Using laser printer glossy media can result in ink puddling on the page and covering the internal parts of the product Printing on the incorrect side of this type of paper can lead to...

Page 26: ...e paper source from the Paper Quality tab Windows or Paper Feed menu Mac Frequently use special paper such as heavy paper or letterhead from one tray Load special paper in Tray 1 and configure the tray for the paper type From the software program print dialog choose the paper type that matches the special paper loaded in the tray before sending the print job Select Tray 1 as the paper source from ...

Page 27: ...1 From the Home screen on the product control panel scroll to and touch the Trays button 2 Touch the line for the tray that you want to configure and then touch the Modify button 3 Select the paper type and size from the lists of options 4 Touch the OK button to save your selection ENWW Configure trays for paper type and size 17 ...

Page 28: ...nsion 3 Extend the paper guides fully and then load the paper stack into Tray 1 Adjust the paper guides to the size of the paper NOTE Place the paper into Tray 1 with the side to be printed on face down and the top of page on the side of the tray closest to the product 18 Chapter 2 Paper trays ENWW ...

Page 29: ... that it is flat at all four corners Slide the side paper width guides so that they align with the paper size marking in the bottom of the tray Slide the front paper length guide so that it pushes the stack of paper against the back of the tray NOTE Place the paper into the tray with the side to be printed on face up ENWW Load Tray 2 or optional Tray 3 19 ...

Page 30: ... the paper stack is below the paper limit tabs on the side of the tray 5 Slide the tray into the product NOTE To close the tray push in the middle or with even pressure on both sides Avoid pushing on one side only 20 Chapter 2 Paper trays ENWW ...

Page 31: ...FPX585 Outside the US go to www hp com support Select your country region Click Troubleshooting Enter the product name and then select Search HP s all inclusive help for your product includes the following information Install and configure Learn and use Solve problems Download software updates Join support forums Find warranty and regulatory information ENWW 21 ...

Page 32: ...ink D8J07A HP 980A Standard capacity cyan ink cartridge with HP Officejet pigment ink D8J09A HP 980A Standard capacity yellow ink cartridge with HP Officejet pigment ink D8J08A HP 980A Standard capacity magenta ink cartridge with HP Officejet pigment ink Ink collection unit B5L09A HP Officejet Enterprise ink collection unit and duplex module NOTE For information about the yield for the cartridges ...

Page 33: ... ink cartridge for each color yellow Y cyan C magenta M and black K 1 Open the ink cartridge door 2 Push the old ink cartridge inward to unlock it 3 Grasp the edge of the old ink cartridge and then pull the cartridge straight out to remove it ENWW Replace the ink cartridges 23 ...

Page 34: ...ouch the gold colored metal contacts of the ink cartridge Fingerprints on the contacts can cause print quality problems C 980 6 Insert the new ink cartridge into the product Push the cartridge until it clicks into place 24 Chapter 3 Parts supplies and accessories ENWW ...

Page 35: ...7 Close the ink cartridge door 8 Place the old cartridge in the box and refer to information about recycling used ink cartridges on the ink cartridge box ENWW Replace the ink cartridges 25 ...

Page 36: ...26 Chapter 3 Parts supplies and accessories ENWW ...

Page 37: ...om support ojcolorMFPX585 Outside the US go to www hp com support Select your country region Click Troubleshooting Enter the product name and then select Search HP s all inclusive help for your product includes the following information Install and configure Learn and use Solve problems Download software updates Join support forums Find warranty and regulatory information ENWW 27 ...

Page 38: ...rint driver NOTE The name of the button varies for different software programs 3 Click or tap the tabs in the print driver to configure the available options For example set the paper orientation on the Finishing tab and set the paper source paper type paper size and quality settings on the Paper Quality tab 4 Click or tap the OK button to return to the Print dialog box Select the number of copies...

Page 39: ... From the software program select the Print option 2 Select the product from the list of printers and then click or tap the Properties or Preferences button to open the print driver NOTE The name of the button varies for different software programs 3 Click or tap the Finishing tab 4 Select the Print on both sides check box Click the OK button to close the Document Properties dialog box 5 In the Pr...

Page 40: ... printers and then click or tap the Properties or Preferences button to open the print driver NOTE The name of the button varies for different software programs 3 Click or tap the Finishing tab 4 Select the Print on both sides manually check box Click the OK button to print the first side of the job 5 Retrieve the printed stack from the output bin and place it in Tray 1 6 If prompted touch the app...

Page 41: ... driver NOTE The name of the button varies for different software programs 3 Click or tap the Finishing tab 4 Select the number of pages per sheet from the Pages per sheet drop down list 5 Select the correct Print page borders Page order and Orientation options Click the OK button to close the Document Properties dialog box 6 In the Print dialog box click the OK button to print the job ENWW Print ...

Page 42: ...n click the OK button 8 Click the OK button to close the Document Properties dialog box In the Print dialog box click the OK button to print the job Additional print tasks In the US go to www hp com support ojcolorMFPX585 Outside the US go to www hp com support Select your country region Click Troubleshooting Enter the product name and then select Search Instructions are available for performing s...

Page 43: ...ng option from the Two Sided drop down list 5 Click the Print button Manually print on both sides Mac OS X NOTE This feature is available if you install the HP print driver It might not be available if you are using AirPrint 1 Click the File menu and then click the Print option 2 In the Printer menu select this product 3 Open the menus drop down list or click Show Details and then click the Manual...

Page 44: ...p down list or click Show Details and then click the Finishing menu 4 Select a type from the Media type drop down list 5 Click the Print button Additional print tasks In the US go to www hp com support ojcolorMFPX585 Outside the US go to www hp com support Select your country region Click Troubleshooting Enter the product name and then select Search Instructions are available for performing specif...

Page 45: ...ct so you can print them at any time NOTE Your print driver might look different than what is shown here but the steps are the same 1 From the software program select the Print option 2 Select the product from the list of printers and then select Properties or Preferences the name varies for different software programs 3 Click the Job Storage tab ENWW Store print jobs on the product to print later...

Page 46: ... the job the person who prints the job must provide the required PIN at the control panel If you encrypt the job the person who prints the job must provide the required password at the control panel 5 To use a custom user name or job name click the Custom button and then enter the user name or the job name Select which option to use if another stored job already has that name Use Job Name 1 99 App...

Page 47: ... to enter this PIN number 7 Click the Print button to process the job Print a stored job Use the following procedure to print a job that is stored in the product memory 1 From the Home screen on the product control panel scroll to and touch the Retrieve from Device Memory button 2 Select the name of the folder where the job is stored 3 Select the name of the job If the job is private or encrypted ...

Page 48: ...dded print solution Symbian mobile devices using the HP ePrint Home Biz App PC and Mac devices using the HP ePrint Software For more information on HP Wireless Direct printing go to www hp com go wirelessprinting and then click HP Wireless Direct on the left navigation bar NFC and HP Wireless Direct capabilities can be enabled or disabled from the printer s control panel 1 From the Home screen on ...

Page 49: ... Server EWS a From the Home screen on the product control panel touch the Network button to display the IP address or host name b Open a Web browser and in the address line type the IP address or host name exactly as it displays on the product control panel Press the Enter key on the computer keyboard The EWS opens 2 Click the HP Web Services tab 3 Select the option to enable Web Services NOTE Ena...

Page 50: ...oftware for drivers and information NOTE The HP ePrint software is a PDF workflow utility for Mac and is not technically a print driver NOTE HP ePrint Software does not support USB printing AirPrint Direct printing using Apple s AirPrint is supported for iOS 4 2 or later Use AirPrint to print directly to the product from an iPad iPhone 3GS or later or iPod touch third generation or later in the fo...

Page 51: ...eneral Settings Enable Retrieve from USB 3 Select the Enable option and then touch the Save button Print USB documents 1 Insert the USB flash drive into the easy access USB port NOTE You might need to remove the cover from the USB port Pull the cover straight out to remove it 2 The product detects the USB flash drive Touch the OK button to access the drive or if prompted select the Retrieve from U...

Page 52: ...42 Chapter 4 Print ENWW ...

Page 53: ...5 Outside the US go to www hp com support Select your country region Click Troubleshooting Enter the product name and then select Search HP s all inclusive help for your product includes the following information Install and configure Learn and use Solve problems Download software updates Join support forums Find warranty and regulatory information ENWW 43 ...

Page 54: ...place it face up in the document feeder and adjust the paper guides to fit the size of the document 2 From the Home screen on the product control panel touch the Copy button 3 To adjust the number of copies touch the Copies field to open a keypad 44 Chapter 5 Copy ENWW ...

Page 55: ...4 Enter the number of copies and then touch the OK button 5 Touch the Start button ENWW Make a copy 45 ...

Page 56: ...ton 6 Touch the Start button Copy on both sides manually 1 Load the document on the scanner glass according to the indicators on the product 2 From the Home screen on the product control panel touch the Copy button 3 Touch the Sides button 4 To make a two sided copy from a one sided original touch the 1 sided original 2 sided output button To make a two sided copy from a two sided original touch t...

Page 57: ...h the More Options button and then touch the Optimize Text Picture button 3 Select one of the predefined options or touch the Manually Adjust button and then adjust the slider in the Optimize For area Touch the OK button 4 Touch the Start button NOTE These settings are temporary After you have finished the job the product returns to the default settings ENWW Optimize copy quality for text or pictu...

Page 58: ...48 Chapter 5 Copy ENWW ...

Page 59: ...CM solution flow models only For more information In the US go to www hp com support ojcolorMFPX585 Outside the US go to www hp com support Select your country region Click Troubleshooting Enter the product name and then select Search HP s all inclusive help for your product includes the following information Install and configure Learn and use Solve problems Download software updates Join support...

Page 60: ...ons Set up the Scan to Email feature via the HP Embedded Web Server 1 Open the HP Embedded Web Server EWS a From the Home screen on the product control panel touch the Network button to display the IP address or host name b Open a Web browser and in the address line type the IP address or host name exactly as it displays on the product control panel Press the Enter key on the computer keyboard The...

Page 61: ...opriate usage options Click Next 14 On the Summary and Test dialog enter a valid emial address in the Send a test e mail to field and then click Test 15 Review the Summary dialog and click Finish 16 On the E mail Setup dialog click Apply to complete the setup Set up personal and network contacts You can send email to a list of recipients by using the address book Depending on how the product is co...

Page 62: ...low the instructions to add an LDAP server 5 Click the Apply button at the bottom of the screen Add contacts to the address book from the product control panel If you are signed in to the product contacts that you add to the address book will not be visible to other people who use the product If you are not signed in to the product contacts that you add to the address book will be visible to all p...

Page 63: ...2 Touch the Address Book button that is next to the To field to open the Address Book screen 3 Touch the Add button that is in the lower left corner of the screen ENWW Set up Scan to Email 53 ...

Page 64: ...tion is necessary to use the Scan to Email feature NOTE The following instructions are for Microsoft Outlook 2007 1 In Outlook click the Tools menu 2 Click Account Settings 3 Select your email account from the list and click Change 4 On the Change E mail Account screen click More Settings 5 On the Internet E mail Settings screen click the Advanced tab 6 Use the following port settings for the inco...

Page 65: ...e the following type of encrypted connection TLS 7 Click OK 8 On the Account Settings screen click Next 9 On the Change Email Account screen click Finish to complete the setup ENWW Set up Scan to Email 55 ...

Page 66: ...the IP address or host name b Open a Web browser and in the address line type the IP address or host name exactly as it displays on the product control panel Press the Enter key on the computer keyboard The EWS opens 2 Click the Scan Digital Send tab 3 On the left navigation menu click Save to Network Folder Setup link 4 On the Save to Network Folder Setup dialog select the Enable Save to Network ...

Page 67: ...d folder address is determined by the signed in user on the product Specify the user s home folder in the Microsoft Active Directory Verify that the user knows where this home folder is located on the network Users must sign in with Windows at the control panel If users do not sign in to open the Network Folder program this selection will not show up on the list This program requires querying the ...

Page 68: ...yone values for a workgroup name default is Workgroup username and password fields are required to save the quick set However it typically does not matter what the values are TIP These fields are available under Authentication Settings using fixed credentials If the folder is in a within a particular user s folders and not Public the credentials of that user must be used An IP address might be nec...

Page 69: ...f scan jobs Jobs can fail if the folder is unavailable Allow sending to folders with write access only Select this option for folders configured for write only access required for this type of folder NOTE When this box is checked the product cannot increment the scan filename It sends the same filename for all scans Select a time related filename prefix or suffix for the scan filename so that each...

Page 70: ...Open a Web browser and in the address line type the IP address or host name exactly as it displays on the product control panel Press the Enter key on the computer keyboard The EWS opens 2 Click the Scan Digital Send tab 3 Click the Save to USB Setup link 4 Select the Enable Save to USB check box 5 Click the Apply button at the bottom of the page 60 Chapter 6 Scan send ENWW ...

Page 71: ...Set Title This title appears on the new Quick Set button on the product control panel Quick Set Description This short description appears next to the title on the new Quick Set button on the control panel Button Location Select whether the new Quick Set button will be directly on the Home screen or within the Quick Sets application on the control panel Quick Set Start Option Select one of these o...

Page 72: ...ions to write to the specified SharePoint site d Click OK 8 On the SharePoint Destination Settings dialog select the Verify folder access prior to job start checkbox if appropriate and then click Next 9 On the Notification Settings dialog select your scan status notification preference and then click Next 10 On the Scan Settings dialog select the scan settings to use Click Next 11 On the File Sett...

Page 73: ...og click Add 5 On the Select an application dialog select the application for which you want to create a Quick Set Click Next 6 On the Set the button location for the Quick Set and options for user interaction at the control panel dialog provide the following information Quick Set Title This title appears on the new Quick Set button on the product control panel Quick Set Description This short des...

Page 74: ...tination Settings NOTE The Save to SharePoint feature is available for all HP LaserJet flow MFPs and the Scanjet 8500 fn1 and the Scanjet 7000nx with firmware datecode 20120119 or newer Proceed through the destination specific dialogs Click Next to advance to the next dialog 8 On the Notification Settings dialog select your scan status notification preference and then click Next 9 On the Scan Sett...

Page 75: ...the document feeder and adjust the paper guides to fit the size of the document 2 From the Home screen on the product control panel touch the E mail button NOTE If prompted type your user name and password 3 Touch the To field to open a keyboard NOTE If you are signed in to the product your user name or other default information might appear in the From field If so you might not be able to change ...

Page 76: ... CC Subject and File Name fields by touching the field and using the touchscreen keyboard to enter information Touch the OK button when you have completed the fields 6 To change the settings for the document touch the More Options button 7 If you are sending a two sided document select the Original Sides menu and then select the 2 sided option Touch the OK button 66 Chapter 6 Scan send ENWW ...

Page 77: ...nother email job touch the OK button on the Status screen NOTE You have the option to retain the settings from this job to use for the next job Send email by using the address book 1 Place the document face down on the scanner glass or place it face up in the document feeder and adjust the paper guides to fit the size of the document 2 From the Home screen on the product control panel touch the E ...

Page 78: ...3 Touch the Address Book button that is next to the To field to open the Address Book screen 4 From the drop down list select the address book view that you want to use 68 Chapter 6 Scan send ENWW ...

Page 79: ...r each recipient and then touch the OK button 6 Touch the Start button to send NOTE You can preview the image at any time by touching the Preview button in the upper right corner of the screen For more information about this feature touch the Help button on the preview screen ENWW Send a scanned document to one or more email addresses 69 ...

Page 80: ...f you have configured Windows File Sharing NOTE You might be required to sign in to the product to use this feature The system administrator can use the HP Embedded Web Server to configure pre defined Quick Sets folders or you can provide the path to another network folder 1 Place the document face down on the scanner glass or place it face up in the document feeder and adjust the paper guides to ...

Page 81: ...ets list 4 To set up a new job touch the File Name text field to open a keyboard and then type the name for the file Touch the OK button 5 If necessary touch the File Type drop down menu to select a different output file format ENWW Send a scanned document to a network folder 71 ...

Page 82: ...th Touch the OK button 7 To configure settings for the document touch the More Options button 8 Touch the Start button to save the file NOTE You can preview the image at any time by touching the Preview button in the upper right corner of the screen For more information about this feature touch the Help button on the preview screen 72 Chapter 6 Scan send ENWW ...

Page 83: ...r documents directly to the HP Flow CM Professional solution Retrieve and print PDF documents set directories and browse a file repository directly from the control panel of a Flow CM enabled product For more information on HP Flow CM Professional go to the following Web sites To log in to HP Flow CM go to www hpflowcm com login To search HP Flow CM Support go to help hpflowcm com To find out more...

Page 84: ...74 Chapter 6 Scan send ENWW ...

Page 85: ...go to www hp com support Select your country region Click Troubleshooting Enter the product name and then select Search HP s all inclusive help for your product includes the following information Install and configure Learn and use Solve problems Download software updates Join support forums Find warranty and regulatory information ENWW 75 ...

Page 86: ...x setup is complete NOTE When first installed the fax accessory might read some of these settings from the product therefore a value might already be set Check the values to verify that they are correct After initial product hardware setup Access the Fax Setup Wizard after initial setup through the control panel by following these steps 1 From the Home screen on the product control panel scroll to...

Page 87: ...4 max 33 600 bps Medium v 17 max 14 400 bps Slow v 29 max 9 600 bps Redial Interval The Redial Interval setting selects the number of minutes between retries if the number dialed is busy or not answering or if an error occurs NOTE You might observe a redial message on the control panel when both the Redial On Busy and Redial On No Answer settings are set to off This occurs when the fax accessory d...

Page 88: ...gs Fax Send Setup General Fax Send Settings Configure any of the following settings Menu item Description Fax Number Confirmation When the Fax Number Confirmation feature is enabled the fax number must be entered twice to ensure that it was entered correctly The feature is disabled by default PC Fax Send Use the PC Fax Send feature to send faxes from a PC This feature is enabled by default Fax Hea...

Page 89: ...his can speed the dialing process and help you if you do not remember the speed dial entry number for a given fax number If the product finds a matching speed dial entry for the fax number entered manually you can touch Yes to send the fax to that number or have the number added to the fax distribution list Fax receive settings 1 From the Home screen on the product control panel scroll to and touc...

Page 90: ...keypad and then touch the OK button The default setting for ring interval is 600 ms Ring Frequency Touch the box beneath the Ring Frequency heading to open the keypad Enter a value for the ring frequency on the keypad and then touch the OK button The default setting for ring frequency is 68 Hz which detects rings up to 68 Hz 80 Chapter 7 Fax ENWW ...

Page 91: ...t 2 From the Home screen on the product control panel touch the Fax button You might be prompted to type a user name and password 3 Touch the More Options button Verify that the settings match those of your original When all settings are completed touch the up arrow to scroll to the main Fax screen 4 Touch the Fax Number field to open the keypad ENWW Send a fax 81 ...

Page 92: ...ouch the Start button to send the fax NOTE You can preview the image at any time by touching the Preview button in the upper right corner of the screen For more information about this feature touch the Help button on the preview screen 82 Chapter 7 Fax ENWW ...

Page 93: ...n In the US go to www hp com support ojcolorMFPX585 Outside the US go to www hp com support Select your country region Click Troubleshooting Enter the product name and then select Search HP s all inclusive help for your product includes the following information Install and configure Learn and use Solve problems Download software updates Join support forums Find warranty and regulatory information...

Page 94: ...ton to display the IP address or host name b Open a Web browser and in the address line type the IP address or host name exactly as it displays on the product control panel Press the Enter key on the computer keyboard The EWS opens 2 Click the Networking tab to obtain network information You can change settings as needed Rename the product on a network If you want to rename the product on a networ...

Page 95: ...ig Method 3 Select the Manual option and then touch the Save button 4 Open the Manual Settings menu 5 Touch the IP Address Subnet Mask or Default Gateway option 6 Touch the first field to open a keypad Enter the correct digits for the field and then touch the OK button Repeat the process for each field and then touch the Save button Manually configure IPv6 TCP IP parameters from the control panel ...

Page 96: ...gure the address touch the Address button and then touch the field to open a keypad 4 Use the keypad to enter the address and then touch the OK button 5 Touch the Save button 86 Chapter 8 Manage the product ENWW ...

Page 97: ...d Web Server When the product is connected to the network the HP Embedded Web Server is automatically available NOTE The HP Embedded Web Server is not accessible beyond the network firewall How to access the HP Embedded Web Server EWS 1 From the Home screen on the product control panel touch the Network button to display the IP address or host name 2 Open a Web browser and in the address line type...

Page 98: ... also show additional services available for the product Usage Page Shows a summary of the number of pages the product has printed grouped by size type and paper print path Device Information Shows the product network name address and model information To customize these entries click the Device Information menu on the General tab Control Panel Snapshot Shows an image of the current screen on the ...

Page 99: ...schedule for each day of the week and for holidays Set which interactions with the product cause it to wake from sleep mode Backup and Restore Create a backup file that contains product and user data If necessary use this file to restore data to the product Restore Factory Settings Restore product settings to the factory defaults Solution Installer Install third party software programs that can en...

Page 100: ...in the product E mail Setup Configure the default email settings for digital sending including the following Settings for the outgoing mail SMTP server Default settings for E mail Quick Sets jobs Default message settings such as the From address and the subject line Settings for digital signatures and encryption Settings for email notifications Default scan settings for email jobs Default file set...

Page 101: ...ng faxes and set up a fax printing schedule Fax Archive and Forwarding Enable or disable fax archiving and fax forwarding and configure basic settings for each Fax archiving is a method to send a copy of all incoming and outgoing faxes to an email address Fax forwarding is a method to forward incoming faxes to a different fax device Fax Activity Log Contains a list of the faxes that have been sent...

Page 102: ...rk Web Service Security Allow resources on this product to be accessed by web pages from different domains If no sites are added to the list then all sites are trusted Self Test Verify that the security functions are running according to expected system parameters HP Web Services tab Use the HP Web Services tab to configure and enable HP Web Services for this product It is necessary to Enable HP W...

Page 103: ...networks only Mgmt Protocols Configure and manage security protocols for this product including the following Set the security management level for the HP Embedded Web Server and control traffic over HTTP and HTTPS Configure the SNMP Simple Network Management Protocol operation Enable or disable the SNMP v1 v2c or SNMP v3 agents on the print server Control access through protocols that may not be ...

Page 104: ...ver Other Links list Menu Description Product Support Connect to the support site for the product to search for help on various topics Shop for Supplies Connect to the HP SureSupply Web site for information on purchasing original HP supplies such as toner cartridges and paper HP Instant Support Connect to the HP Web site to find solutions to product problems 94 Chapter 8 Manage the product ENWW ...

Page 105: ... the Printers pane at the left side of the screen All Settings Click this button to return to the HP Utility main page Applications Click this button to manage which HP tools or utilities appear in the Dock HP Support Click this button to open a browser and go to the HP support Web site for the product Supplies Click this button to open the HP SureSupply Web site Registration Click this button to ...

Page 106: ...settings Output Devices Manages settings for optional output accessories Duplex Mode Turns on the automatic two sided printing mode Protect Direct Ports Disables printing over USB or parallel ports Stored Jobs Manages print jobs that are stored on the product hard disk Network Settings Configures the network settings such as the IPv4 and IPv6 settings Additional Settings Provides access to the HP ...

Page 107: ...otely install monitor maintain troubleshoot and secure your printing and imaging environment ultimately increasing business productivity by helping you save time control costs and protect your investment HP Web Jetadmin upgrades are periodically made available to provide support for specific product features Go to www hp com go webjetadmin and click the Self Help and Documentation link to learn mo...

Page 108: ...the Home screen on the product control panel scroll to and touch the Administration button 2 Open the following menus General Settings Energy Settings Sleep Timer Settings 3 Touch Sleep Auto Off After to select the option 4 Select the appropriate time period and then touch the Save button NOTE The sleep mode default time is 30 minutes Set the Sleep Schedule NOTE You must configure the date and tim...

Page 109: ...for Daylight Savings box 6 Touch the Save button 7 Touch the back arrow button to return to the Administration screen 8 Open the following menus General Settings Energy Settings Sleep Schedule 9 Touch the Add button and then select the type of event to schedule Wake or Sleep 10 Configure the following settings Time Event Days 11 Touch the OK button and then touch the Save button ENWW Economy setti...

Page 110: ...ng the Networking tab in the HP Embedded Web Server Sign in to the product Some features on the product control panel can be secured so that unauthorized people cannot use them When a feature is secured the product prompts you to sign in before you can use it You can also sign in without waiting for a prompt by touching the Sign In button on the Home screen Typically you use the same user name and...

Page 111: ...sword in the Old Password field 6 Click the Apply button Make note of the password and store it in a safe place Encryption support HP High Performance Secure Hard Disks The hard disk provides hardware based encryption so you can securely store sensitive data without impacting product performance This hard disk uses the latest Advanced Encryption Standard AES and has versatile time saving features ...

Page 112: ...are Download the most recent firmware update file from the Web In the US go to www hp com support ojcolorMFPX585 Click Drivers Software Outside the US follow these steps 1 Go to www hp com support 2 Select your country region 3 Click Drivers Software 4 Enter the product name HP Officejet Enterprise Color MFP X585 and then select Search 102 Chapter 8 Manage the product ENWW ...

Page 113: ...Improve fax image quality Solve wired network problems Solve fax problems For more information In the US go to www hp com support ojcolorMFPX585 Outside the US go to www hp com support Select your country region Click Troubleshooting Enter the product name and then select Search HP s all inclusive help for your product includes the following information Install and configure Learn and use Solve pr...

Page 114: ... Open the following menus General Settings Restore Factory Settings 3 A verification message advises that completing the reset function might result in loss of data Touch the Reset button to complete the process NOTE The product restarts automatically after the reset operation completes 104 Chapter 9 Solve general problems ENWW ...

Page 115: ... through the menu structure by touching the buttons in the menu Some Help screens include animations that guide you through procedures such as clearing jams For screens that contain settings for individual jobs the Help opens to a topic that explains the options for that screen If the product alerts you of an error or warning touch the Help button to open a message that describes the problem The m...

Page 116: ...duct control panel scroll to and touch Supplies 2 Open the following menus Manage Supplies Supply Settings Black Cartridge or Color Cartridges Very Low Settings 3 Select one of the following options Select the Stop option to set the product to stop printing when the cartridge reaches the Very Low threshold Select the Prompt to continue option to set the product to stop printing when the cartridge ...

Page 117: ...using the HP Embedded Web Server EWS To access in a supported Web browser on your computer enter the product IP address or host name in the address URL field The EWS contains a link to the HP SureSupply Web site which provides options for purchasing Original HP supplies ENWW A Cartridge is low or Cartridge is very low message displays on the product control panel 107 ...

Page 118: ...lutions 1 Remove the stack of paper from the tray and flex it rotate it 180 degrees and flip it over Do not fan the paper Return the stack of paper to the tray 2 Use only paper that meets HP specifications for this product 3 Use paper that is not wrinkled folded or damaged If necessary use paper from a different package 4 Make sure the tray is not overfilled If it is remove the entire stack of pap...

Page 119: ...t tray and remove pages from the output bin Verify that there are no pieces of paper staples paper clips or other debris in the paper path Clean the document feeder rollers and the separation pad Use compressed air or a clean lint free cloth moistened with warm water If misfeeds still occur replace the rollers From the Home screen on the product control panel scroll to and touch the Supplies butto...

Page 120: ...printed or copied on 4 Make sure the tray is not overfilled If it is remove the entire stack of paper from the tray straighten the stack and then return some of the paper to the tray 5 Make sure the paper guides in the tray are adjusted correctly for the size of paper Adjust the guides so they are touching the paper stack without bending it 6 Make sure that the tray is fully inserted in the produc...

Page 121: ...H J K L Z X C V B N M alt alt shift enter 2 Remove any visible media NOTE If the sheet tears make sure that all fragments are removed before resuming printing caps lock shift A S D F G H J K L Z X C V B N M alt alt shift enter 3 Open and then close the left door to clear the message ENWW Clear jams 111 ...

Page 122: ...t all of the fragments are removed before you resume printing 2 The jammed sheet may also be accessible by removing Tray 2 and removing the jammed sheet by pulling it to the right and then out of the product 3 If the jammed sheet is not visible or easily accessible in Tray 1 open the left door to access the jammed sheet 112 Chapter 9 Solve general problems ENWW ...

Page 123: ... ink collection unit avoid making direct contact with the black cylinder to prevent ink smear on skin or clothes 5 Lower the platen by pressing down on the green tab This will cause the product to try to feed the sheet through the print zone You may need to gently pull on the sheet if it does not feed Remove the sheet 6 Lift the green tab to place the platen back into its operating position ENWW C...

Page 124: ...7 Reinstall the ink collection unit 8 Close the left door 114 Chapter 9 Solve general problems ENWW ...

Page 125: ...r 2 Gently remove any visible paper from the rollers and delivery area NOTE If the sheet tears make sure that all fragments are removed before you resume printing Do not use sharp objects to remove fragments 3 Close the left door ENWW Clear jams 115 ...

Page 126: ...he paper is not visible or accessible remove the ink collection unit by pulling it out with both hands Set the unit aside upright on a piece of paper to prevent ink spills CAUTION When pulling out the ink collection unit avoid making direct contact with the black cylinder to prevent ink smear on skin or clothes 116 Chapter 9 Solve general problems ENWW ...

Page 127: ...ab This will cause the product to try to feed the sheet through the print zone You might need to gently pull on the sheet if it does not feed Remove the sheet 5 Lift the green tab to place the platen back into its operating position ENWW Clear jams 117 ...

Page 128: ...6 Reinstall the ink collection unit 7 Close the left door 118 Chapter 9 Solve general problems ENWW ...

Page 129: ...ng the latch at the rear left of the tray 2 Remove the jammed sheet by pulling it to the right and then out of the product 3 Close Tray 2 NOTE To close the tray push in the middle or with even pressure on both sides Avoid pushing on one side only ENWW Clear jams 119 ...

Page 130: ...Clear jams in optional Tray 3 1 Open Tray 3 3 2 Remove the jammed sheet by pulling it to the right and then out of the product 3 120 Chapter 9 Solve general problems ENWW ...

Page 131: ...not be cleared at the tray try clearing the jam from the lower left door 4 Close Tray 3 NOTE To close the tray push in the middle or with even pressure on both sides Avoid pushing on one side only 3 ENWW Clear jams 121 ...

Page 132: ...Clear jams in the document feeder 1 Lift the latch to release the document feeder cover 2 Open the document feeder cover 122 Chapter 9 Solve general problems ENWW ...

Page 133: ... remove any jammed paper If necessary rotate the green wheel at the front of the document feeder to remove jammed paper 4 Press on the door next to the document feeder rollers to make sure it is closed completely ENWW Clear jams 123 ...

Page 134: ...the document feeder input tray 6 Flow models only Squeeze inward on the two slots at each end of the e Duplex assembly 7 Flow models only Remove the e Duplex assembly by pulling it out 124 Chapter 9 Solve general problems ENWW ...

Page 135: ... models only Remove any jammed paper 9 Flow models only Reinstall the e Duplex assembly by sliding it in until it locks into place 10 Flow models only Lower the document feeder input tray ENWW Clear jams 125 ...

Page 136: ...eeder input tray are adjusted tightly against the document Remove all staples and paper clips from original documents NOTE Original documents that are printed on heavy glossy paper can jam more frequently than originals that are printed on plain paper 126 Chapter 9 Solve general problems ENWW ...

Page 137: ... If the page prints correctly the problem is with the software program from which you were printing Check the paper type setting for the print job Check the paper type setting when printing from a software program and the printed pages have smears fuzzy or dark print curled paper scattered dots of ink or small areas of missing ink Check the paper type setting Windows 1 From the software program se...

Page 138: ...en a supply level is very low After an HP supply has reached the very low threshold HP s premium protection warranty on that supply has ended The ink cartridge does not need to be replaced now unless the print quality is no longer acceptable Consider having a replacement available to install when print quality is no longer acceptable If you determine that you need to replace an ink cartridge or ot...

Page 139: ...he Device Maintenance button 2 Touch Calibration Cleaning 3 Touch Clean Print head Resolve ink smears 1 From the Home screen on the product control panel scroll to and touch the Device Maintenance button 2 Touch Calibration Cleaning 3 Touch Resolve Ink Smear Check the scanner glass for dirt and smudges Over time specks of debris might collect on the scanner glass and white plastic backing which ca...

Page 140: ... platen They might seep and damage the product NOTE If you are having trouble with streaks on copies when you are using the document feeder be sure to clean the small strip of glass on the left side of the scanner 4 Dry the glass and white plastic parts with a chamois or a cellulose sponge to prevent spotting 5 Connect the power cable to an outlet and then press the power button to turn the produc...

Page 141: ... is of good quality and free of cuts nicks tears spots loose particles dust wrinkles voids staples and curled or bent edges Use paper that has not been previously printed on Use paper that does not contain metallic material such as glitter Use paper that is designed for use in laser printers Do not use paper that is designed only for use in Inkjet printers Use paper that is not too rough Using smo...

Page 142: ...her adjustments if necessary 6 When you are satisfied with the results touch the Save button to save the new settings Calibrate the product to align the colors Calibration is a product function that optimizes print quality Follow these steps to resolve print print quality problems such as misaligned color colored shadows blurry graphics or other print quality issues 1 From the Home screen on the p...

Page 143: ...hotos Photo Adobe RGB 1998 Use this theme with printing digital photos that use the AdobeRGB color space rather than sRGB Turn off color management in the software program when using this theme None No color theme is used Custom Profile Select this option to use a custom input profile to accurately control color output for example to emulate a specific HP Color LaserJet product Download custom pro...

Page 144: ...e GDI for the best speed in Windows environments Might not be fully compatible with third party and custom software programs that are based on PCL 5 HP UPD PS driver Recommended for printing with Adobe software programs or with other highly graphics intensive software programs Provides support for printing from postscript emulation needs or for postscript flash font support HP UPD PCL 5 Recommende...

Page 145: ...using the document feeder load the original document into the feeder correctly using the paper guides to avoid unclear or skewed images If the problem still exists try these additional solutions If they do not fix the problem see Improve print quality for further solutions Check the scanner glass for dirt and smudges Over time specks of debris might collect on the scanner glass and white plastic b...

Page 146: ... sure to clean the small strip of glass on the left side of the scanner 4 Dry the glass and white plastic parts with a chamois or a cellulose sponge to prevent spotting 5 Connect the power cable to an outlet and then press the power button to turn the product on Calibrate the scanner If the copied image is not positioned correctly on the page follow these steps to calibrate the scanner NOTE When u...

Page 147: ...e OK button NOTE These settings are temporary After you have finished the job the product returns to the default settings Check the image adjustment settings Adjust these additional settings to improve copy quality 1 From the Home screen on the product control panel touch the Copy button 2 Touch the Image Adjustment button 3 Adjust the sliders to set the Darkness level the Contrast level the Sharp...

Page 148: ...the product control panel scroll to and touch the Administration button 2 Open the following menus Copy Settings Edge To Edge 3 Select the Edge To Edge output option if the original document is printed close to the paper edges 4 Touch the Save button 5 Touch the Start button Clean the pickup rollers and separation pad in the document feeder Follow these steps if the printed pages have toner smudge...

Page 149: ...mpressed air or a clean lint free cloth moistened with warm water NOTE Lift up the roller assembly so you can clean the second roller 4 Close the document feeder cover If the problem persists check the document feeder separation pad and rollers for damage or wear and replace them if necessary ENWW Improve copy image quality 139 ...

Page 150: ...void unclear or skewed images If the problem still exists try these additional solutions If they do not fix the problem see Improve print quality for further solutions Check the scanner glass for dirt and smudges Over time specks of debris might collect on the scanner glass and white plastic backing which can affect performance Use the following procedure to clean the scanner if the printed pages ...

Page 151: ...feeder be sure to clean the small strip of glass on the left side of the scanner 4 Dry the glass and white plastic parts with a chamois or a cellulose sponge to prevent spotting 5 Connect the power cable to an outlet and then press the power button to turn the product on Check the scan send settings from the product control panel Check the scan settings on the product Check the resolution settings...

Page 152: ...ditional settings to improve scan quality 1 From the Home screen on the product control panel scroll to and touch the Administration button 2 Open the Scan Digital Send Settings menu 3 Select the category of scan and send settings that you want to configure 4 Open the Default Job Options menu 5 Touch the Image Adjustment button 6 Adjust the sliders to set the Darkness level the Contrast level the ...

Page 153: ...ompression when saving the file For the highest quality select the highest setting 1 From the Home screen on the product control panel scroll to and touch the Administration button 2 Open the Scan Digital Send Settings menu 3 Select the category of scan and send settings that you want to configure 4 Open the Default Job Options menu 5 Touch the Output Quality button 6 Select one of the predefined ...

Page 154: ...essed air or a clean lint free cloth moistened with warm water NOTE Lift up the roller assembly so you can clean the second roller 4 Close the document feeder cover If the problem persists check the document feeder separation pad and rollers for damage or wear and replace them if necessary 144 Chapter 9 Solve general problems ENWW ...

Page 155: ...up rollers and separation pad in the document feeder Check the fit to page setting Check the sender s fax machine Check the scanner glass for dirt and smudges Over time specks of debris might collect on the scanner glass and white plastic backing which can affect performance Use the following procedure to clean the scanner 1 Press the power button to turn the product off and then disconnect the po...

Page 156: ...ks on copies when you are using the document feeder be sure to clean the small strip of glass on the left side of the scanner 4 Dry the glass and white plastic parts with a chamois or a cellulose sponge to prevent spotting 5 Connect the power cable to an outlet and then press the power button to turn the product on Check the send fax resolution settings NOTE Increasing the resolution increases the...

Page 157: ...s 1 From the Home screen on the product control panel touch the Fax button 2 Touch the More Options button and then touch the Optimize Text Picture button 3 Select one of the predefined options or touch the Manually adjust button and then adjust the slider in the Optimize For area Touch the OK button 4 Touch the Start button NOTE These settings are temporary After you have finished the job the pro...

Page 158: ... fax quality is better the problem is related to the initial recipient s fax machine settings or supplies status Clean the pickup rollers and separation pad in the document feeder 1 Lift the document feeder latch 2 Open the document feeder cover 148 Chapter 9 Solve general problems ENWW ...

Page 159: ...uct control panel scroll to and touch the Administration button 2 Open the following menus Fax Settings Fax Receive Settings Default Job Options Fit to Page 3 Touch the Enabled option to enable the setting or touch the Disabled option to disable it Touch the Save button Check the sender s fax machine Ask the sender to try sending from a different fax machine If the fax quality is better the proble...

Page 160: ...fy that the product is attached to the correct network port using a cable of the correct length 2 Verify that cable connections are secure 3 Look at the network port connection on the back of the product and verify that the amber activity light and the green link status light are lit 4 If the problem continues try a different cable or port on the hub The computer is using the incorrect IP address ...

Page 161: ... network Hewlett Packard recommends leaving these settings in automatic mode the default setting If you change these settings you must also change them for your network New software programs might be causing compatibility problems Verify that any new software programs are correctly installed and that they use the correct print driver The computer or workstation might be set up incorrectly 1 Check ...

Page 162: ...phone system Standard home phones and the fax accessory use an analog phone signal Some PBX systems are digital and might not be compatible with the fax accessory You might need an interfacing Analog Telephone Adapter ATA to connect the fax machine to digital PBX systems Roll over lines A phone system feature where a new call rolls over to the next available line when the first incoming line is bu...

Page 163: ...the Fax Accessory Page does not print there might be a problem with the analog fax accessory If you are using LAN fax or Internet fax those configurations could be disabling the feature Operational Enabled1 The analog fax accessory is installed and ready Operational Disabled1 The fax accessory is installed but you have not configured the required fax settings yet The fax accessory is installed and...

Page 164: ... fax but the fax was still sent If the job is too far along in the sending process you cannot cancel the job This is normal operation No fax address book button displays The fax address book feature has not been enabled Use the HP MFP Digital Sending Software Configuration utility to enable the fax address book feature Not able to locate the Fax settings in HP Web Jetadmin Fax settings in HP Web J...

Page 165: ...de or adjust the fit to page setting A document stops in the document feeder in the middle of faxing A jam is in the document feeder Clear the jam and send the fax again The volume for sounds coming from the fax accessory is too high or too low The volume setting needs to be adjusted Adjust the volume in the Fax Send Settings menu and the Fax Receive Settings menu ENWW Solve fax problems 155 ...

Page 166: ...156 Chapter 9 Solve general problems ENWW ...

Page 167: ...ult gateway setting 85 deleting stored jobs 37 digital send settings HP Embedded Web Server 90 digital sending address books 51 67 folders 70 recipient lists 67 sending documents 65 setting up scan to email 50 document feeder 46 capacity 2 copying two sided documents 46 jams 122 locating 5 paper feeding problems 108 double sided copying 46 double sided printing Mac 33 Windows 30 duplex copying 46 ...

Page 168: ...Flow CM solution 73 HP Utility 95 HP Utility for Mac Bonjour 95 features 95 HP Utility Mac 95 HP Web Jetadmin 97 HP Web Services enabling 92 HP Wireless Direct Printing 38 I information pages HP Embedded Web Server 88 ink cartridge low threshold settings 106 using when low 106 ink cartridge status 128 ink cartridges part numbers 22 replacing 23 ink collection unit jams 116 locating 7 ink smears cl...

Page 169: ...ring 115 paper pickup problems solving 108 paper type selecting Windows 32 paper types selecting Mac 34 paper ordering 22 ports locating 8 power connection locating 7 power switch locating 5 print on both sides Mac 33 manually Windows 30 Windows 30 print settings HP Embedded Web Server 89 printhead cleaning 129 printing from USB storage accessories 41 stored jobs 37 printing on both sides settings...

Page 170: ...edded Web Server 87 T TCP IP manually configuring IPv4 parameters 85 manually configuring IPv6 parameters 85 transparencies printing Windows 32 Tray 1 jams clearing 112 locating 5 Tray 2 jams clearing 119 120 Tray 2 and Tray 3 locating 5 Tray 3 part number 22 trays capacity 2 configure 16 included 2 jams clearing 119 120 locating 5 troubleshooting jams 110 network problems 150 paper feed problems ...

Page 171: ......

Page 172: ... 2014 Hewlett Packard Development Company L P www hp com B5L04 90904 B5L04 90904 B5L04 90904 ...

Reviews: