background image

___________

13

Display/video

The OB4000 DSTN may report the display RAM to be 1024KBs, however, it is
512KB.  Later versions have corrected this.  It is not a hardware problem but a
reporting problem.

Display RAM is not upgradable.

Display Manufacturer:  Hitachi

Video graphics controller chip:  Western Digital 90c24 rocket chip.

External video resolution (both types):  Supports VGA/SVGA
external monitors with up to 1024 x 768 x 256 colors in
noninterlaced mode.

Auto detection of external monitor without rebooting

Note:  Includes option to simultaneously display external video
and notebook display.

TFT Display
Quality

TFT display manufacturing is a high precision but imperfect technology and
manufacturers cannot currently produce large displays that are cosmetically
perfect.  Most if not all TFT displays will exhibit some level of cosmetic
imperfection.  These cosmetic imperfections may be visible to the customer under
varying display conditions and can appear as bright, dim or dark spots.

This issue is common across all vendors supplying TFT displays in their products
and is not specific to the HP OmniBook display.

The HP OmniBook TFT displays meet or exceed all TFT manufacturer's
standards for cosmetic quality of TFT displays. HP does not warrant that the
displays will be free of cosmetic imperfections.

TFT displays may have a small number of cosmetic imperfections and still
conform to the display manufacturers cosmetic quality specifications.

Here are some guidelines to use in determining what action to take on a customer
complaint of cosmetic imperfection in their TFT display:

1.  The unit should be viewed in the customer's normal operating condition.

This means if the customer uses the unit predominately in DOS, or Windows, or in
some other application or combination of applications, that is where the
determination shall be made.  Self test is not a normal operating condition and is
not a sufficient tool to interpret display quality.

2.  In the customer's normal operating mode:

a.  If 4 or more variant pixels appear clustered in the area approximated by a
thumbprint on the display surface, then the display should be considered for
replacement.

Summary of Contents for OmniBook 4000C

Page 1: ...ed the HP Vectra PC family training course or equivalent and have at least six months of experience servicing the HP Vectra PCs It is a self paced guide designed to train you to install configure and repair the OmniBook Notebook PC You can follow it without having any equipment available HP OmniBook 4000C CT Familiarization Guide ...

Page 2: ...Thank you for purchasing this Factory Service Manual CD DVD from servicemanuals4u com Please check out our eBay auctions for more great deals on Factory Service Manuals servicemanuals4u ...

Page 3: ...or energy efficiency All Certifications may not be completed at product introduction Please check with your HP reseller for certification status This equipment is subject to FCC rules It will comply with the appropriate FCC rules before final delivery to the buyer ENERGY STAR is a service mark of the U S Environmental Protection Agency IBM and OS 2 are registered trademarks of International Busine...

Page 4: ...ity 17 Password Decode 17 Password Decode Policy 18 Notebook Hardware Structure 19 Field Replaceable Assemblies 19 Installing memory End User Replaceable 19 Battery Module and Floppy Disk Drive Module End User Replaceable 20 Hard Disk Drive End User Replaceable 21 Small parts End User Replaceable 22 Icon Assembly and Display Module HP Authorized Support Providers Only 23 Palm Rest Assembly and Tra...

Page 5: ... System Configuration 40 Input Output Configuration 41 Printer port 41 Disk Configuration 42 Audio Configuration 43 Troubleshooting and Repair 44 Known Hardware Issues 44 OmniBook Self Test 44 First POST BEEP CODES 44 Last POST DISPLAY CODES 47 PhoenixBIOS POST Messages Power On Self Test 47 Appendix A Part Numbers 50 Appendix B Additional Resources 52 ...

Page 6: ...e 3 Hard Disk Drive 21 Figure 4 Display Screws 23 Figure 5 Icon Assembly 24 Figure 6 Display Removal 25 Figure 7 Lower Case Screws 26 Figure 8 Palm Rest and Track Ball Assemblies 27 Figure 9 Keyboard and Sound Board 29 Figure 10 Upper Case and Display Connect 32 Figure 11 System Board and Keyboard Grounding Plate 34 ...

Page 7: ...me models include 256 KB external L2 cache No L2 cache No L2 cache Display 10 4 inch diagonal VGA C CT 640 x 480 x 65 536 colors DSTN or TFT SVGA CTS 800 x 600 x 256 colors TFT PCI local bus video 1 5 MB video RAM SVGA out supports VGA SVGA monitors up to 1024 x 768 x 256 colors 10 3 diagonal DSTN up to 256 colors or 10 4 inch diagonal TFT up to 65 536 colors VGA 640 x 480 Local bus video 1 MB dis...

Page 8: ...fe up to 3 0 3 5 hours Battery pack recharges to high level in less than 2 hours using AC adapter 2 minute or less low battery warning AC adapter 100 to 240 Vac 50 to 60 Hz input 12 Vdc 2 5 A output Instant on maintains computer in ready to work state for months on a charge Turn it on again and you re instantly back where you were Removable Modules Floppy disk drive can be replaced with a second b...

Page 9: ... baud bidirectional infrared Expansion bus connector SCSI 2 port NTSC PAL video out port Keyboard mouse port Headphone stereo out port Stereo in and microphone ports MIDI joystick port 9 pin 115 200 b s RS 232 port 25 pin EPP and ECP parallel port SVGA out up to 1024 x 768 x 256 115 200 baud bi directional infrared Expansion bus connector Keyboard mouse port Headphone stereo out port Microphone po...

Page 10: ...allel serial VGA out up to 1024 768 keyboard PS 2 or Microsoft mouse and SCSI ports external floppy connector and optional HP EtherTwist LAN card slot Pre installed Software Microsoft Windows 95 or Microsoft Windows for Workgroups 3 11 MS DOS 6 22 Plug and Play BIOS HP PIM Microsoft Windows for Workgroups 3 11 MS DOS 6 2 Laplink Remote Access Easy connection to your desktop PC network and desktop ...

Page 11: ...0C DX2 50MHz 340MB Hard Drive F1082A HP OmniBook 4000C DX2 50MHz 520MB Hard Drive F1083A HP OmniBook 4000CT DX4 75MHz 340MB Hard Drive F1157A HP OmniBook 4000CT DX4 75MHz 520MB Hard Drive F1158A HP OmniBook 4000CT DX4 75 MHz 810MB Hard Drive F1159A HP OmniBook 4000C DX4 100MHz 340MB Hard Drive F1086A HP OmniBook 4000C DX4 100MHz 520MB Hard Drive F1087A HP OmniBook 4000C DX4 100MHz 810MB Hard Drive...

Page 12: ...2A NiMH Battery Pack Module F1073A External Battery Charger Charges up to two batteries concurrently F1074A Automobile Adapter F1075A Enhanced Port Replicator F1090A What comes in the box OmniBook 4000 mainframe Battery pack User documentation manuals support material registration card Companion utility disks AC adapter P N F1072A localized power cord Brochures for OmniBook accessories and Deskjet...

Page 13: ... replaced Hard drive manufacturer Toshiba for all capacities Flexible disk drive Internal 3 5 inch 1 44 MB flexible disk drive is standard on all models The flexible disk drive can be easily removed by the user and replaced with an additional battery pack to double battery life This is part of the modularity features of the OmniBook 4000 Manufacturer Canon subject to change Built in I O 25 pin bi ...

Page 14: ...rk spots This issue is common across all vendors supplying TFT displays in their products and is not specific to the HP OmniBook display The HP OmniBook TFT displays meet or exceed all TFT manufacturer s standards for cosmetic quality of TFT displays HP does not warrant that the displays will be free of cosmetic imperfections TFT displays may have a small number of cosmetic imperfections and still...

Page 15: ...ok with a DSTN display We expect over time that the industry will continue to improve in their ability to produce displays with fewer inherent cosmetic imperfections and will adjust our HP guidelines as the improvements are implemented User interface Keyboard 85 key touch type keyboard with embedded numeric keypad and 12 Fn keys Wrist pad provides comfort for extended keyboard use External 6 pin m...

Page 16: ... adapter the type shipped with the OmniBook Using any other adapter could damage the OmniBook and void the warranty Always plug it into a grounded outlet Power management options Advanced Standard Off Custom Optional power accessories from HP A fully charged NiMH battery in storage will loose 20 of its charge per month in storage External battery charger Designed for desktop use It has an internal...

Page 17: ...tests for altitude magnetic radiated susceptibility interference shock vibration Note These are the tests that HP designs notebook computers to meet Due to normal variations in the components of individual machines some machines will perform better and some won t perform as well HP does not guarantee that every notebook computer will meet these specifications BIOS Plug and Play BIOS stored in EEPR...

Page 18: ... the password entry screen Then the user s stored password can be entered 3 The user reads the encoded master password to Support 4 Support runs a program that decodes the encoded password and reads the decoded password alphanumeric to the user 5 The user types in the decoded password 6 Omnibook decodes the encoded master password it generated and compares it to the decoded password typed in by th...

Page 19: ... the owner of the unit The statement can be a FAX copy of the document The fact that the unit is in the hands of an HP representative on the behalf of the customer is not evidence of ownership In addition HP will not descramble a unit for any non owner even if it involves law enforcement agencies If you receive such a request you should notify management and HP Corporate Legal immediately These re...

Page 20: ...the side of the OmniBook that has the battery also has the factory RAM module installed To add an additional 8MB or 16MB of RAM use the location on the other side of the unit near the floppy drive If the base unit has 4MB or 8MB of memory and you want to expand the memory to more than 20MB or 24MB then the original 4MB or 8MB module must be replace with a larger module Figure 1 Memory Doors Module...

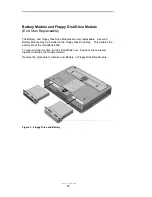
Page 21: ...ble A second Battery Module may be installed in the Floppy Disk Drive Bay This doubles the battery life of the OmniBook 4000 To remove either module turn the OmniBook over Squeeze the two levers together and slide the module forward Reverse the procedure to install a new Battery or Floppy Disk Drive Module Figure 2 Floppy Drive and Battery ...

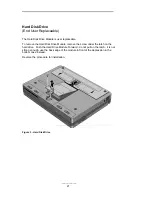
Page 22: ...the Hard Disk Drive Module remove the screw under the latch on the hard drive Push the Hard Drive Module Forward do not pull on the latch it is not strong enough use the back edge of the module in front of the depression in the bottom case instead Reverse the procedure for installation Figure 3 Hard Disk Drive ...

Page 23: ...the center hinge separates from the backcase Continue to flex until side pins clear holes in back case To reassemble simply reverse the procedure The expansion door is removed by opening it fully and flexing it in the middle until the pins in the backcase disengage from the slots in the side of the door To reassemble reverse the procedure The rubber feet are adhered to the bottom case with adhesiv...

Page 24: ...y To remove the display module on the OmniBook 4000C and CT turn the unit over and withdraw the two Phillips screws from the bottom back corners of the unit see diagram below This is not required if only the ICON assembly is to be removed Display Chassis Screws Figure 4 Display Screws ...

Page 25: ...the unit right side up and remove the Icon assembly by placing the thumbs on each edge of the assembly and pushing lightly see diagram below The front edge of the Icon Assembly will lift up slightly Figure 5 Icon Assembly ...

Page 26: ...board The display can now be removed the rest of the way Display Chassis Screws Figure 6 Display Removal To reinstall the display module or Icon Assembly just reverse the above procedure When reinstalling the Display Module make sure that the two posts on either side of the display line up parallel with their slots in the top case If they are not parallel the post will get caught inside the top ca...

Page 27: ... and the floppy disk drive assembly a second battery may be installed in to the floppy drive bay must be removed See instructions for removal of these two modules In the floppy disk drive and battery bays are four Phillips screws two in each bay Remove these four screws while the unit is upside down see illustration below Palm Rest Screws 4 Figure 7 Lower Case Screws ...

Page 28: ...rack ball assembly disconnect the Track Ball Assembly cable and remove the one screw that holds the Track Ball Assembly in place The Track Ball Assembly then lifts out Palm Rest Assembly Track Ball Assembly Screw ISOB M2 6x5L Sub Battery Assembly Figure 8 Palm Rest and Track Ball Assemblies Reverse the procedure to install a new Palm Rest Assembly or Track Ball Assembly ...

Page 29: ...he Track Ball does not need to be removed and the Palm Rest may be lifted out without being disconnected 3 The keyboard can then be lifted out by gently prying up on the front edge 4 To gain access to the Keyboard flex cables the Sound Board must be removed see Figure 9 To remove the Sound Board lift up on the sides of the board Note the Sound Board cannot be completely disconnected at this point ...

Page 30: ...___________ 29 Figure 9 Keyboard and Sound Board ...

Page 31: ...ocedure 1 Remove Battery Floppy Disk Drive and Hard Disk Drive 2 Follow the Palm Rest Assembly Removal Procedure to remove this component Note the Palm Rest only needs to be lifted out it may remain connected 3 Follow the Keyboard Removal Procedure Note the Keyboard only needs to be lifted out it may remain connected 4 Remove the Power Board by gently rocking back and forth See Figure 10 for compo...

Page 32: ...ase by gently prying up at the seam between the Upper Case and Lower Case The Upper Case will then snap off 7 At this point the Upper Case will still have the Sound Board and the Microphone Assembly attached The Microphone can simply be disconnected from the Sound Board if necessary The Sound Board may be affixed with a drop of glue to the Upper Case where the Audio Ports meet the plastic The Audi...

Page 33: ... Screw ISOB M2x6L Microphone Assembly Upper Case PCA Display Connect PK LSP Screw ISOB M2 6x5L Qty 3 LSP M B Shielding Plate PCA Assy PK DC Power Board Screw ISOB 2 6x5L Audio Ports part of Sound Board Assembly Figure 10 Upper Case and Display Connect ...

Page 34: ...omponents 3 Follow the Palm Rest and Keyboard Assembly Removal Procedures to remove these components 4 Remove the Power Board by gently rocking back and forth 5 Remove the Upper Case Sound Board and Display Connect by following the corresponding Removal Procedure 6 Remove the K B Grounding Plate by unfastening the three 3 ISOB M2 6x5L screws and one 1 10mm standoff See Figure 11 for locations of t...

Page 35: ... K B Grounding Plate Track Ball and Sub Battery M B Harnesses PCA Proc CPU Standoff 15mm Screw ISOB M2 6x5L Qty 2 PCA Main PK 486 System Board PCMCIA Button Assembly Lower Case CPU Shielding Plate Figure 11 System Board and Keyboard Grounding Plate ...

Page 36: ...unit must be replaced Troubleshooting Tips The OmniBook 4000 will only detect one pointing device at a time Therefore if an external mouse is connected to the EPR the track ball will not be active When an external mouse is detached the pointing devices settings must be manually updated in the Setup for the change to be detected The EPR PCMCIA slots do not receive power when the OmniBook is in Susp...

Page 37: ...fn f2 invokes the BIOS setup and configuration utility Users can check system configuration and changes settings using f keys from this screen This is the most accurate place to check battery and system status Pressing f3 from this screen exits back to the current application ...

Page 38: ...wn When Custom is selected suspend after hibernate after and HDD stop after settings can be changed by the user indicated again by the settings in brackets xxx When any of the other selections are chosen by the user the system will show the settings that are programmed by the system The hibernation setup area is shown to inform the user the size of the file used to save the RAM image to disk There...

Page 39: ...ings they are preset Suspend After Disable Time 1 15 minutes 2 minutes How long the system will stay in Run with no activity until it suspends If disabled it will stay in Run Hibernate After Disable Time 5 120 minutes 30 minutes How long the system will be in the suspend state If disabled it will stay in the suspend state HDD Stop After Disable Time 0 5 15 minutes 1 minute HDD will turn off system...

Page 40: ...d Off and Custom power conservation default values are Advanced Standard Off Custom Suspend After 1 minute 2 minutes Disabled 1 minute Hibernate After 15 minutes 60 minutes Disabled 15 minutes HDD Stop After 30 seconds Disabled Disabled 30 seconds ...

Page 41: ...me clock is not changed until the user exits the setup program The user can also enable or disable the processor cache When the user decides to enable a password a pop up window requests the old password new password and confirmation of the new password Hard drives or mass storage are not affected by the password only the turn on condition Password is not tested at resume from suspend ...

Page 42: ...i directional IR Port Assignment COM2 COM2 IR is hard wired to COM2 Pointer device Internal External Internal External Fn key Enabled Disabled Enabled Display LCD CRT LCD and CRT LCD LCD gray scale 8 16 64 64 00 Dimmed with color display attached Display mode Normal Inverse Normal Dimmed with color display attached ...

Page 43: ...___________ 42 Disk Configuration Setting Parameters Default Comments Diskette A Enabled Disabled Enabled Boot from FDD first HDD only FDD first HDD Configuration Auto User defined Auto ...

Page 44: ... adjust the speaker volume of the system The user can also select the IRQ I O Address and DMA channel of the audio board Setting Parameters Default Comments Volume Left Slider Middle Volume Right Slider Middle IRQ IRQ5 IRQ7 IRQ9 IRQ10 IRQ7 DMA channel DMA0 DMA1 DMA3 DMA1 ...

Page 45: ...s a number of hardware and firmware items in the unit at each cold start BOOT or RESET First POST BEEP CODES These multiple beep codes indicate a failure in a simple test of a portion of base memory Flash BIOS checksum a portion of conventional memory a portion of extended memory If the unit fails to boot all accessories are removed including memory cards external floppy port expander modems PCMCI...

Page 46: ...will result in a system 1 2 2 DMA channel 0 address and count register test in progress or failure Failure will result in a system halt 1 2 3 DMA page register write read test in progress or failure Failure will result in a system halt 1 3 1 RAM refresh verification test in progress or failure Failure will result in a system halt 1 3 2 SMI RAM Bad Failure will result in a system halt none First 64...

Page 47: ...s or failure An error message is displayed on the screen The system does not halt 4 2 2 Shutdown test in progress or failure If possible the BIOS will continue POST skipping the memory tests 4 2 3 Gate A20 failure An error message is displayed on the screen and the memory tests are suspended The system does not halt 4 2 4 Unexpected interrupt in protected mode The system does not half when an unex...

Page 48: ...This kind of warning sounds when POST errors occur and the screen is not available Because the OmniBook cannot be repaired by a service center below the FRU level these messages will provided limited troubleshooting or repair information However the support specialist and service technician will be able to identify trends in repairs from these codes Message Possible Cause Diskette drive failure Th...

Page 49: ...ure where xxxxxh is the starting address of the option ROM The peripheral card contains a defective ROM Shutdown failure Either the keyboard controller is not accepting the reset command or the associated reset logic has failed Time of day not set run SETUP program Clock not set Timer 2 failure The timer chip has failed F2 to enter ROM based SETUP Invalid configuration information must be changed ...

Page 50: ...e Fl key to continue This message indicates that an error was found during POST Pressing the Fl key allows the system to attempt to boot Beginning memory test Press the SPACEBAR to terminate the memory test A user can stop the memory tests by pressing the spacebar Press the Fl key to continue F2 to nm the Setup utility This message indicates that an error was found during POST Pressing the Fl key ...

Page 51: ...one DISPLAY CHASSIS SCREW ISOP M2 6x8L F1081 60939 none HDD SCREW ISOP M2 6X4L EXTERN F1081 60940 none HDD SCREW ISOP M3X6L INTERN F1081 60941 none HDD LABEL F1081 60943 none HDD COVER F1081 60944 none HDD LATCH F1081 60945 none THERMAL MOUNTING TAPE F1081 60947 none HARNESS TRACK BALL F1081 60948 none HARNESS SUB BAT M B F1081 60949 none INTEL INSIDE STICKER F1052 80013 none HDD SHIELDING F1081 6...

Page 52: ...ase with Button F1081 60959 none LCD Back Cover for TFT F1088 60902 none LCD Front Cover for TFT F1088 60903 none LCD Back Cover for DSTN F1081 60960 none LCD Front Cover for DSTN F1081 60961 none PCB Assy PK 688 PK AUD F1081 60962 none PCA 50MHZ PROC PK 4D2 50 F1081 60917 F1081 69003 PCA 75MHZ PROC PK 4D4 75 F1081 60952 F1081 69004 PCA 100MHZ PROC PK 4D4 100 F1081 60918 F1081 69005 PCA MAIN W O C...

Page 53: ...uct related information Resource Number Address Comments HP External Web http hpcc998 external hp com mcd No usage restriction HP MCD Internal Web http webmcd cv hp com Restricted to HP internet access only HP MCD Service Engineer svc eng_mcd cv hp com Email address for service related questions and issues ...

Reviews: