Using Windows 95
Installing Windows 95
3-4
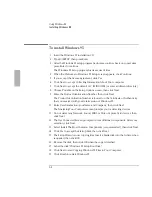
To install Windows 95
1. Insert the Windows 95 installation CD.
2. Type D:\SETUP, then press Enter.
3. After the Windows 95 setup program performs a routine check on your system,
press Enter to continue.
The Windows 95 Setup program loads a series of files.
4. When the Welcome to Windows 95 Setup screen appears, click Continue.
5. If you accept the license agreement, click Yes.
6. Click Next to accept Collecting Information About Your computer.
7. Click Next to accept the default of C:\WINDOWS (or enter a different directory).
8. Choose Portable on the Setup Options screen, then click Next.
9. Enter the Product Identification Number, then click Next.
The Product Identification Number is located on the Certificate of Authenticity
that you received with your retail version of Windows 95.
10. Enter User Information--your Name and Company, then click Next.
The Analyzing Your Computer screen prompts you for detecting devices.
11. Do not detect any Network, Sound, MIDI, or Video Capture Card devices, then
click Next.
12. The Get Connected Screen prompts you for additional components. After your
selection, click Next.
13. Select Install The Most Common Components (recommended), then click Next.
14. Click Yes to accept the Startup Disk, then click Next.
15. The Setup Wizard is now copying files. Insert a blank disk into the A drive when
requested, then click OK.
16. Remove the disk, then click OK when the copy is finished.
17. Label the disk "Windows 95 Setup Boot Disk."
18. Click Next to start Copying Windows 95 Files to Your Computer.
19. Click Finish to restart Windows 95.
Summary of Contents for OMNIBOOK 5700
Page 1: ...HP OmniBook 2000 5700 Corporate Evaluator s Guide ...
Page 9: ...1 Introduction ...
Page 30: ......
Page 31: ...2 Using Windows 3 x ...
Page 45: ...3 Using Windows 95 ...
Page 67: ...4 Using Windows NT 3 51 ...
Page 81: ...5 Using Windows NT 4 0 ...
Page 99: ...6 Using OS 2 Warp 4 0 ...
Page 116: ......
Page 117: ...7 Using the OmniBook Docking System ...
Page 124: ......
Page 125: ...8 Features and Support Services ...


