Using Windows NT 4.0
Installing Windows NT 4.0
5-5
23. Enter an Administration password twice, then click Next. This password is used
to administer User IDs and Windows NT security.
24. Choose Yes, create an emergency repair disk, then click Next.
25. Choose Install the most common components, then click Next.
26. Click Next to Install Windows NT Networking.
27. Choose Do not connect the computer to a network at this time, then click Next.
Important
We recommend that you install Windows NT networking
after
Windows NT is fully
installed. Follow the instructions in the application note for the network card you
are using. The application notes are available from our website. A few sample
application notes are also included at the end of this chapter.
28. Click Finish to finish setting up Windows NT.
29. Enter the correct Time Zone and Date and Time, then click Close.
30. Click OK twice to accept the VGA-Compatible Display Adapter (The video
driver will be installed in the next section.)
31. Insert a blank disk in the floppy disk drive, then press Enter.
32. Remove the disk from the floppy disk drive and label it
“OmniBook Windows NT 4.0 Emergency Repair Disk”
33. Press Enter to reboot.
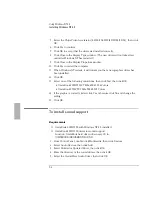
To install video support
Requirements
♦
OmniBook 2000/5700 with Windows NT 4.0 installed.
♦
OmniBook 2000/5700 driver for video support.
Location: OmniBook hard drive or Recovery CD in
\OMNIBOOK\DRIVERS\NT\VIDEO.40.
1. From Control Panel, double-click Display, then click Settings.
2. Click Display Type, then click Change.
3. Click Have Disk in the Change Display window.
4. Enter the directory of the video drivers, then click OK.
Summary of Contents for OMNIBOOK 5700
Page 1: ...HP OmniBook 2000 5700 Corporate Evaluator s Guide ...
Page 9: ...1 Introduction ...
Page 30: ......
Page 31: ...2 Using Windows 3 x ...
Page 45: ...3 Using Windows 95 ...
Page 67: ...4 Using Windows NT 3 51 ...
Page 81: ...5 Using Windows NT 4 0 ...
Page 99: ...6 Using OS 2 Warp 4 0 ...
Page 116: ......
Page 117: ...7 Using the OmniBook Docking System ...
Page 124: ......
Page 125: ...8 Features and Support Services ...


