
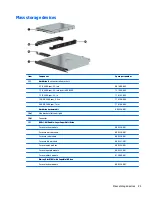


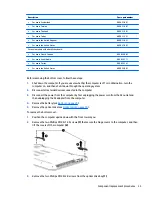
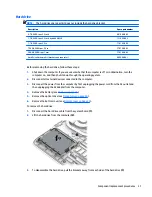
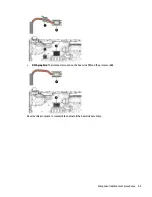


4.
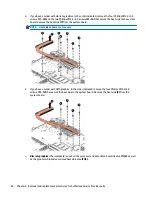
Remove the six Phillips PM2.5×6.5 screws from near the battery bay
(2)
.
5.
Position the computer upside down.
CAUTION:
To avoid the hard drive falling out of the computer and getting damaged, be sure the
computer is upside-down when removing the bottom cover.
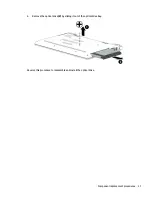
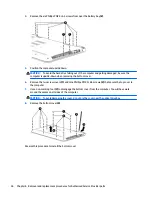
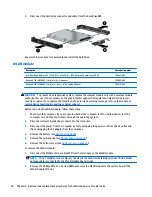
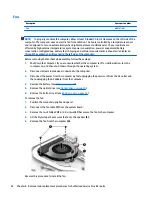
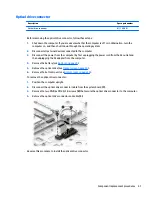
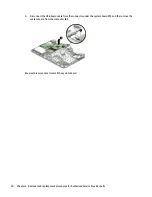
6.
Remove the two screw covers
(1)
and nine Phillips PM2.5×6.5 screws
(2)
that secure the top cover to
the computer.
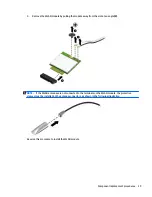
7.
Use a non-marking tool
(3)
to disengage the bottom cover from the computer. You will have work
around the seams on all sides of the computer.
CAUTION:
To avoid damaging the cover, do not pry the cover near the optical drive bay.
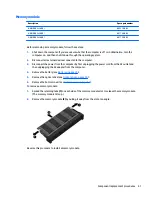
8.
Remove the bottom cover
(4)
.
Reverse this procedure to install the bottom cover.
36
Chapter 6 Removal and replacement procedures for Authorized Service Provider parts
Summary of Contents for Pavilion 2159m
Page 1: ...HP Pavilion Notebook AMD Maintenance and Service Guide ...
Page 4: ...iv Safety warning notice ...
Page 8: ...14 Recycling 97 Index 99 viii ...
Page 12: ...4 Chapter 1 Product description ...
Page 32: ...24 Chapter 3 Illustrated parts catalog ...
Page 40: ...32 Chapter 5 Removal and replacement procedures for Customer Self Repair parts ...
Page 80: ...72 Chapter 8 Using Setup Utility BIOS in Windows 8 1 ...
Page 88: ...80 Chapter 10 Backing up restoring and recovering in Windows 8 1 ...
Page 100: ...92 Chapter 12 Specifications ...
Page 104: ...96 Chapter 13 Power cord set requirements ...
Page 106: ...98 Chapter 14 Recycling ...
Page 110: ...102 Index ...


