Processor
NOTE:
All processor spare part kits include thermal material.
Description
Spare part number
AMD Turion Ultra ZM86 2.40-GHz processor
480854-001
AMD Turion Ultra ZM82 2.20-GHz processor
480852-001
AMD Turion Ultra ZM80 2.10-GHz processor
480851-001
AMD Turion RM70 2.00-GHz processor
480857-001
AMD Athlon QL60 1.90-GHz processor
480856-001
Intel Core2 Duo 2.80-GHz processor
481377-001
Intel Core2 Duo 2.53-GHz processor
481374-001
Intel Core2 Duo 2.40-GHz processor
481375-001
Intel Core2 Duo 2.26-GHz processor
481376-001
Intel Core2 Duo 2.00-GHz processor
491000-001
Before removing the processor, follow these steps:
1.
Shut down the computer. If you are unsure whether the computer is off or in Hibernation, turn the
computer on, and then shut it down through the operating system.
2.
Disconnect all external devices connected to the computer.
3.
Disconnect the power from the computer by first unplugging the power cord from the AC outlet and
then unplugging the AC adapter from the computer.
4.
Remove the battery (see
Battery on page 51
).
5.
Remove the following components:
a.
Hard drive (see
Hard drive on page 56
)
b.
Optical drive (see
Optical drive on page 54
)
c.
Switch cover (see
Switch cover on page 66
)
d.
Keyboard (see
Keyboard on page 68
)
e.
Speaker assembly (see
Speaker assembly on page 72
)
f.
Display assembly (see
Display assembly on page 73
)
g.
Top cover (see
Top cover on page 82
)
h.
System board (see
System board on page 91
)
i.
Heat sink (see
Heat sink on page 102
)
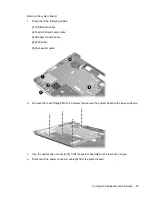
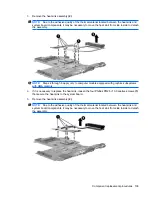
Remove the processor:
1.
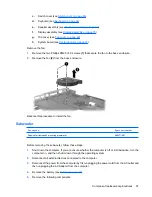
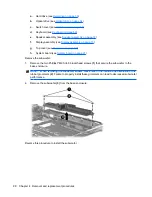
Turn the processor locking screw
(1)
one-half turn counterclockwise until you hear a click.
106 Chapter 4 Removal and replacement procedures
Summary of Contents for Pavilion dv7-1100 - Entertainment Notebook PC
Page 1: ...HP Pavilion dv7 Entertainment PC Maintenance and Service Guide ...
Page 4: ...iv Safety warning notice ...
Page 26: ...Computer major components 18 Chapter 3 Illustrated parts catalog ...
Page 113: ...Reverse this procedure to install the heat sink Component replacement procedures 105 ...
Page 167: ...Universal Serial Bus Pin Signal 1 5 VDC 2 Data 3 Data 4 Ground Universal Serial Bus 159 ...
Page 181: ......

