background image

Software Updates and Recovery

Hardware and Software Guide

14–13

Reinstalling Applications from a Recovery Disc

The location of application recovery software varies by notebook 
model. 

Some or all of your application recovery software may be on 
the 

Driver Recovery

 disc. 

Some or all of your application recovery software may be on 
one or more 

Application Recovery

 discs.

Use the following procedure to restore or reinstall the 
applications on either the 

Driver Recovery

 disc or an 

Application 

Recovery 

disc

.

 It is recommended that you restore applications 

first from the 

Driver Recovery

 disc and then from any 

Application Recovery 

discs


included with your notebook.

To reinstall a preloaded or preinstalled application from the 

Driver Recovery

 disc or an 

Application Recovery 

disc: 

»

While the notebook is in Windows, insert the disc into the 
optical drive, and then follow the instructions on the screen. 
(When you are prompted to select the applications you want 
to reinstall, you can select or clear the check boxes for some 
or all of the listed items.)

If the disc does not open within several seconds:

a. Select 

Start > Run.

b. In the 

Open

 text field, type 

D:\SWSETUP\APPINSTL\SETUP.EXE 

where 

D

 indicates the optical drive.

c. Select 

OK.

Summary of Contents for Pavilion zv6000 - Notebook PC

Page 1: ...including optional wireless features available on your notebook For additional notebook information including troubleshooting information refer to the Help and Support Center at Start Help and Support If your model includes a wireless device wireless setup information is provided in a printed Go Wireless booklet Additional 802 11 information is included within 802 11 software ...

Page 2: ...ation contained herein is subject to change without notice The only warranties for HP products and services are set forth in the express warranty statements accompanying such products and services Nothing herein should be construed as constituting an additional warranty HP shall not be liable for technical or editorial errors or omissions contained herein Hardware and Software Guide HP Notebook Se...

Page 3: ...ireless Button and Light 1 6 Keys 1 7 Front Components 1 8 Rear Components 1 9 Right Side Components 1 10 Ports 1 10 Jacks and Vent 1 11 Left Side Components 1 12 External Card Features 1 12 Security Cable Slot Ports and Bays 1 13 Bottom Components 1 14 Bays and Vents 1 14 Expansion Memory Module Compartment 1 15 Wireless Antennae 1 16 Additional Hardware Components 1 17 Power and Modem Hardware 1...

Page 4: ... from Hibernation 2 11 Initiating or Resuming from Standby 2 12 Using Emergency Shutdown Procedures 2 13 Power Options 2 13 Accessing the Power Options Window 2 13 Displaying the Power Meter Icon 2 14 Setting or Changing a Power Scheme 2 15 Using a Security Password 2 16 Battery Packs 2 17 Inserting or Removing a Battery Pack 2 17 Charging Battery Packs 2 19 Monitoring the Charge in a Battery Pack...

Page 5: ...Keypad 3 18 Using an External Numeric Keypad 3 20 4 Multimedia Audio Features 4 1 Using the Audio In Microphone Jack 4 1 Using the Audio Out Headphone Jack 4 2 Adjusting the Volume 4 3 Video Features 4 4 Using the S Video Jack 4 4 Connecting a Monitor Projector or Television 4 6 Changing the Video Display 4 8 Multimedia Software 4 9 Finding Included Multimedia Applications 4 9 Selecting Multimedia...

Page 6: ... Optical Disc Contents 5 6 Avoiding Standby or Hibernation 5 6 6 PC Cards and ExpressCards What Is a PC Card 6 1 Inserting a PC Card 6 2 Stopping or Removing a PC Card 6 4 What Is an ExpressCard 6 5 Selecting an ExpressCard 6 5 Configuring an ExpressCard 6 6 Inserting an ExpressCard 6 6 Stopping or Removing an ExpressCard 6 8 7 Digital Memory Cards What Is a Digital Memory Card 7 1 Using the Digit...

Page 7: ...t Is 1394 9 3 1394 Device Connection 9 3 10Modem and Networking Internal Modem 10 1 Modem Cable 10 1 Modem Country Selection 10 5 Preinstalled Communication Software 10 9 Network 10 10 Network Cable 10 10 Using the Network Cable 10 11 11Wireless Select Models Only Wireless Local Area Network Select Models Only 11 3 Setting Up a WLAN in Your Home 11 4 Using a WLAN Connection 11 5 Using Wireless Sec...

Page 8: ...9 Setting HP Administrator Passwords 12 10 Entering HP Administrator Passwords 12 11 Power On Passwords 12 11 Setting Power On Passwords 12 11 Entering Power On Passwords 12 12 DriveLock 12 13 Setting DriveLock Passwords 12 14 Entering DriveLock Passwords 12 15 Changing DriveLock Passwords 12 16 Removing DriveLock Protection 12 17 Device Security 12 18 Antivirus Software 12 19 Critical Security Up...

Page 9: ...t Software 14 4 Downloading System ROM 14 4 Downloading Software 14 7 System Recovery 14 8 Before You Begin 14 9 Safeguarding Your Data 14 9 Using System Restore 14 10 Repairing or Reinstalling Drivers 14 11 Repairing or Reinstalling Applications 14 12 Repairing the Operating System 14 14 Reinstalling the Operating System 14 15 15Notebook Care Temperature 15 1 Notebook 15 1 Keyboard 15 3 Display 1...

Page 10: ...x Hardware and Software Guide Contents 17Specifications Operating Environment 17 1 Rated Input Power 17 2 Expansion Port 2 Input Output Signals 17 3 Index ...

Page 11: ... Lights Component Description 1 Caps lock light On Caps lock is on 2 Digital Media Slot light select models only On A digital memory card is being accessed This light is also visible from the left side of the notebook 3 Num lock light On Num lock is on or the embedded numeric keypad is enabled ...

Page 12: ...harging Blinking The notebook is unable to start up while running on the available battery power Off The battery pack is fully charged or not inserted The notebook has 2 power standby lights The power standby light on the top of the notebook is visible only when the notebook is open the power standby light on the front of the notebook is visible when the notebook is closed The battery light blinks...

Page 13: ...d right TouchPad buttons Function like the left and right buttons on an external mouse 4 TouchPad vertical scroll zone Scrolls upward or downward 5 TouchPad button Enables disables the TouchPad This table describes default settings For information about changing the functions of TouchPad components refer to Setting Mouse Properties in Chapter 3 Keyboard ...

Page 14: ...on briefly press to restore from hibernation If the system has stopped responding and Microsoft Windows shutdown procedures cannot be used press and hold for at least 4 seconds to turn off the notebook 2 Display switch Initiates standby if the notebook is closed while on This table describes default settings For information about changing the function of the display switch or power button refer to...

Page 15: ...e default music application 3 Internet button Opens the default Web browser The factory default Web browser is Microsoft Internet Explorer 4 Stereo speakers 2 Produce stereo sound This table describes default settings The function of the DVD button and the music button can be changed For instructions refer to Setting DVD and Music Button Preferences in Chapter 3 Keyboard ...

Page 16: ...On One or more optional internal wireless devices such as an 802 11 wireless device and or a Bluetooth device are turned on This light does not indicate whether a wireless connection has been established To establish a wireless connection a wireless network must already be set up For information about establishing a wireless connection refer to the printed Go Wireless brochure included with your n...

Page 17: ...erform additional tasks as hotkeys 2 fn key Combines with other keys to perform system tasks For example pressing fn f7 decreases screen brightness 3 Windows logo key Displays the Windows Start menu 4 Windows applications key Displays a shortcut menu for items beneath the pointer 5 Embedded numeric keypad keys 15 Can be used like the keys on an external numeric keypad ...

Page 18: ... down button Decreases system volume 2 Volume up button Increases system volume 3 Display release latch Opens the notebook 4 Consumer infrared lens select models only Links the notebook to an optional remote control 5 Volume mute button Mutes or restores volume 6 Mute light On Volume is muted ...

Page 19: ... or a soft surface such as pillows or thick rugs or clothing to block airflow 3 External monitor port Connects an optional VGA monitor or projector 4 USB port Connects an optional USB device 5 RJ 11 modem jack Connects the modem cable The notebook has 5 vents Another one of these vents is visible on the right side of the notebook All vents are visible on the bottom of the notebook The notebook has...

Page 20: ... port Connects an optional USB device 3 Expansion port 2 Connects the notebook to an optional docking device The notebook has 4 USB ports The other USB ports are on the left side and the rear of the notebook The notebook has only one expansion port The term expansion port 2 describes the type of expansion port For expansion port signal information refer to Expansion Port 2 Input Output Signals in ...

Page 21: ...3 Exhaust vent Provides airflow to cool internal components Ä To prevent overheating do not obstruct vents Do not allow a hard surface such as a printer or a soft surface such as pillows or thick rugs or clothing to block airflow 4 RJ 45 network jack Connects an optional network cable 5 S Video out jack Connects an optional S Video device such as a television VCR camcorder projector or video captu...

Page 22: ...ital Media Slot light select models only On An optional digital memory card is being accessed 4 PC Card slot Supports an optional Type I or Type II 32 bit CardBus or 16 bit PC Card Stores an optional remote control 5 PC Card eject button Ejects an optional PC Card from the PC Card slot The slot supports most digital memory cards For example you could use a Secure Digital SD Memory Card Memory Stic...

Page 23: ...t a product from being mishandled or stolen 2 USB ports 2 Connect an optional USB device 3 Optical drive Supports an optical disc 4 Optical drive release button Opens the media tray of the optical drive when power is available The notebook has 4 USB ports The other USB ports are on the right side and the rear of the notebook The type of optical drive for example a DVD ROM drive a DVD CD RW Combo D...

Page 24: ... airflow to cool internal components Ä To prevent overheating do not obstruct vents Do not allow a hard surface such as a printer or a soft surface such as pillows or thick rugs or clothing to block airflow 3 Hard drive bay Holds the primary hard drive 4 Battery pack release latch Releases a battery pack from the battery bay Battery packs vary by notebook model ...

Page 25: ...ment Component Description Expansion memory module compartment Contains one memory module slot As shipped the slot may be vacant or may contain a replaceable memory module Your notebook contains 2 memory module slots For more memory information refer to Chapter 8 Memory Modules ...

Page 26: ...device should be used in such a manner that the potential for human contact during normal operation is minimized To avoid the possibility of exceeding the FCC radio frequency exposure limits human proximity to the antennae should be not less than 20 cm 8 inches during normal operation including when the notebook display is closed The antennae are not visible from the outside of the notebook For op...

Page 27: ...re Component Description 1 AC adapter Converts AC power to DC power 2 Power cord Connects an AC adapter to an AC outlet 3 Battery pack Powers the notebook when the notebook is not connected to external power 4 Modem cable Connects the modem to an RJ 11 telephone jack or to a country specific modem adapter 5 Country specific modem adapter included by region as required Adapts the modem cable to a n...

Page 28: ...scs are provided in case you ever need to repair or reinstall preinstalled or preloaded software Operating system recovery and driver recovery software is included with all notebook models Application recovery software is provided with select models If an operating system update disc is included with your notebook it is strongly recommended that you install the updates immediately For instructions...

Page 29: ... the notebook Regulatory label Provides regulatory information about the notebook The Regulatory label is affixed inside the battery bay Modem Approval label Provides regulatory information about the modem and lists the agency approval markings required by some of the countries in which the modem has been approved for use You may need this information when traveling internationally The Modem Appro...

Page 30: ...Hardware and Software Guide 2 1 2 Power Power Control and Light Locations The following illustration is provided as a quick reference to the locations of the power controls and lights on the notebook ...

Page 31: ...tems are provided in this chapter The notebook has 2 power standby lights The power standby light on the top of the notebook is visible only when the notebook is open The power standby light on the front of the notebook is visible when the notebook is closed 1 fn f5 hotkey 4 Display switch 2 Power standby lights 2 5 Battery light 3 Power button ...

Page 32: ...an optical disc An inserted battery pack can charge only while the notebook is connected to external power ÅWARNING To reduce the risk of electric shock or damage to your equipment Plug the power cord into an AC outlet that is easily accessible at all times Disconnect power from the notebook by unplugging the power cord from the AC outlet not by unplugging the power cord from the notebook If provi...

Page 33: ...l power If the notebook is running on external power and contains a charged battery pack and you disconnect the notebook from external power the notebook switches to battery power The current power source is identified by the Power Meter icon which is displayed by default in the notification area at the far right of the taskbar The Power Meter icon changes shape whenever the power source changes b...

Page 34: ...k before initiating standby is not usually necessary but is a recommended precaution When you resume from standby your work is returned instantly to the screen By default the system initiates standby after 10 minutes of notebook inactivity when the notebook is running on battery power and after 25 minutes of inactivity when the notebook is running on external power For information about changing t...

Page 35: ...ecommended precaution When you restore from hibernation your work is returned to the screen where you left off Restoring from hibernation takes a little longer than resuming from standby but is much faster than returning to your place manually after restarting the notebook To determine whether the notebook is in hibernation or turned off press the power button If the notebook is in hibernation you...

Page 36: ...the Enable hibernation check box is selected All Windows instructions in your user guides describe Microsoft Windows XP procedures based on the default Windows XP category view To switch between category view and classic view within Control Panel Select Start Control Panel Then select your preference in the Control Panel pane in the left panel of the Control Panel window For more information about...

Page 37: ...n for longer times or for power conservation The amount of time a battery pack can support standby or hibernation or hold a charge varies by notebook configuration and the condition of the battery pack Standby requires more power than hibernation If you plan to resume within 2 weeks Shut down the notebook If possible connect the notebook to external power to keep an inserted battery pack fully cha...

Page 38: ...tting the computer into hibernation or standby might stop the playback Do you want to continue If the message is displayed select No Default Power Settings The following table describes the default standby hibernation and shutdown procedures For information about changing the function of some of the power features on your notebook refer to Power Options later in this chapter The controls and light...

Page 39: ... Turn Off Computer Shut down OK Power standby lights are turned off Operating system is shut down Notebook is turned off Turn off the display Close the notebook When the notebook is closed the display presses the display switch which then initiates standby When standby is initiated the display is cleared If the system is unresponsive and you are unable to shut down the notebook with this procedure...

Page 40: ...d Allow the system to initiate hibernation No action is required If the notebook is running on battery power and hibernation is enabled the system initiates hibernation After 30 minutes of notebook inactivity Whenever the battery pack reaches a critical low battery condition Power standby lights are turned off Screen is cleared Restore from hibernation Press the power button If the system initiate...

Page 41: ...g on external power Power standby lights blink Screen is cleared Resume from standby Use any of the following procedures Press any key Briefly press the power button Press the fn f5 hotkey Depending on your notebook configuration you may also be able to resume from standby by activating the TouchPad or an optional external mouse Power standby lights are turned on Your work is returned to the scree...

Page 42: ...al instructions refer to Inserting or Removing a Battery Pack later in this chapter Power Options Accessing the Power Options Window To access the Power Options window Select Start Control Panel Performance and Maintenance Power Options or Right click the Power Meter icon in the notification area at the far right of the taskbar and then select Adjust Power Properties If the Power Meter icon is not...

Page 43: ...hibernation is enabled If the Hibernate function is not available on these lists 1 Select Start Control Panel Performance and Maintenance Power Options Hibernate tab 2 Select the Enable hibernation check box 3 Then select OK For information about setting power schemes in the Power Options window refer to Setting or Changing a Power Scheme later in this chapter Displaying the Power Meter Icon The P...

Page 44: ...mance while the notebook is running on external power Among the settings that you can use in a power scheme are settings that specify the time intervals before the system initiates standby or hibernation To select a preset power scheme or to create a custom power scheme Select Start Control Panel Performance and Maintenance Power Options Power Schemes tab and then follow the instructions on the sc...

Page 45: ...from standby or restored from hibernation The standby password is the password for the Windows user account that is active at the time the password is set To set a standby password prompt 1 Select Start Control Panel Performance and Maintenance Power Options 2 Select the Advanced tab 3 Select the check box for Prompt for password when computer resumes from standby 4 Select OK For information about...

Page 46: ...battery pack If you initiate hibernation do not begin battery pack removal until the power standby lights are turned off indicating that hibernation is complete Inserting a Battery Pack Although battery packs vary by model the insertion procedure is the same for all supported battery packs To insert a battery pack 1 Turn the notebook upside down 2 Slide the battery pack into the battery bay 1 3 Pi...

Page 47: ...ery Pack Although battery packs vary by model the removal procedure is the same for all models To remove a battery pack 1 Turn the notebook upside down 2 Slide and hold the battery pack release latch 1 as you pivot the battery pack out of the battery bay 2 ...

Page 48: ...r 2 weeks or more or is much warmer or cooler than room temperature The battery light displays charging status and in some circumstances power availability On the battery pack is charging Off the battery pack is fully charged or not installed Blinking The charge in the battery pack is too low to start the notebook For example the battery light blinks if you try to turn on the notebook while the on...

Page 49: ... Monitoring the Charge in a Battery Pack Obtaining Accurate Charge Information To increase the accuracy of the battery charge information that is displayed by your notebook Allow a battery pack to discharge to about 10 percent of a full charge through normal use before charging it When you charge a battery pack charge it fully The charge in even a new battery pack may be reported inaccurately unti...

Page 50: ...isplaying the Power Meter Icon earlier in this chapter Interpreting Charge Information Displays Battery charge status is displayed as a percentage which indicates the amount of charge remaining in the battery pack Managing Low Battery Conditions This section describes the default system responses to low battery and critical low battery conditions The default battery light responses cannot be chang...

Page 51: ...ttery pack continues to drop the notebook eventually enters a critical low battery condition If the notebook is on or in standby when a critical low battery condition is reached If hibernation is enabled the system initiates hibernation Some unsaved work may be lost If hibernation is disabled the notebook remains briefly in standby and then shuts down All unsaved work is lost The battery light bli...

Page 52: ...tems AC adapter Optional docking device When a Charged Battery Pack Is Available To resolve a low battery condition when a charged battery pack is available shut down the notebook or initiate hibernation Insert a charged battery pack and then turn on the notebook When No Power Source is Available To resolve a low battery condition when no power source is available save your work Then initiate hibe...

Page 53: ...een unused for one month or more When the notebook has been running primarily on external power and rarely on battery power for more than one month When battery charge displays report large changes in the percentage of power remaining within 2 minutes For example if the Power Meter displays 20 percent of a full charge remaining and then less than 2 minutes later displays only 5 percent of a full c...

Page 54: ...ht is then turned off Discharging the Battery Pack ÄCAUTION To prevent loss of work save your work before beginning an unattended discharge procedure The notebook must remain on throughout the discharge process The battery pack can discharge whether or not you are using the notebook but the battery pack will discharge faster if the notebook is in use If you use the notebook occasionally during the...

Page 55: ...mes tab a Record the power scheme displayed in the Power schemes field so you can reapply it after the calibration b Use the Power schemes drop down list to select the Always On power scheme c Record all settings in the Running on batteries column so you can reset them after the calibration d Use the drop down lists in the Running on batteries column to set each item in the column to Never e Selec...

Page 56: ...y charged 3 Display the settings on the Power Schemes tab To access the Power Schemes tab select Start Control Panel Performance and Maintenance Power Options Power Schemes tab a Reapply the power scheme you recorded earlier b Reenter the settings you recorded earlier for the items in the Plugged in column 4 Select OK ÄCAUTION To prevent an unintended battery drain and a potential loss of work whe...

Page 57: ...only and close modem applications Disconnect from the notebook any external devices that are not plugged into an external power source Stop disable or remove an inserted PC Card Digital memory card select models only ExpressCard select models only Turn off a device connected to the S Video out jack Use optional externally powered speakers instead of the internal speakers whenever possible When you...

Page 58: ...electing or creating a power scheme refer to Setting or Changing a Power Scheme earlier in this chapter Storing a Battery Pack ÄCAUTION To prevent damage to a battery pack do not expose it to high temperatures for extended periods of time If the notebook will be unused and disconnected from external power for more than 2 weeks remove and store the battery pack High temperatures which may be presen...

Page 59: ...ttery pack to high temperatures above 60 C 140 F Replace a battery pack only with a battery pack approved for this notebook N When a battery pack has reached the end of its useful life do not dispose of the battery pack in general household waste Follow the local laws and regulations in your area for computer battery pack disposal In Europe dispose of or recycle battery packs by using the public c...

Page 60: ...Hardware and Software Guide 3 1 3 Keyboard TouchPad Using the TouchPad The TouchPad shown in the following illustration is enabled each time the notebook is turned on ...

Page 61: ...s the left or right TouchPad button 3 To scroll vertically place your finger on the scroll zone 4 and then slide your finger upward or downward To activate the scroll zone you must first lift your finger from the TouchPad and then place your finger on the scroll zone To disable or reenable the TouchPad press the TouchPad button 5 If you work exclusively with keystrokes rather than mouse actions yo...

Page 62: ...evice settings such as click speed mouse trails and pointer speed and shape Configure the right and left TouchPad buttons for right handed or left handed use These buttons are set by default for right handed use In the TouchPad Properties window you can access additional TouchPad preferences such as Tapping which enables you to tap the TouchPad once to select an item or twice to double click an it...

Page 63: ...Hotkey Information later in this chapter Default Function Hotkey Opens Help and Support Center fn f1 Opens print window fn f2 Opens default Internet browser fn f3 Switches the image among displays fn f4 Initiates standby fn f5 Initiates QuickLock fn f6 Decreases screen brightness fn f7 Increases screen brightness fn f8 Plays pauses or resumes an audio CD or DVD fn f9 Stops an audio CD or DVD fn f1...

Page 64: ...tructions refer to Using Hotkeys with External Keyboards later in this chapter Using Hotkey Commands Opening the Help and Support Center fn f1 The fn f1 hotkey opens the Help and Support Center You can also access the Help and Support Center by selecting Start Help and Support In addition to providing information about your operating system the Help and Support Center provides Information about yo...

Page 65: ... Web browser The factory default Web browser is Microsoft Internet Explorer Until you have set up your Internet or network services the fn f3 hotkey opens the Windows Internet Connection Wizard For information about using this wizard and other Internet connection methods refer to the printed Getting Started guide included with your notebook After you have set up your Internet or network services a...

Page 66: ...s receive video information from the notebook using the external VGA video standard The fn f4 hotkey can also toggle images among other devices receiving video information from the notebook The following video transmission types with examples of devices that use them are supported by the fn f4 hotkey LCD notebook display External VGA most monitors S Video televisions camcorders VCRs and video capt...

Page 67: ...chPad or an optional pointing device such as an external mouse For more information about using standby and hibernation refer to Chapter 2 Power Initiating QuickLock fn f6 The fn f6 hotkey initiates the QuickLock security feature QuickLock protects a Windows account by displaying a log on window To access the protected account from the log on window the Windows password for the protected account m...

Page 68: ...t is active To lock the account press fn f6 To unlock the account from the log on window a Select the account if more than one account is displayed b Type the account password in the password text field c Press enter When a Windows password is set for a Windows account you must enter the password to access the account each time the notebook is turned on or restarted To access procedures for changi...

Page 69: ...wing 4 media activity hotkeys can control the play of an audio CD or a DVD To control the play of a video CD use the media activity controls in your video CD player application Playing Pausing or Resuming an Audio CD or a DVD fn f9 If the audio CD or the DVD is not playing press the fn f9 hotkey to begin or resume the play If the audio CD or the DVD is playing press the fn f9 hotkey to pause the p...

Page 70: ...essor name keyboard revision and system BIOS In the fn esc display the version of the system BIOS basic input output system is displayed as the BIOS date On some notebook models the BIOS date is displayed in decimal format The BIOS date is sometimes called the system ROM version number For information about updating the system ROM refer to Downloading System ROM in Chapter 14 Software Updates and ...

Page 71: ...ation 2 Music button Opens the default music application 3 Internet Opens the default Web browser The factory default Web browser is Internet Explorer This button is programmable For instructions refer to Setting DVD and Music Button Preferences later in this chapter Until you set up your Internet or network services the Internet button opens the Windows Internet Connection Wizard For information ...

Page 72: ...ions provide instructions for setting preferences within the control panel For additional on screen information about any item on the control panel select the Help button in the upper right corner of the window The Help button is identified with a question mark icon Displaying the Quick Launch Buttons Icon To show or hide the Quick Launch Buttons icon on your taskbar or your Windows desktop 1 Open...

Page 73: ...on the desktop check box 3 To save your preferences and close the display select OK Setting DVD and Music Button Preferences At default settings the DVD button and the music button open factory assigned media applications The default assignments vary among notebook models according to which media applications are installed You can set these buttons to open different media applications to access In...

Page 74: ... drop down list press the down arrow beside the displayed application and then select OK To remove an item from a drop down list use the down arrow to display the item select Remove and then select OK Default applications on a drop down list cannot be removed To add an item to a drop down list so that you can assign it to the music button the DVD button or a button on an optional remote control se...

Page 75: ...ier in this chapter Setting Windows Desktop Icon Display Preferences To change the size of the icons on your desktop and of the text displayed with them 1 Open the Quick Launch Buttons control panel Select Start Control Panel Printers and Other Hardware Quick Launch Buttons or Select the Quick Launch Buttons icon on your taskbar or Windows desktop 2 Select the Zoom tab 3 Adjust the slider toward t...

Page 76: ... click an open area on your Windows desktop 2 Select Arrange Icons By 3 Select Auto Arrange to remove the check mark and disable Auto Arrange Keypads The notebook has an embedded numeric keypad and supports an optional external numeric keypad or an optional external keyboard that includes a numeric keypad Depending on your configuration the embedded keypad may be unavailable while an external keyp...

Page 77: ...meric Keypad The embedded numeric keypad consists of 15 keys that can be used like the keys on an external numeric keypad When the embedded numeric keypad is turned on each keypad key performs the functions indicated by the icon in the upper right corner of the key ...

Page 78: ...dded numeric keypad is disabled by default When the embedded numeric keypad is disabled press fn num lk 1 to enable the keypad The num lock light 2 is turned on When the embedded numeric keypad is enabled press fn num lk to disable the keypad The num lock light is turned off ...

Page 79: ... its standard function if the keypad is turned off Using an External Numeric Keypad Depending on your configuration the embedded keypad may be unavailable while an external keypad is connected to the notebook To turn num lock mode on or off on an external numeric keypad press the num lk key on the external keypad not on the notebook When an external numeric keypad is turned on and is in num lock m...

Page 80: ...fied in the following illustration connects an optional monaural single sound channel microphone The audio out jack is sometimes called a microphone jack It is recommended that you use an electret condenser microphone with a 3 5 mm plug If you connect a dynamic microphone the recommended sensitivity may not be achieved ...

Page 81: ...channel plug into the audio out jack The audio out jack identified in the following illustration connects optional headphones or externally powered stereo speakers The audio out jack sometimes called a headphone jack is also used to connect the audio functions of an audio video device such as a television or VCR When you connect a device to the audio out jack use only a 3 5 mm plug When a device i...

Page 82: ... notebook overrides all software volume settings Using the Volume Buttons To adjust volume using the notebook volume buttons To decrease volume press the volume down button 1 To increase volume press the volume up button 2 To mute or restore volume press the volume mute button 3 When volume is muted the mute light on the volume mute button is turned on When volume is muted the mute light 4 is turn...

Page 83: ...additional volume settings such as balance right click the icon If you cannot see an icon you have placed on the taskbar it may be hidden To display the icon right click the taskbar select Properties clear the Hide inactive icons check box and then select OK Video Features Using the S Video Jack The S Video out jack supports video signals only This section describes how to connect an S Video devic...

Page 84: ... you need a standard S Video cable available from most computer or electronics retailers To connect the S Video cable 1 Plug either end of the S Video cable into the notebook S Video out jack 2 Plug the other end of the cable into the S Video in jack not the S Video out jack on the external device ...

Page 85: ...ble on the monitor or projector to the external monitor port which is on the rear of the notebook 3 Plug the power cord of the monitor or projector into a grounded AC outlet 4 Turn on the monitor or projector If the notebook does not recognize the monitor or projector restart the notebook If a properly connected monitor projector or other display device does not display an image try pressing the f...

Page 86: ...3 5mm stereo to 2 RCA cable To connect the cable 1 Plug the 3 5 mm plug end of the audio cable into the audio out jack on the notebook 2 Plug the RCA connectors on the other end of the cable into the audio in connectors on the television For more information about the notebook audio out jack including an illustration of this connection refer to Using the Audio Out Headphone Jack earlier in this ch...

Page 87: ...Changing the Color Television Format Color television formats are modes by which television video signals are sent and received To send signals between the notebook and a television both the notebook and the television must be using the same color television format Different regions and countries use different formats Region specific formats are set at the factory for most notebooks and are contro...

Page 88: ...re Your desktop icons The applications listed at Start All Programs The preloaded items available at Start All Programs Software Setup The applications on discs included with your notebook For information about installing a preloaded application or an application provided on a disc refer to Installing Multimedia Applications later in this chapter Printed supplementary information about some multim...

Page 89: ...pplication For information about changing the way the notebook responds when you access the files on an optical disc or other removable storage device refer to Setting AutoPlay Preferences later in this chapter For information about changing the default application assigned to the music button or the DVD button refer to Setting DVD and Music Button Preferences in Chapter 3 Keyboard Using Windows M...

Page 90: ...c RecordNow Sonic RecordNow can be used to create backups of data files or audio CDs and DVDs transfer audio files from a CD to a hard drive and create personalized audio CDs Using InterVideo WinDVD Player InterVideo WinDVD Player can be used to play audio CDs video CDs and DVD movies Using InterVideo WinDVD Creator InterVideo WinDVD Creator can be used to create edit and burn movies to a DVD or v...

Page 91: ... Installing Multimedia Applications Installing Preloaded Applications Some multimedia applications included with your computer are preloaded but not preinstalled A preloaded item is loaded on your hard drive but cannot be used until it is installed To access preloaded items select Start All Programs Software Setup Then To display a list of the software available in a category select the plus sign ...

Page 92: ...plications 4 Insert the disc into the optical drive After several seconds an installation wizard is displayed If the installation wizard does not display your AutoPlay settings may have been modified To proceed with the installation a Select Start Run b In the Open text field type x setup exe where x is the drive designation of the drive containing the disc c Select OK 5 When the installation wiza...

Page 93: ...p file that you can access from the menu bar or from an icon that may be identified with a question mark Most applications also include tutorials You can obtain customer support for any multimedia application included with your notebook Some CDs and DVDs contain player software which is not included with your notebook such as PCFriendly If you insert a disc that contains player software which is n...

Page 94: ...ing to a disc close all open applications including screen savers and antivirus software except the disc software you are using Do not copy directly from a source disc to a destination disc or from a network drive to a destination disc Instead copy from a source disc or network drive to your hard drive and then copy from your hard drive to the destination disc Do not use the notebook keyboard or m...

Page 95: ... use the media activity controls in your video CD player application To play pause or resume an inserted audio CD or a DVD press fn 1 plus f9 2 To stop an inserted audio CD or a DVD that is playing press fn 1 plus f10 3 To play the previous track of an audio CD or the previous chapter of a DVD that is playing press fn 1 plus f11 4 To play the next track of an audio CD or the next chapter of a DVD ...

Page 96: ...cess files on a removable storage device such as an optical disc AutoPlay default settings vary by notebook model and configuration For example the first time you insert a disc into an optical drive and close the tray the disc may begin playing or the AutoPlay pop up window may be displayed If the AutoPlay pop up window is displayed select your preferences as instructed on the screen The default A...

Page 97: ...ies 4 Select the AutoPlay tab Changing DVD Region Settings ÄCAUTION To prevent selecting a permanent region setting that is not your permanent preference consider that the region setting on a DVD ROM drive or a combo drive such as a DVD CD RW Combo Drive or a DVD RW and CD RW Combo Drive can be changed only 5 times The region setting you select the fifth time becomes the permanent region setting o...

Page 98: ...ur DVD ROM drive or combo drive DVD region settings can be changed in the operating system or in some multimedia applications as described in the following sections Changing DVD Settings in the Operating System To change DVD region settings in the operating system 1 Select Start Control Panel Performance and Maintenance System 2 Select the Hardware tab 3 On the Hardware tab select the Device Manag...

Page 99: ...n settings in the operating system To access instructions for changing DVD region settings within InterVideo WinDVD Player 1 Select Start All Programs InterVideo WinDVD Player 2 Then select Help on the menu bar of the WinDVD console InterVideo WinDVD Player may be included with your notebook For information about finding the multimedia software included with your notebook refer to Finding Included...

Page 100: ...a conveyor belt use x rays instead of magnetism and will not damage a hard drive Do not spray a drive with cleaning fluids Avoid exposing a drive to liquids or temperature extremes If you mail a drive ship it in packaging that protects it from shock vibration extreme temperatures and high humidity Label the package FRAGILE ÄCAUTION To reduce the risk of data loss initiate standby before you move t...

Page 101: ... following illustration is on or blinking the primary hard drive or an optical drive is being accessed Primary Hard Drive The primary hard drive sometimes called the internal hard drive is the hard drive inside the hard drive bay The hard drive assembly and the hard drive bay should be accessed only by a service partner ...

Page 102: ...e flat surfaces To insert an optical disc 1 Be sure the notebook is turned on 2 To release the media tray press the release button 1 on the drive bezel 3 Pull the media tray outward until it is fully extended 2 4 Position the disc over the media tray label side up 5 Gently press downward near the center of the disc until the disc snaps into place 3 6 Close the media tray 4 ...

Page 103: ...he fn f10 hotkey To protect your disc during this procedure handle the disc by the edges rather than by the flat surfaces To remove an optical disc while the notebook is turned on 1 To release the media tray press the release button 1 on the drive bezel 2 Pull the media tray outward until it is fully extended 2 3 To remove the disc from the media tray gently push downward on the media tray spindle...

Page 104: ... the edges rather than by the flat surfaces To remove an optical disc when the notebook is turned off 1 Insert the end of a small object like a paper clip into the release access 1 in the front bezel of the drive 2 To release the media tray press gently on the paper clip 3 Pull the tray outward until it is fully extended 2 4 To remove the disc from the media tray gently push downward on the media ...

Page 105: ...anually 1 Select Start Run 2 In the Open text field type x where x is the drive designation of the drive containing the disc 3 Select OK A drive designation is a letter of the alphabet that the notebook uses to identify a drive To display the drive designation of every drive in the system select Start My Computer Avoiding Standby or Hibernation To prevent the loss of playback or playback quality d...

Page 106: ...s card services socket services or enablers that may also be supplied by the PC Card manufacturer A PC Card is a credit card sized accessory designed to conform to the standard specifications of the Personal Computer Memory Card International Association PCMCIA PC Cards can be used to add modem sound storage wireless communication or digital camera functions to the notebook The notebook PC Card sl...

Page 107: ...ransport the notebook while a PC Card is inserted As shipped the PC Card slot contains a protective insert The insert must be released and then removed before you can insert a PC Card 1 To remove the PC Card slot insert a Press the PC Card eject button 1 You may need to press the button once to extend the button and then press the button again to release the PC Card insert b Pull the insert out of...

Page 108: ...s and ExpressCards Hardware and Software Guide 6 3 2 To insert a PC Card a Position the card label side up with the connectors facing the notebook b Gently slide the card into the slot until the card is seated ...

Page 109: ...he PC Card Then To stop the PC Card select the Safely Remove Hardware icon on the taskbar and then select PC Card To display the Safely Remove Hardware icon right click the taskbar select Properties clear the Hide inactive icons check box and then select OK To remove the PC Card stop the PC Card as described in the preceding instruction and then proceed to step 2 2 Press the PC Card eject button 1...

Page 110: ...ed in standard PC Card slot An ExpressCard slot is available on select models Selecting an ExpressCard ExpressCards use one of 2 interfaces and are available in 2 sizes The ExpressCard slot supports both interfaces and both sizes For example you can use An ExpressCard with either a USB interface or a PCI Express interface A full size ExpressCard called ExpressCard 54 1 or a smaller ExpressCard cal...

Page 111: ...only the device drivers for your operating system Do not install other software such as card services socket services or enablers that may also be supplied by the ExpressCard manufacturer Inserting an ExpressCard ÄCAUTION To prevent damage to the ExpressCard connectors Use minimal force when inserting an ExpressCard into the ExpressCard slot Do not move or transport the notebook while an ExpressCa...

Page 112: ...ssCard slot insert a Press the insert firmly inward and then quickly release your pressure 1 b Pull the insert out of the slot 2 2 To insert an ExpressCard a Position the card label side up with the connectors facing the notebook b Gently slide the card into the slot until the card is seated ...

Page 113: ...by the ExpressCard Then To stop the ExpressCard select the Safely Remove Hardware icon on the taskbar and then select the ExpressCard To display the Safely Remove Hardware icon right click the taskbar select Properties clear the Hide inactive icons check box and then select OK To release and remove the ExpressCard stop the card as described in the preceding instruction and then proceed to step 2 2...

Page 114: ...st digital memory cards For example you can use cards of the following types Memory Stick and Memory Stick Pro xD Picture Card MultiMediaCard SmartMedia SM card Secure Digital SD Memory Card You can set the notebook to open the files on a digital memory card in ways you specify For example you could set a digital memory card to open with a slide show of the photographs it contains For instructions...

Page 115: ...ia Slot light identified in the following illustration is available only on notebook models which feature a Digital Media Slot The light is Turned on when an inserted digital memory card is being accessed Turned off when an inserted digital memory card is inactive or when the Digital Media Slot is vacant ...

Page 116: ... card into the Digital Media Slot Do not move or transport the notebook while a digital memory card is inserted in the Digital Media Slot To insert a digital memory card 1 Hold the card label side up with the connectors facing the notebook 2 Gently slide the card into the Digital Media Slot until the card is seated The card extends slightly beyond the edge of the notebook ...

Page 117: ...stop a data transfer select the Cancel button in the Windows Copying window 2 To stop the card select the Safely Remove Hardware icon on the taskbar and then select the digital memory card To display the Safely Remove Hardware icon right click the taskbar select Properties clear the Hide inactive icons check box and then select OK 3 To remove the card slide the card out of the slot ...

Page 118: ...o games without increasing RAM For information about this procedure refer to Video Memory Settings later in this chapter Primary Memory Module Slot All models of your notebook ship with a memory module installed in the primary memory module slot The primary memory module slot should be accessed only by a service partner Expansion Memory Module Slot Depending on your notebook model the expansion me...

Page 119: ...nts on the notebook All other areas that require a tool to access should be opened only by a service partner ÅWARNING To prevent exposure to electric shock and damage to the notebook shut down the notebook unplug the power cord and remove the battery pack before installing a memory module ÄCAUTION To prevent electrostatic discharge from damaging electronic components before beginning this procedur...

Page 120: ...rnal power 5 Turn the notebook upside down 6 Remove the battery pack For instructions refer to Inserting or Removing a Battery Pack in Chapter 2 Power 7 Loosen the expansion memory module compartment screw 1 and then lift up and remove the expansion memory module compartment cover 2 ...

Page 121: ... a memory module a Pull away the retention clips on each side of the module 1 The module tilts upward b Grasp the module by the edges and then gently pull the module out of the expansion memory module slot 2 c To protect a memory module after removal place it in an electrostatic safe container ...

Page 122: ... with the keyed tabbed area in the expansion memory module slot 1 b With the module at a 45 degree angle from the surface of the expansion memory module compartment press the module into the expansion memory module slot until the module is seated 2 c Push the module downward until the retention clips snap into place 3 ...

Page 123: ...dule compartment cover with the cover slots on the notebook 1 b Tilt the cover downward until it is seated 2 10 To secure the expansion memory module compartment cover reinsert and then tighten the screw that secures the cover to the notebook 3 11 Replace the battery pack reconnect the notebook to external power and then turn on the notebook ...

Page 124: ...Control Panel Performance and Maintenance Power Options Hibernate tab Video Memory Settings Video memory capabilities and settings vary by notebook model On select models you can improve the video performance of the notebook while using graphics intensive applications such as 3 D games by changing the default shared video memory setting This setting affects the amount of memory reserved for graphi...

Page 125: ...layed 5 To change the shared video memory setting use the navigation and selection information at the bottom of the screen to choose your Shared video memory preference 6 To set your preference and exit the Setup utility press f10 and then follow the instructions on the screen Your preferences are in effect when the notebook restarts in Windows For more information about the Setup utility includin...

Page 126: ... be connected to a USB port on the notebook or to other USB hubs Hubs support varying numbers of USB devices and are used to increase the number of USB devices in the system Powered hubs must be connected to external power Unpowered hubs must be connected either to a USB port on the notebook or to a port on a powered hub A USB device may require support software which is usually included along wit...

Page 127: ...nd Software Guide USB and 1394 Devices USB Device Connection A USB device can be connected to any of the 4 USB ports on the notebook The USB ports are on the rear 1 left side 2 and 3 and right side 4 of the notebook ...

Page 128: ...ire a 1394 connection A 1394 port is available on select notebook models 1394 Device Connection Connect a 1394 device to the notebook 1394 port shown in the following illustration The port supports IEEE 1394a devices You may have to load device specific drivers and other software before using some 1394 devices For information about device specific software refer to the device documentation or to t...

Page 129: ...ct your modem to the type of telephone jack that is standard in your country ÄCAUTION To prevent permanent damage to the modem do not connect the modem to a digital line If you accidentally connect the modem cable to a digital line immediately disconnect the cable Your modem cable must be connected to an analog not a digital telephone line Most home telephone lines are analog Jacks for most PBX sy...

Page 130: ...se suppression circuitry prevents interference from television and radio reception When you connect a modem cable with noise suppression circuitry 2 orient the circuitry end 1 of the cable toward notebook Modem cables vary in appearance by region and country ...

Page 131: ...t do not plug a modem cable into the notebook RJ 45 network jack To connect the modem to an analog telephone line that has an RJ 11 jack 1 Plug the modem cable into the RJ 11 modem jack 1 on the notebook 2 Plug the other end of the modem cable into the telephone wall jack 2 Telephone wall jacks and modem cables vary in appearance by region and country ...

Page 132: ...otebook RJ 45 network jack To connect the modem to an analog telephone line that does not have an RJ 11 telephone jack 1 Plug the modem cable into the RJ 11 modem jack 1 on the notebook 2 Plug the modem cable 2 into the country specific modem adapter 3 Plug the country specific modem adapter 3 into the telephone wall jack Telephone wall jacks modem adapters and modem cables vary in appearance by r...

Page 133: ...trol Panel Date Time Language and Regional Options 2 Select Regional and Language Options The current location setting for your modem is displayed in the Location pane at the bottom of the Regional Options tab Adding New Locations When Traveling ÄCAUTION To prevent possible modem malfunction and violation of telecommunications regulations and laws set the modem to a location setting for the countr...

Page 134: ...ther Hardware Phone and Modem Options 2 Select the Dialing Rules tab 3 Select New The New Location dialog box is displayed 4 Type a name for the new location setting in the Location name text field 5 Select a country or region from the Country region drop down list If you select a country or region that is not supported by the modem the Country region selection for USA or UK is displayed by defaul...

Page 135: ...orts one of 2 dialing modes pulse dialing or tone dialing Modem location settings include dialing mode options The dialing mode option set in your current modem location setting must be the dialing mode supported by the telephone line To determine the dialing mode supported by a telephone line dial a few digits on the telephone and then listen for clicks pulses or tones Clicks indicate that the te...

Page 136: ...hone and Modem Options 2 Select the Modems tab 3 Select your modem 4 Select Properties 5 Select the Modem tab 6 Clear the check box for Wait for Dial Tone Before Dialing 7 Select OK OK If you continue to receive the No Dial Tone error message after clearing the Wait for Dial Tone Before Dialing check box 1 Select Start Control Panel Printers and Other Hardware Phone and Modem Options 2 Select the ...

Page 137: ... Accessories Communications 2 Select a fax or terminal emulation program or a connection wizard For information about establishing an Internet connection for your modem refer to the Connect to the Internet section in the printed Getting Started guide included with your notebook For more modem information including instructions for using AT commands and dial modifiers refer to the supplementary gui...

Page 138: ... with an RJ 45 connector at each end A network cable can be purchased from most computer or electronics retailers Some network cables contain noise suppression circuitry which prevents interference from television and radio reception When you connect a network cable with noise suppression circuitry 2 orient the circuitry end 1 of the cable toward the notebook Network cables vary in appearance ...

Page 139: ...uide 10 11 Using the Network Cable To connect a network cable 1 Plug the network cable into the RJ 45 network jack 1 on the notebook 2 Plug the other end of the cable into a network wall jack 2 Network jacks and network cables vary in appearance ...

Page 140: ... notebook can connect to wireless networks in corporate offices your home and public places Wireless networks include wireless local area networks WLANs or hotspots Hotspots are wireless access points available in public places such as airports restaurants coffee shops hotels and universities A Bluetooth wireless notebook can connect to other Bluetooth wireless enabled devices using a wireless per...

Page 141: ...llowing illustration shows the wireless button 1 and light 2 In addition to the wireless button and light your notebook has a software utility Wireless Assistant that enables you to control your wireless devices Wireless Assistant is a software utility that enables you to turn on and off the 802 11 and Bluetooth wireless devices individually For more information about using Wireless Assistant refe...

Page 142: ...at can handle a large number of computers and accessories and can separate critical network functions A home or small office WLAN typically uses a wireless router which enables several wireless and wired computers to share an Internet connection a printer and files without additional pieces of hardware or software Wireless access point and wireless router are often used interchangeably Notebooks w...

Page 143: ... device in your notebook refer to Identifying an 802 11 wireless device later in this chapter Setting Up a WLAN in Your Home To set up a WLAN and connect to the Internet in your home you need the following equipment An optional broadband modem either DSL or cable and high speed Internet service purchased from an Internet service provider ISP 1 An optional wireless router purchased separately 2 You...

Page 144: ...ight is turned on If the wireless light is off turn on the 802 11 wireless device Refer to Device Power States later in this chapter For your home WLAN verify that your router is correctly configured For instructions refer to your router documentation The functional range for subsequent WLAN connections may vary depending on your notebook WLAN implementation router manufacturer and interference fr...

Page 145: ... enabling WPA Personal or WEP security encryption on the router you may want to use one or more of the following security measures Change the default network name SSID and password Use a firewall Set security on your Web browser Enable MAC address filtering on the router For more information about WLAN security visit the HP Web site at http www hp com go wireless Installing Wireless Software Optio...

Page 146: ... Identify the 802 11 wireless device from the list that is displayed The listing for an 802 11 wireless device includes the term wireless LAN WLAN or 802 11 If no 802 11 wireless device is listed either your notebook does not have an integrated 802 11 wireless device or the driver for the 802 11 wireless device is not properly installed Accessing WLAN Software and Documentation Your WLAN software ...

Page 147: ...Enter your computer model information and then follow the instructions provided at the Web site WLAN software is provided in the Network category To access model information about your computer refer to the Service Tag label on the bottom of your notebook To access documentation for your WLAN software 1 Install the WLAN software as instructed earlier in this chapter 2 Open the utility 3 Select Hel...

Page 148: ...oth for Windows software provides the following functions Personal Information Management PIM item transfer Sends and receives information files such as business cards calendar items notes and message items to and from another Bluetooth computer or device PIM synchronization Synchronizes PIM data between a computer PDA or cell phone using Bluetooth File Transfer Sends and receives files to and fro...

Page 149: ...ces The camera can be controlled remotely by a notebook and images can be transferred from a camera to be stored on a computer or to be printed Human interface device Provides a wireless connection to other Bluetooth devices such as keyboards pointing devices gaming devices and remote monitoring devices Fax Provides a Bluetooth connection that enables a notebook to send or receive a fax message us...

Page 150: ...default the 802 11 wireless and Bluetooth devices and wireless light 2 are turned on when you turn on the notebook Turning on a wireless device does not automatically create a WLAN or connect you to a WLAN For information about setting up a WLAN refer to Wireless Local Area Network Select Models Only earlier in this chapter The 802 11 wireless and Bluetooth devices have two power states Enabled Di...

Page 151: ...bled you must enable them before you can turn them on or off with Wireless Assistant To view the state of your wireless devices place the cursor over the Wireless Assistant icon in the notification area or open Wireless Assistant by double clicking the icon in the notification area Wireless Assistant displays the status of the devices as on off or disabled For more information about Wireless Assis...

Page 152: ...ss Assistant shows that both WLAN and Bluetooth are disabled Wireless light is off You want to turn on either or both devices 1 Press the wireless button The devices return to their previous on or off state 2 If the wireless devices are turned off right click the Wireless Assistant icon in the notification area 3 Select the device or devices you want to turn on Wireless Assistant shows that one de...

Page 153: ...hows that both WLAN and Bluetooth are off Wireless light is off You want to disable both devices Press the wireless button Wireless Assistant shows that one device is on and the other device is off Wireless light is on You want to disable both devices Press the wireless button You want to turn off both devices 1 Right click the Wireless Assistant icon in the notification area 2 Select the device o...

Page 154: ...provided with your notebook to protect your notebook personal information and data from a variety of risks Depending on how and where you use your notebook you may not need to use all of these features It is recommended that you follow the procedures provided in this chapter for using AntiVirus software Windows updates Firewall software The table next in this chapter may help you decide which othe...

Page 155: ... identification information HP administrator password Computer viruses Norton AntiVirus software Unauthorized removal of the notebook Security cable slot used with an optional security cable For more information about the security cable slot refer to Optional Security Cable later in this chapter This security feature is configured in the Setup utility The Setup utility is a non Windows utility acc...

Page 156: ...access the protected account from the log on window the Windows password for the protected account must be entered Before you can use QuickLock you must set a Windows user password or a Windows administrator password for the account you want to protect A Windows user password protects a Windows user account a Windows administrator password protects a Windows administrator account To set password f...

Page 157: ...ess enter When a Windows password is set for a Windows account you must enter the password to access the account each time the notebook is turned on or restarted To access procedures for changing or deleting Windows passwords and for using password hints Select Start Control Panel User Accounts User Accounts For more information about using hotkeys including information about using hotkeys on an e...

Page 158: ...ot be able to access the Setup utility If you forget a DriveLock password the hard drive protected by the password is permanently locked and can no longer be used HP and Windows Passwords HP security features and Windows operating system security features work independently from one another For example a device disabled in the Setup utility cannot be enabled in Windows HP passwords and Windows pas...

Page 159: ...ssword with QuickLock refer to QuickLock earlier in this chapter Coordinating HP and Windows passwords refer to the password guidelines section next in this chapter HP Passwords Function HP administrator password Used to access the Setup utility Power on password Used to access notebook contents when the notebook is turned on restarted or restored from hibernation DriveLock password Used to access...

Page 160: ...t case sensitive An HP password must be set and entered with the same type of keys For example an HP password set with keyboard number keys will not be recognized if it is entered with embedded numeric keypad number keys For information about the embedded numeric keypad refer to Using the Embedded Numeric Keypad in Chapter 3 Keyboard Any text used for a an HP password can be used for a Windows pas...

Page 161: ...ssword at a Windows password prompt For example If a power on password is set your power on password not a Windows password must be entered when the notebook is turned on restarted or restored from hibernation If a Windows standby password is set your Windows password not your power on password must be entered when the notebook is resumed from standby or restored from hibernation Although their na...

Page 162: ...sword although both can use the same word or series of letters and numbers Can include any combination of up to 8 letters and numbers and is not case sensitive Does not display as it is set entered changed or deleted Must be set and entered with the same keys For example an HP administrator password set with keyboard number keys will not be recognized if you enter it with embedded numeric keypad n...

Page 163: ... the lower left corner of the screen 4 Use the arrow keys to select Security Administrator Password and then press enter To set an HP administrator password type your password in the Enter New Password and Confirm New Password fields and then press enter To change an HP administrator password type your current password in the Enter Current Password field type the new password in the Enter New Pass...

Page 164: ...changed or deleted Must be set and entered with the same keys For example a power on password set with keyboard number keys will not be recognized if you enter it with embedded numeric keypad number keys Can include any combination of up to 8 letters and numbers and is not case sensitive Setting Power On Passwords A power on password is set changed or deleted in the Setup utility To manage the pas...

Page 165: ... Password field type the new password in the Enter New Password and Confirm New Password fields and then press enter To delete a power on password type the current password in the Enter Current Password field press enter 3 times and then press f10 5 To save your preferences and exit the Setup utility press f10 and then follow the instructions on the screen Your preferences are in effect when the n...

Page 166: ...lity After a DriveLock password is set it must be entered each time the notebook is turned on or restarted from the hard drive protected by DriveLock You can delete a DriveLock password only by removing DriveLock protection from the drive For instructions refer to Removing DriveLock Protection later in this chapter A hard drive protected by DriveLock can only be accessed by using the DriveLock pas...

Page 167: ... message is displayed in the lower left corner of the screen 4 Use the arrow keys to select Security DriveLock Password and then press enter 5 Read the warning and then press enter 6 Type the new password in the Enter New Password field and then press enter 7 Type the new password in the Confirm New Password field and then press enter 8 To confirm DriveLock protection on the drive you have selecte...

Page 168: ...age HDD is locked now is displayed When the message is displayed If you restart your notebook you can try again to enter your DriveLock password If you press enter the notebook tries to start from another bootable device in the system At default settings the notebook will try to start from the following devices in the sequence listed A bootable diskette A bootable disc A network adapter Advanced u...

Page 169: ...Setup message is displayed in the lower left corner of the screen 4 Use the arrow keys to select Security DriveLock Password and then press enter 5 Type the current password in the Enter Current Password field and then press enter 6 Type the new password in the Enter New Password field and then press enter 7 Type the new password in the Confirm New Password field and then press enter 8 When the Se...

Page 170: ...he Setup message is displayed in the lower left corner of the screen 4 Use the arrow keys to select Security DriveLock Password and then press enter 5 Type the current password in the Enter Current Password field and then press enter 3 times Pressing enter at each of the remaining password fields indicates that you are removing not changing the password 6 When the Setup Notice is displayed press e...

Page 171: ...e notebook is off and not in hibernation turn the notebook on 3 Press f10 while the Setup message is displayed in the lower left corner of the screen 4 Select Security Device Security and then press enter 5 Use the arrow keys to select an item Then To disable an item press f5 or f6 to toggle the field for the item to Disable and then press enter To reenable an item press f5 or f6 to toggle the fie...

Page 172: ...ed To provide protection against newly discovered viruses antivirus software must be updated Norton AntiVirus software is preinstalled on your notebook Your version of Norton AntiVirus software includes 60 days of free updates It is strongly recommended that you protect your notebook against new viruses beyond 60 days by purchasing extended update service Instructions for using and updating your N...

Page 173: ...onfigured but before your notebook was shipped To update your system using the Critical Security Updates for Windows XP disc 1 Insert the disc into your optical drive 2 Follow the instructions on the screen to install all updates This may take a few minutes 3 Remove the disc Additional updates to your operating system and other software included on your notebook may have become available after you...

Page 174: ... enabled by default To learn more about this firewall or to disable or reenable this firewall 1 Select Start Control Panel Network and Internet Connections Windows Firewall 2 Select the General tab To learn more about Windows Firewall select the What else should I know about Windows Firewall link To disable Windows Firewall select Off not recommended To reenable Windows Firewall select On recommen...

Page 175: ...y device that can prevent unauthorized removal of the notebook To attach and lock a security cable 1 Insert the cable lock key 1 into the cable lock 2 Loop the security cable 2 around a secured object 3 Insert the cable lock into the security cable slot 3 and then lock the cable lock with the cable lock key ...

Page 176: ...tings for startup security and other preferences Step by step instructions for setting specific preferences in the Setup utility are included by topic throughout this guide For example procedures for setting password and other security preferences are provided in Chapter 12 Security You can set additional system preferences such as icon display preferences in the Quick Launch button software For i...

Page 177: ...orner of your screen To open the Setup utility 1 Display the Setup message If the notebook is on and in Windows restart the notebook If the notebook is off turn on the notebook If the notebook is in hibernation restore the notebook from hibernation and then restart the notebook If you are not sure whether the notebook is off or in hibernation press the power button Then if the notebook opens in Wi...

Page 178: ...on or restored from hibernation 2 Display the Setup message If the notebook is on restart the notebook through the operating system If you are certain that the notebook is off and not in hibernation turn the notebook on 3 Press f10 while the Setup message is displayed 4 Use the arrow keys to select the Advanced menu 5 Use the arrow keys to select Language Support 6 Press f5 or f6 to select a langu...

Page 179: ... most Setup utility submenu screens To display additional navigation and selection information while the Setup utility is open press f1 System Information The following procedure explains how to display system information in the Setup utility If the Setup utility is not open begin at step 1 If the Setup utility is open begin at step 3 1 If you are not sure whether the notebook is off or in hiberna...

Page 180: ... Setup utility begin at step 1 If the notebook is in the Setup utility begin at step 3 1 If you are not sure whether the notebook is off or in hibernation press the power button The notebook turns on or restores from hibernation 2 Display the Setup message If the notebook is on restart the notebook through the operating system If you are certain that the notebook is off and not in hibernation turn...

Page 181: ...rned on restarted or restored from hibernation is the prompt for a Network Service Boot to a PreBoot eXecution Environment PXE server Settings for boot order preferences The Press ESC to change boot order message that is displayed in the lower left corner of the screen each time the notebook is turned on restarted or restored from hibernation is the prompt to change the boot order Settings for ena...

Page 182: ...play Then use arrow keys to select the Exit menu Exit Saving Changes and then press enter When you use the f10 procedure you are offered an option to return to the Setup utility When you use the Exit Saving Changes procedure the Setup utility closes when you press enter To close the Setup utility without saving your changes from the current session If the Setup utility menus are not visible press ...

Page 183: ...nd that the easiest way to update the software preloaded or preinstalled on your notebook is to use the software update links provided at Start Help and Support If you prefer to work from more detailed instructions the supplementary information in the following sections may help you to Prepare for any update by identifying your notebook category product name product number and serial number Prepar...

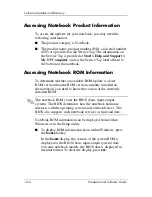
Page 184: ...pdate is a later ROM version than the ROM version currently installed on the notebook you need to know the version of the currently installed ROM The notebook ROM stores the BIOS basic input output system The BIOS determines how the notebook hardware interacts with the operating system and external devices The BIOS also supports such notebook services as time and date Notebook ROM information can ...

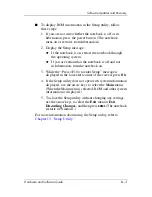
Page 185: ...s off and not in hibernation turn the notebook on 3 While the Press F10 to enter Setup message is displayed in the lower left corner of the screen press f10 4 If the Setup utility does not open with system information displayed use the arrow keys to select the Main menu When the Main menu is selected ROM and other system information is displayed 5 To close the Setup utility without changing any se...

Page 186: ...hooting information about the download The Readme txt files included with ROMPaqs are in English only The following sections provide instructions for downloading and installing A ROM update A SoftPaq containing an update other than a ROM update for example an application update Downloading System ROM ÄCAUTION To prevent serious damage to the notebook or an unsuccessful installation download and in...

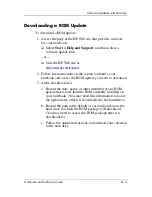
Page 187: ...tify your notebook and access the ROM update you want to download 3 At the download area a Record the date name or other identifier of any ROM update that is later than the ROM currently installed on your notebook You may need this information to locate the update later after it is downloaded to the hard drive b Record the path to the default or custom location on the hard drive to which the ROM p...

Page 188: ...ne of the Windows Explorer window a Select My Computer your hard drive designation The hard drive designation is typically Local Disk C b Follow the path you recorded earlier to the folder on your hard drive that contains the update 3 To begin the installation open the folder and then double click the file with an exe extension for example Filename exe The ROM update installation begins 4 To compl...

Page 189: ...Paq you plan to download You may need this information to locate the update later after it has been downloaded to the hard drive b Follow the online instructions to download the SoftPaq to the hard drive 4 When the download is complete open Windows Explorer To open Windows Explorer from the Start button select Start All Programs Accessories Windows Explorer 5 In the left pane of the Windows Explor...

Page 190: ...sage on the screen reports a successful installation you can delete the downloaded file from the destination folder System Recovery ÄCAUTION To prevent loss of notebook functionality perform the procedures described in this section only while the notebook is connected to reliable external power through the AC adapter During a software restoration repair or reinstallation Do not unplug the notebook...

Page 191: ...eate a backup copy of My Documents Step Description Refer to 1 Return the notebook to a system restore point Using System Restore later in this chapter 2 Try to solve or diagnose the problem by using the Help and Support Center Start Help and Support Fixing a problem 3 Reinstall all HP drivers Repairing or Reinstalling Drivers later in this chapter 4 If you suspect the problem could be caused by a...

Page 192: ...r extensively modify software or hardware Periodically whenever the system is performing optimally Restoring to any restore point does not affect your data files For example restoring your system software to an earlier time will not affect documents or e mails that you saved after that time All System Restore procedures are reversible Setting a Restore Point To set a system restore point manually ...

Page 193: ...einstall the drivers for notebook functionality before repairing or reinstalling drivers for external devices To reinstall the drivers required for notebook functionality from your hard drive Select Start All Programs Software Setup and then follow the instructions on the screen When you are prompted to select the drivers you want to reinstall you can select or clear the check boxes for some or al...

Page 194: ...and reinstalls deleted system files within the application In most cases If the application you are repairing or reinstalling is still installed on your notebook the reinstallation process does not affect your settings within the application In all cases If an application has been deleted from your notebook the reinstallation process reinstalls the application with factory settings Reinstalling Ap...

Page 195: ...s recommended that you restore applications first from the Driver Recovery disc and then from any Application Recovery discs included with your notebook To reinstall a preloaded or preinstalled application from the Driver Recovery disc or an Application Recovery disc While the notebook is in Windows insert the disc into the optical drive and then follow the instructions on the screen When you are ...

Page 196: ...t and then select OK If you are unable to shut down the notebook using the ctrl alt del keys press and hold the power button for 4 seconds 4 Turn on the notebook by briefly pressing the power button 5 When prompted press any key to boot from disc After a few minutes the setup wizard opens and the Welcome to Setup page is displayed On the Welcome to Setup page do not press R step 8 in this procedur...

Page 197: ... functionality To fully restore your system you will also need to Reinstall all of your additional software Update all of your reinstalled software including the operating system Back Up Data ÄCAUTION To prevent the loss of all of your personal data back up your data before reinstalling the operating system Reinstalling the operating system deletes all personal data settings and software on your n...

Page 198: ...Program Files Microsoft Office Templates The shortcuts on a desktop are often stored in C Documents and Settings Your User Account Desktop If you have customized the settings in a window toolbar or menu bar you may want to take a screen shot of that element The screen shot could be a time saving reference when you begin resetting your preferences A screen shot is a copy of an element on the screen...

Page 199: ...book 1 Make sure the notebook is connected to a AC outlet through the AC adapter 2 Insert the Operating System disc into the optical drive 3 Shut down the notebook using the standard shutdown procedure for your operating system In Windows XP Home press ctrl alt del and then select Shut Down Turn Off In Windows XP Professional press ctrl alt del Select Shut down from the drop down list and then sel...

Page 200: ...explains that formatting this drive will delete all current files 12 Press F to format the drive The reinstallation process begins After the reinstallation process is complete which may take up to several hours the notebook restarts in Windows To properly set up Windows follow the instructions on the screen Reinstall Drivers After the operating system reinstallation process is complete you must re...

Page 201: ...gly recommended that you update all reinstalled software Depending on the settings you used on your former configuration some software may have been automatically updated without your knowledge Use the following update procedures as soon as your notebook is connected to the Internet To access update links for the operating system and other software provided on your notebook Select Start Help and S...

Page 202: ...onal Standard for Safety of Information Technology Equipment IEC 60950 Notebook ÅWARNING To reduce the risk of electric shock or damage to your equipment Before cleaning your notebook disconnect the notebook from external power and disconnect all external devices from the notebook Do not spray liquids on your notebook display or keyboard Do not allow liquids to drip onto the notebook keyboard ÄCAU...

Page 203: ...the following suggestions may be helpful Carry and store your notebook in an optional portable carrying case Avoid placing heavy objects on top of the notebook even when the notebook is inside a carrying case Protect your notebook especially the display and keyboard from liquids and excessive moisture Avoid exposing your notebook to direct sunlight extreme temperatures or ultraviolet light for ext...

Page 204: ...r notebook Some liquids and household solvents can permanently damage the finish of your notebook ÄCAUTION To prevent the deposit of household debris on the keyboard do not clean the keyboard with a regular vacuum cleaner Clean the keyboard regularly to prevent keys from sticking and to remove dust lint and particles that can become trapped beneath the keys Ideally use a can of compressed air with...

Page 205: ...static screen cleaning product or premoistened antistatic wipes TouchPad Grease and dirt on the TouchPad can cause your pointer to move erratically To protect the performance of your TouchPad Wash your hands frequently while you are using the notebook Clean the TouchPad often with a damp cloth External Mouse Keeping an optional external mouse clean can substantially improve the performance of the ...

Page 206: ...urn the mouse upside down 2 Rotate the circular plate until the plate pops loose 1 Most mice have an arrow to indicate the direction to turn the plate 3 Remove the ball 2 from your mouse and clean it with an antistatic wipe or a lint free cotton cloth ...

Page 207: ...6 Hardware and Software Guide Notebook Care 4 To remove loose debris and dust spray the inside of the mouse with compressed air or clean it with a non cotton swab 5 Replace the ball and the circular plate ...

Page 208: ...ecurity device that examines carry on items placed on a conveyor belt uses x rays and is safe for the notebook and diskettes The walk through security device and the handheld security wands are magnetic and may damage the notebook or diskettes If you are traveling by air Carry your notebook as hand baggage Do not check it with the rest of your luggage Check in advance with the airline if you plan ...

Page 209: ...ng the notebook apply also to traveling with the notebook Shipping To prepare the notebook for shipping or traveling 1 Back up your work For backup information refer to Back Up Data in Chapter 14 Software Updates and Recovery 2 Remove all media including CDs DVDs PC Cards ExpressCards digital memory cards etc 3 Turn off then disconnect all external devices 4 Shut down the notebook 5 If the noteboo...

Page 210: ... or transport the notebook in extreme environments Factor Metric U S Temperature Operating 10 C to 35 C 50 F to 95 F Nonoperating 20 C to 60 C 4 F to 140 F Relative humidity noncondensing Operating 10 to 90 10 to 90 Nonoperating 5 to 95 5 to 95 Maximum altitude unpressurized Operating 15 m to 3 048 m 50 ft to 10 000 ft Nonoperating 15 m to 12 192 m 50 ft to 40 000 ft ...

Page 211: ...otebook can be powered from a stand alone DC power source it is strongly recommended that the notebook be powered only with an AC adapter or DC power cord supplied with or approved for an HP notebook The notebook is capable of accepting DC power within the following specifications This product is designed for IT power systems in Norway with phase to phase voltage not exceeding 230V Input Power Rat...

Page 212: ...he expansion port 2 is illustrated in Right Side Components in Chapter 1 Component ID The following table identifies the input and output signals supported by the expansion port 2 on your notebook Feature Support USB 2 0 Yes 10 100 Ethernet Yes Gigabit Ethernet No IEEE 1394 4 pin port Yes Consumer IR for optional remote control only Yes Power inputs 90 W to 240 W maximum Composite TV Yes S Video T...

Page 213: ...ications 17 1 analog vs digital line 10 1 10 7 antennae 1 16 antivirus software 12 1 12 19 Application Recovery disc 1 18 applications default multimedia 3 12 4 10 installing 4 12 reinstalling or repairing 14 12 See also software applications key Windows 1 7 AT commands modem 10 9 audio cable 4 7 audio in microphone jack 4 1 audio out headphone jack 4 2 4 7 AutoPlay 4 17 5 6 B backup 14 9 14 15 ba...

Page 214: ...attery power vs AC power 2 4 bays battery 1 14 1 19 hard drive 1 14 See also compartment expansion memory module BIOS information displaying fn esc 3 11 password protection 12 2 Service Tag 14 2 Setup utility 13 4 Bluetooth device functions 11 9 wireless button 1 6 11 2 wireless light 1 6 11 2 Bluetooth label 1 19 boot order 13 6 buttons DVD 3 12 3 14 Internet 3 12 music 3 12 3 14 mute 1 8 4 3 PC ...

Page 215: ... 19 connectors digital memory card 7 3 drive 5 1 ExpressCard 6 6 PC Card 6 2 power 1 9 See also jacks ports conservation power 2 28 consumer infrared lens 1 8 cord power connecting 2 3 identifying 1 17 See also cables country specific modem adapter 1 17 10 1 10 4 critical low battery condition 2 22 Critical Security Updates for Windows XP disc 12 20 D default settings multimedia applications 4 10 ...

Page 216: ... by airport security 5 1 16 1 protecting playback 2 9 5 6 display release latch 1 8 display switch identifying 1 4 setting preferences 2 2 2 13 display internal care and maintenance 15 4 controlling brightness 3 10 switching image 3 7 docking device docking undocking while using disc diskette 4 17 expansion port 2 on notebook 1 10 USB support 9 1 DriveLock 12 13 DriveLock password See passwords Dr...

Page 217: ...sCards configuring 6 6 inserting 6 7 removing 6 8 removing insert in ExpressCard slot 6 6 stopping 6 8 types supported 6 5 external device drivers 14 11 external monitor port 1 9 4 6 external numeric keypad 3 20 F F12 to boot from LAN message 13 6 firewall software 12 1 12 21 flash memory cards 7 1 fn key 1 7 function keys f1 f2 etc 3 4 13 6 G Getting Started 1 18 H hard drive affected by airport ...

Page 218: ... 10 initiate QuickLock 3 8 12 3 initiate standby 2 12 2 13 open Internet Explorer 3 6 open print options window 3 6 Quick Reference 3 4 switch image 3 7 hotkeys displaying functions on the screen 3 15 identifying 1 7 3 4 procedures 3 5 Quick Reference 3 4 using with external keyboard 3 11 HP administrator password See passwords hub USB 9 1 humidity specifications 17 1 I icons hotkey 3 4 multimedia...

Page 219: ...board external 3 11 keyboard internal care and maintenance 15 1 keypad embedded numeric identifying 1 7 3 18 procedures 3 19 keys fn 1 7 3 4 function f1 f2 etc 1 7 3 4 hotkeys 3 4 keypad 1 7 3 18 num lock 3 19 prt sc 14 16 scroll lock 3 11 shift 2 11 3 20 Windows applications 1 7 Windows logo 1 7 See also buttons display switch latches L labels Bluetooth 1 19 Microsoft Certificate of Authenticity ...

Page 220: ... module slot expansion 8 1 primary 8 1 memory modules defined 8 1 removing or inserting 8 2 selecting 8 2 Memory Stick Memory Stick Pro 1 12 7 1 microphone 4 1 microphone audio in jack 1 11 4 1 Microsoft Certificate of Authenticity label 1 19 14 17 model identifying notebook 3 5 14 2 modem AT commands 10 9 cable 10 1 country specific adapter 1 17 10 1 10 4 dialing mode pulse or tone settings 10 7 ...

Page 221: ...ily type and serial number 3 5 14 2 num lock key 3 19 num lock light 1 1 3 19 O operating environment specifications 17 1 operating system firewall 12 1 12 21 Internet Connection Wizard 3 6 3 12 loading 2 10 Microsoft Certificate of Authenticity label 1 19 14 17 modem settings 10 5 10 7 passwords 12 5 Product Key 1 19 14 17 reinstalling 14 9 14 15 repairing 14 9 14 14 shutting down 2 10 2 13 updat...

Page 222: ... 3 external monitor 1 9 3 7 4 6 USB 1 9 1 10 1 13 9 1 See also connectors jacks power conserving 2 5 2 28 control and light locations 2 1 schemes 2 15 setting preferences 2 13 sources 2 4 switching between AC and battery 2 4 See also battery pack hibernation shutdown procedures standby power button default functions 2 9 identifying 1 4 2 2 resetting notebook with 2 13 setting preferences 2 13 powe...

Page 223: ...m access memory 8 1 8 7 reader memory card 7 1 recovery discs procedures See system recovery regional settings for DVDs 4 18 regulatory information Modem Approval label 1 19 Regulatory label 1 19 wireless certification labels 1 19 reinstallation software See system recovery release latch battery pack 1 14 2 18 remote control buttons 3 14 infrared lens 1 8 repair software See system recovery reset ...

Page 224: ...eypad function 3 20 hibernation function 2 11 shipping drive 5 1 notebook 16 2 shutdown procedures 2 10 sleep See standby slots Digital Media Slot 1 12 7 1 ExpressCard 1 12 6 5 memory module 1 15 8 1 PC Card 1 12 6 1 security cable 1 13 12 22 SmartMedia SM card 1 12 7 1 socket services ExpressCard 6 6 PC Card 6 1 SoftPaq 14 4 14 7 software AutoPlay 4 17 backing up 14 9 14 15 firewall 12 1 12 21 In...

Page 225: ... 12 setting preferences 2 13 stereo speakers external 4 2 internal 1 5 4 2 S Video cable 4 4 4 7 S Video out jack 1 11 4 4 4 7 switch display identifying 1 4 2 2 setting preferences 2 13 system information displaying fn esc 3 11 Service Tag 14 2 Setup utility 13 4 system lock up emergency shutdown procedures 2 13 system recovery backing up data 14 9 14 15 recovery procedures summary 14 9 reinstall...

Page 226: ...ttings 10 5 precautions preparations 16 1 using modem cable adapter 10 4 wireless certification labels 1 19 troubleshooting modem connections 10 7 turning off notebook 2 10 2 13 turning on notebook 2 10 tutorials 3 5 4 14 U unresponsive system emergency shutdown procedures 2 13 USB devices connecting 9 1 USB ports identifying 1 9 1 10 1 13 user password Windows See passwords V VCR connecting audio...

Page 227: ... password See passwords WinDVD Creator 4 11 WinDVD Player 4 11 4 20 wireless antennae 1 16 wireless button 1 6 11 11 wireless certification label 1 19 wireless LAN devices certification labels 1 19 identifying 11 6 troubleshooting 11 5 11 8 types 11 7 types of WLAN adapters 11 7 wireless button 1 6 wireless light 1 6 wireless local area network WLAN 11 6 WLAN software 11 8 wireless light 1 6 X xD ...

Reviews: