1-20
Chapter 1
Overview
Control Panel Switches and Indicators
WARNING
If the Service Bypass switch is in the
BYPASS
position, voltage may still
be present at the output! This is true regardless of the
UPS/BATTERY switch setting.
12
UPS/BATTERY Switch
This slide switch enables or disables operation of the UPS. In the
ENABLE
position (switch to the right), the UPS functions normally.
Depending on other conditions, there may be voltage present at the
AC output, and the UPS may be charging or discharging its
batteries.
Unless the UPS is in Bypass Mode, it is completely disabled when
this switch is in the
DISABLE
position (switch to the left); there is no
voltage present at the AC output, and the UPS is neither charging
nor discharging its batteries. The switch should be left in the
DISABLE
position if the UPS is disconnected from AC input power or
the system is shut down for an extended period of time.
Cycling this switch — moving the switch to the
DISABLE
position
and then back to the
ENABLE
position — resets all UPS conditions
except an Emergency Power Off (EPO) shutdown and an automatic
bypass condition.
13
Enable Light
This green light indicates that the UPS is enabled and operating.
The Enable light is normally on if the UPS/BATTERY switch is set
to
ENABLE
. However, there are two exceptions:
1. If the UPS/BATTERY switch is set to the
ENABLE
position
while the AC input power is off, the Enable light flashes,
and then remains off until AC input power returns.
2. If the batteries discharge while AC input power is off and
the Output On/Output Off switch is set to
Output On,
the
Enable light turns off. It remains off until AC input power
returns.
14
Output Receptacle
Cover
The cover that prevents the connectors in the output receptacles
from being accidentally unplugged.
15
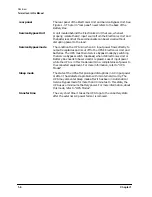
Precharge Failure
LED
When flashing, this red LED indicates that the voltage on the main
inverter has not precharged properly and that the Battery
Precharge Shorting Plate must not be installed.
16
Battery Precharge
Shorting Plate
This plate is used to prevent the battery from being directly
connected to an unenergized inverter assembly. It must be
removed to attach the battery cable and, when reinstalled,
provides a low resistance, direct current path from the battery to
the main inverter.
17
Caution Light
This light warns that the UPS should not be switched into or out of
Bypass mode.
Summary of Contents for PowerTrust A3589A
Page 7: ...Contents Contents 5 ...
Page 8: ...Contents 6 Contents ...
Page 10: ...Contents 8 Figures ...
Page 12: ...Contents 10 Tables ...
Page 14: ...2 ...
Page 20: ...Preface 8 ...
Page 22: ...Preface 10 ...
Page 52: ...1 30 Chapter1 Overview Specifications Figure 1 8 UPS Input Voltage Transfer Points ...
Page 56: ...1 34 Chapter1 Overview UPS Modes Figure 1 10 Simplified UPS 5 5 kVA UPS Block Diagram ...
Page 62: ...1 40 Chapter1 Overview Support Information ...
Page 76: ...2 14 Chapter2 Unpacking and Inspecting Shipping and Storage Requirements ...
Page 104: ...3 28 Chapter3 Installing the UPS Examples of PowerTrust Connections in a System ...
Page 116: ...5 4 Chapter5 Verification Procedures Load Testing ...
Page 148: ...7 6 Chapter7 Cleaning and Maintenance Exchanging Batteries Fan ...
Page 190: ...A 42 AppendixA HP UX UPS Monitor Error Messages Log Only Messages ...
Page 218: ...C 8 AppendixC Configuring the OS for the PowerTrust UPS Power Failing the UPS ...


