2.
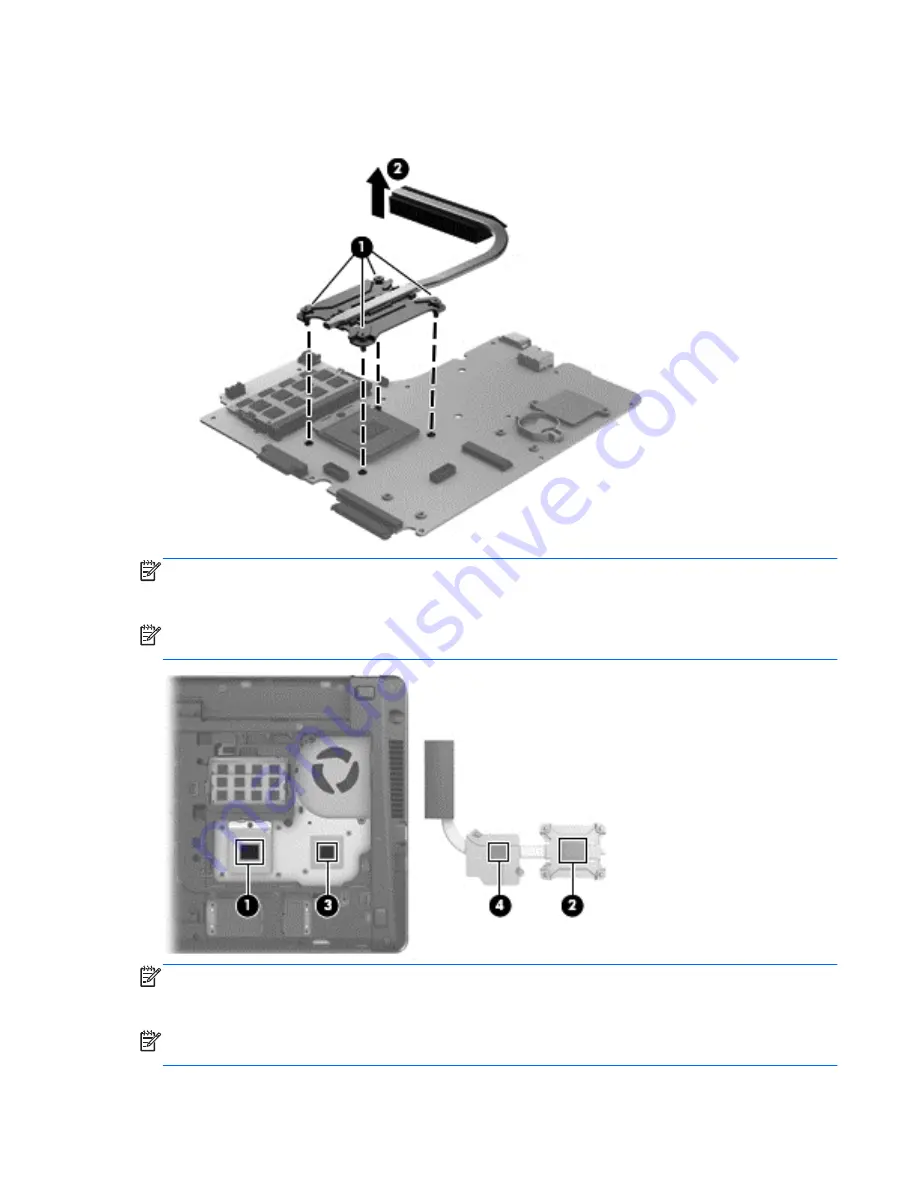
Lift the heat sink up
(2)
, and then pull it out of the computer
(3)
.
Remove the UMA heat sink.
NOTE:
For discrete models, thoroughly clean thermal material from the surfaces of the system
board components
(1)
and
(3)
and the heat sink
(2)
and
(4)
each time you remove the heat sink. All
heat sink and processor spare part kits include thermal material.
NOTE:
When installing the heat sink, always tighten the screws in the order stamped on the
components.
NOTE:
For UMA models, thoroughly clean thermal material from the surface of the system board
(1)
and heat sink
(2)
each time you remove the heat sink. All heat sink and processor spare part kits
include thermal material.
NOTE:
When installing the heat sink, always tighten the screws in the order stamped on the
components.
Component replacement procedures
71


