2-15
Installing the HP 5400 zl Switches
Installation Procedures
Installing the HP 5400 zl
Switches
E q u i p m e n t
C a b i n e t
N o t e
If you are installing the switch in an
equipment cabinet
, in place of the
12-24 screws supplied with the switch, use the clips and screws that came with
the cabinet. Plan which four holes you will be using in the cabinet and install
all four clips and partially install the two bottom screws, as described in step
2 on the previous page, before proceeding to step 3.
W A R N I N G
For safe operation, please read the “Installation Precautions” on
page
2-4
and
page 2-5
before mounting the switch.
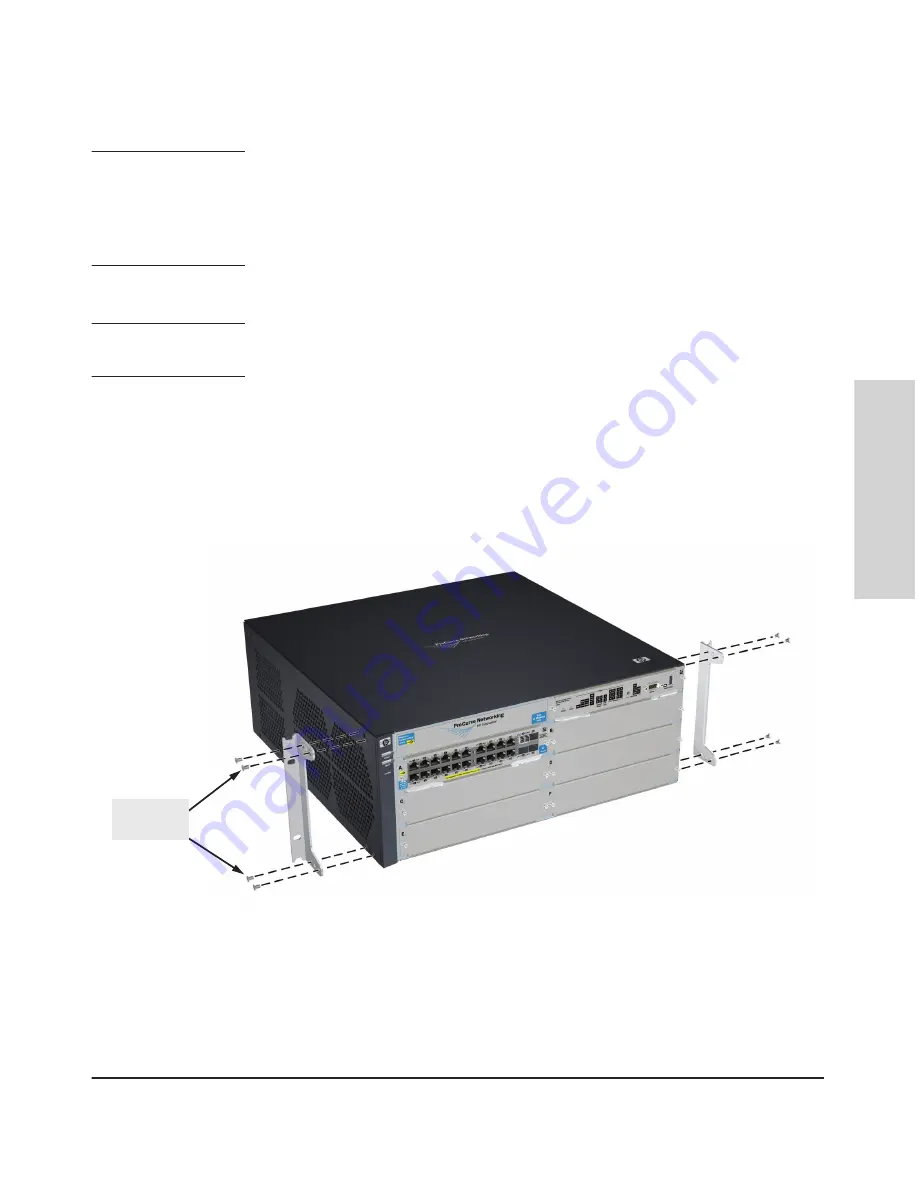
1.
Use a #1 Phillips (cross-head) screwdriver and attach the mounting
brackets to the switch with the included 8-mm M4 screws.
For the 5406 zl switches, each bracket is attached with four screws as
shown in the following illustration.
Although these procedures show the 6-slot chassis, the procedures are
the same for the 12-slot chassis.
8 mm
M4 screws
Figure 2-7. Attaching brackets to the 5400 zl switch
Summary of Contents for ProCurve 5400zl Series
Page 1: ...HP 5400 zl Switches Installation and Getting Started Guide Power over Ethernet ...
Page 2: ......
Page 3: ...HP 5400 zl Switches Installation and Getting Started Guide ...
Page 10: ......
Page 60: ......
Page 93: ...5 15 Troubleshooting HP Customer Support Services Troubleshooting ...
Page 94: ...5 16 Troubleshooting HP Customer Support Services Troubleshooting ...
Page 110: ......
Page 134: ......


