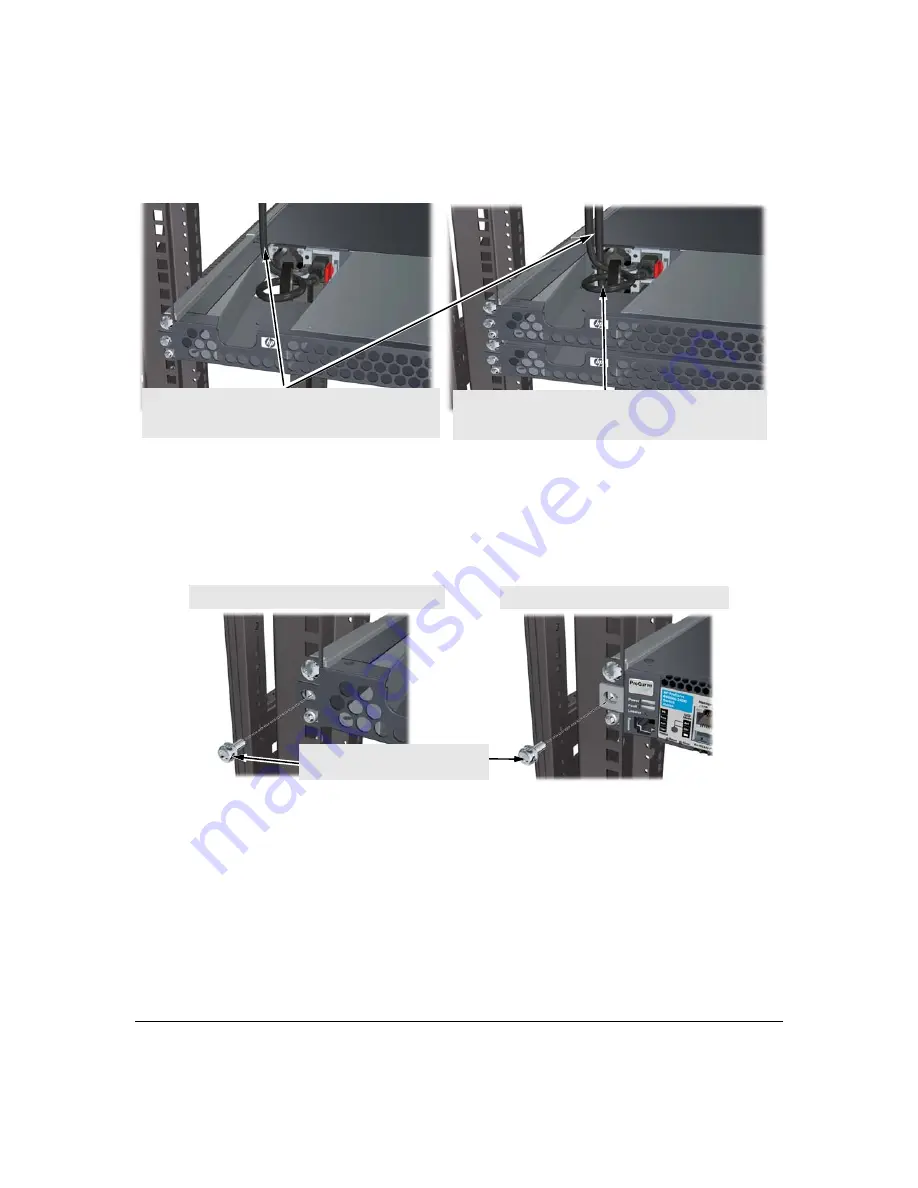
background image

4    

Figure 6.

Routing a Power Cord Up and Over the Switch

4. Secure the switch to the rack. 

Use two 10-32 screws (one for each bracket) to tighten the plenum and mounting bracket (in a 
power-side mounting) or only the bracket (in a port-side mounting) to the rack.

Figure 7.

Securing the Switch to the Rack

Route the power cord through the plenum opening, and up 
and over the switch in either a single- or stacked-switch 
installation.

When you mount a pair of 6600 switches so that one is on top of 
the other, the opening in the bottom of each plenum allows you 
to route the power cord up and through it.

Port-side mounting for a 6600 Switch (Option 3)

Power-side mounting for a 6600 Switch (Option 1 or 2)

Install and tighten a 10-32 screw in the 
middle hole.

© Copyright 2009 Hewlett-Packard 
Development Company, L.P. The 
information herein is subject to 
change without notice.

Part Number: 5992-5503
June 2009
Printed in China

*5992-5503*

Summary of Contents for ProCurve 6600-48G-4XG

Page 1: ...ounting 4 Secure the switch to the rack 1 Install the rails in the rack a Determine the height in the rack at which you want to mount the switch Align the mounting holes at each end of a rail with the holes on the front and back rack posts so that they are at the same height For a square hole rack leave the pre installed square hole pin in each rail Unscrew and re install the 10 32 screw on each r...

Page 2: ...the switch is fully inserted and the mounting hole in each bracket lines up with the mounting holes in the rack Figure 3 Installing the Switch in the Rack Important In a port side or power side mounting you must ensure that the air flow direction is from the cold side to the hot side of the aisle If necessary reverse the direction of the fans to provide adequate switch cooling as described in Chap...

Page 3: ...two sizes Both plenums are installed in the same way J9480A is the shorter air plenum for 6600 24XG 6600 48G and 6600 48G 4XG Switches J9481A is the longer air plenum for 6600 24G and 6600 24G 4XG Switches Slide the plenum into the rails until the plenum is fully inserted and the two mounting holes align with the mounting holes on the bracket and rack Figure 4 Installing the Plenum Figures 5 and 6...

Page 4: ... over the switch in either a single or stacked switch installation When you mount a pair of 6600 switches so that one is on top of the other the opening in the bottom of each plenum allows you to route the power cord up and through it Port side mounting for a 6600 Switch Option 3 Power side mountingfora 6600Switch Option1or 2 Install and tighten a 10 32 screw in the middle hole Copyright 2009 Hewl...

Reviews: