background image

E-4

ProCurve Secure Access 700wl Series Installation and Getting Started Guide


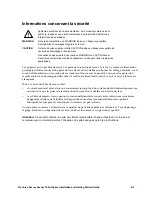
Hinweise zur Sicherheit

Dies ist ein Gerät der Sicherheitsklasse I und verfügt über einen schützenden Erdungsterminal. Der 
Betrieb des Geräts erfordert eine ununterbrochene Sicherheitserdung von der Hauptstromquelle zu den 
Geräteingabeterminals, den Netzkabeln oder dem mit Strom belieferten Netzkabelsatz voraus. Sobald 
Grund zur Annahme besteht, daß der Schutz beeinträchtigt worden ist, das Netzkabel aus der 
Wandsteckdose herausziehen, bis die Erdung wiederhergestellt ist.

Für LAN-Kabelerdung:

Wenn Ihr LAN ein Gebiet umfaßt, das von mehr als einem Stromverteilungssystem beliefert wird, 
müssen Sie sich vergewissern, daß die Sicherheitserdungen fest untereinander verbunden sind.

LAN-Kabel können gelegentlich gefährlichen Übergangsspannungen ausgesetzt werden 
(beispielsweise durch Blitz oder Störungen in dem Starkstromnetz des Elektrizitätswerks). Bei der 
Handhabung exponierter Metallbestandteile des Netzwerkes Vorsicht walten lassen.

Dieses Gerät enthält innen keine durch den Benutzer zu wartenden Teile. Wartungs-, Anpassungs-, 
Instandhaltungs- oder Reparaturarbeiten dürfen nur von geschultem Bedienungspersonal durchgeführt 
werden.

Vorsicht:

 Dieses Produkt enhalt eine wechselbare Lithium Batterie. Es besteht Explosionsgefahr wenn 

die Batterie durch einen falschen Typ ersetzt wird. Entsorgen Sie gebrauchte Batterien nach den 
Anweisungen.

Symbol für Dokumentationsverweis. Wenn das Produkt mit diesem Symbol markiert 
ist, schlagen Sie bitte in der Produktdokumentation nach, um mehr Informationen 
über das Produkt zu erhalten.

WARNING

Symbol für Dokumentationsverweis. Wenn das Produkt mit diesem Symbol markiert 
ist, schlagen Sie bitte in der Produktdokumentation nach, um mehr Informationen 
über das Produkt zu erhalten.

CAUTION

Symbol für Dokumentationsverweis. Wenn das Produkt mit diesem Symbol markiert 
ist, schlagen Sie bitte in der Produktdokumentation nach, um mehr Informationen 
über das Produkt zu erhalten.

Fahren Sie nach dem Hinweis WARNING oder CAUTION erst fort, nachdem Sie den 
Gefahrenzustand verstanden und die entsprechenden Maßnahmen ergriffen haben.

Summary of Contents for ProCurve 745wl

Page 1: ...Installation and Getting Started Guide www procurve com ProCurve Secure Access 700wl Series ...

Page 2: ......

Page 3: ...PROCURVE SECURE ACCESS 700WL SERIES INSTALLATION AND GETTING STARTED GUIDE ...

Page 4: ...h in the express warranty statements accompanying such products and services Nothing herein should be construed as constituting an additional warranty HP shall not be liable for technical or editorial errors or omissions contained herein Warranty See the Customer Support Warranty booklet included with the product A copy of the specific warranty terms applicable to your Hewlett Packard products and...

Page 5: ...Network Installation 1 2 Access Control Server with One or More Access Controller Modules 1 2 Redundant Access Control Servers with One or More Access Controller Modules 1 2 Tools and Information Required 1 3 Chapter 2 Hardware Installation 2 1 Hardware Description 2 1 System Memory Storage 2 2 Chassis 2 2 Power Supply 2 2 Fans 2 2 I O Ports 2 2 Controls and Indicators 2 3 Rear Chassis 2 4 Site Pl...

Page 6: ...Overview 4 1 Preparation 4 2 Creating a User Account in the Built In Database 4 2 User Authentication Through the Default Logon Page 4 3 PPTP Gateway Configuration 4 4 Configuring Access Policies for Encryption 4 5 PPTP Client Configuration 4 8 User Authentication Via PPTP Connection 4 11 External Authentication Service Configuration 4 11 Verify the External Authentication Service 4 15 Appendix A ...

Page 7: ...onsole Port D 1 10 100 Downlink Ethernet Cables D 2 Power Crossover Connector D 2 Appendix E Safety and EMC Regulatory Statements E 1 Safety Information E 1 U S A E 9 Canada E 9 Australia New Zealand E 9 Japan E 9 Korea E 9 BSMI E 10 Regulatory Model Identification Number E 10 European Community E 11 Appendix F Recycle Statements F 1 Waste Electrical and Electronic Equipment WEEE Statements F 1 In...

Page 8: ......

Page 9: ...ion of the ProCurve Access Control Server 745wl and XL Access Controller Module Each procedure is written in a task oriented format consisting of numbered step by step instructions In most cases several procedures are required to complete one overall task All procedures should be performed in the order they appear in this document unless otherwise instructed This document also provides instruction...

Page 10: ...P Appendix A Troubleshooting This chapter presents troubleshooting procedures for the 700wl Series system Appendix B LCD Display Description This appendix describes the LCD display on the Access Control Server 745wl The display can be used to view the system s network parameters and to power down the system Appendix C Technical Specifications Safety and Compliance This appendix describes the techn...

Page 11: ...s for contacting HP Compliance and Safety Notices Technical specifications safety information and regulatory compliance statements can be found in Appendix C Technical Specifications This information should be read thoroughly before installing the HP system equipment Convention Definition Boldface Arial Screen menus that you click to select field names and commands that you select are in boldface ...

Page 12: ......

Page 13: ...ess Controller Modules but authentication and rights administration for these clients is handled centrally from the Access Control Server In addition all configuration of the Access Controller Modules connected to the system is handled by the Administrative Console located in the Access Control Server Once you have installed an Access Controller Module onto your network you should not need to perf...

Page 14: ...ler Modules perform installation in the following order Step 1 Install the Access Control Server following the steps in Chapter 2 Hardware Installation in this manual Step 2 Perform the network setup for the Access Control Server following the steps in Access Control Server Setup on page 3 2 Step 3 Install the Access Controller Modules following the steps in the ProCurve Series 5300xl Switches Ins...

Page 15: ...cure Access 700wl Series Management and Configuration Guide Tools and Information Required To perform network installation for an Access Control Server or Access Controller Module the information defined in Table 1 1 may be required Note The information you gather here is required during configuration and is presented here as a reminder to find it before beginning the network installation Table 1 ...

Page 16: ...hen all the parameters shown in the table must be provided when the system is configured for the network The following tools and equipment are required to install a 700wl Series system in a rack Tape measure and level Number 2 Phillips screwdriver Shared Secret Secret key used to establish trust relationship between an Access Control Server and an Access Controller Module Alphanumeric string The s...

Page 17: ...consists of the following sections Hardware Description 2 1 Site Planning Checklist 2 4 Installing a 700wl Series System 2 6 Hardware Description This section describes the hardware features of the Access Control Server 745wl which is designed for high performance high density wiring closet applications Figure 2 1 shows an Access Control Server 745wl Figure 2 1 Access Control Server 745wl The Acce...

Page 18: ...ackets provided Power Supply TheAccess Control Server 745wl contains an auto voltage sensing power supply Input is 100 220 volts 2 5A 50 60 Hz with a measured 350 watts output Fans Note For environmental specifications see Site Power Requirements and Heat Dissipation on page 2 5 The system fan assembly provides cooling air for the internal chassis components The fans exhaust warm air from the back...

Page 19: ... the front panel power button will not function System Status Indicator There is one system status LED indicator on the front of the chassis Power ON ON is lit when the power supply is plugged into a live outlet the rear panel On Off switch is in the On position and the power is turned on by the front panel On Off button LCD Display The LCD display can be used to view the system s network paramete...

Page 20: ...be used to power on the system When this switch is in the Off 0 position the front panel power button will not function Note The power switch must be left in the On I position for the unit to be operational Figure 2 5 Rear chassis of an Access Control Server 745wl Site Planning Checklist Before installing an Access Control Server 745wl or XL Access Controller Module you should evaluate the items i...

Page 21: ...luation Input power type Proximity of receptacle to equipment UPS for power failures Grounding Evaluation Circuit breaker size Cable and Interface Equipment Evaluation Cable type Connector type Cable distance limitations Interface equipment transceivers EMI Evaluation Distance limitations for signaling Site wiring RFI levels Site Power Requirements and Heat Dissipation Table 2 3 shows the site pow...

Page 22: ...ation CD ROM Software License Agreement Software Release Notes ProCurve Secure Access 700wl Series Installation and Getting Started Guide this document If any of the above are missing contact HP immediately and do not attempt installation Rack Mounting the Chassis Each Access Control Server 745wl comes with a steel mounting kit suitable for mounting the chassis in a standard 19 inch 48 3 cm equipm...

Page 23: ...t where the operating temperature might exceed 10 C 104 F Caution Do not restrict air flow around the side and rear of the chassis The air space in front and rear of system should be 6 00 inches minimum Connecting Power to the Chassis Follow these steps to connect power to the chassis Step 1 Before you connect the power supply to a power source ensure that all site power and grounding requirements...

Page 24: ......

Page 25: ...rative Console For an Access Control Server you may be able to access the Administrative Console immediately upon connecting the unit to your network as the unit is configured by default to request an IP address using the Dynamic Host Configuration Protocol DHCP If a DHCP server is reachable and an address is assigned to the ProCurve unit you can point your browser to that IP address and access th...

Page 26: ...s An Access Control Server requires a stable IP address so the Access Controller Modules under its control can readily identify and communicate with the server You can either arrange for DHCP to always assign the same IP address to the Access Control Server or you can manually enter a static IP address Most commonly a static IP address is used A 700wl Series system ships configured by default to o...

Page 27: ...the Access Control Server to be recognized and communicate on the network Note See Appendix A in the ProCurve Secure Access 700wl Series Management and Configuration Guide for full documentation of the commands available from the CLI Connecting a Serial Console To use the CLI you must first connect a null modem serial cable from the serial port male DB 9 connector on the Access Control Server to a...

Page 28: ...fter you have connected the serial console follow these steps to configure the Access Control Server network parameters These instructions assume you have not connected the unit to the network Step 1 Power up the Access Control Server You will see a series of messages on the terminal emulator as the system boots and initializes itself At the end of the boot and initialization sequence you will see...

Page 29: ...Control Server This parameter is optional set gateway ip address ip address is the address of the default router set dns primary dns ip address secondary dns ip address The two DNS IP addresses are the addresses of your primary and secondary DNS servers The secondary IP address is optional Step 4 Change the administrator login and password by entering the following command set admin login name pas...

Page 30: ...ccess 700wl Series Management and Configuration Guide for detailed information on the features of the Administrative Console Connecting Using SSH To use SSH to access the CLI you must first connect an Ethernet cable from the uplink port on the Access Control Server to the network Figure 3 2 The 700wl Series system supports SecureCRT 4 05 with the Auto Detect or Standard SSH server options Issuing ...

Page 31: ... 5 Verify that you can access the Administrative Console from a browser program running on a computer connected to your network by entering the IP address of the unit http ip address The Administrator Logon page should appear see Figure 3 4 Figure 3 4 Administrator Logon Step 6 Log on using the username and password you set in Step 3 Step 7 You can now use the browser based Administrative Console ...

Page 32: ...or do not wish to configure your DHCP server to provide a known address then in order to connect to the Access Control Server you must determine the IP address supplied by DHCP The easiest way to do this is by looking at the LCD display on the Access Control Server The LCD alternates the display of the IP address with the display of the date time and software version number If you do not have acce...

Page 33: ... initial Administrative Console page appears as shown in Figure 3 6 The Access Control Server will be displayed in the left panel of the page Figure 3 6 Initial Administrative Console Page Equipment Status Step 4 Click the NETWORK button The System Components page appears as shown in Figure 3 7 Access Controller Modules appear here Access Control Server appears here ...

Page 34: ... Access 700wl Series Installation and Getting Started Guide Network Setup Figure 3 7 System Components Page Step 5 Click the Local Networks tab below the navigation bar This brings up the Local Networks page see Figure 3 8 ...

Page 35: ...elect Using DHCP from the Configure drop down list When Configure is set to Using DHCP you cannot change the IP Address Subnet Mask or Gateway You can change the DNS and WINS server IP addresses if necessary If your DHCP server is configured appropriately the IP address subnet mask netmask gateway and primary and secondary DNS addresses will already be filled in Step 9 To set a static IP address s...

Page 36: ...ntrol Server Page Step 12 To give the Access Control Server a descriptive name replace the IP address in the Name field with the name you want to use Step 13 In the Shared Secret field type the shared secret that Access Controller Modules will use to validate themselves to this Access Control Server Step 14 Retype the shared secret in the Confirm Shared Secret field Step 15 Change the administrato...

Page 37: ...ter and confirm a shared secret the 700wl Series system does not let you save this configuration without one Step 18 To set the system date and time and time zone if necessary click the Date Time tab The Date Time page appears see Figure 3 10 Figure 3 10 Date Time Page Step 19 To set the time zone select the appropriate setting from the Time Zone drop down list Step 20 To configure an NTP server c...

Page 38: ...acy settings and set up authentication and access policies for client network access See the ProCurve Secure Access 700wl Series Management and Configuration Guide for detailed information on the features of the Administrative Console Access Controller Module Setup Configuration of an Access Controller Module is done primarily through the Administrative Console running on the Access Control Server...

Page 39: ...tive Console Note You can access online Help from within the Administrative Console at any time by clicking the HELP button This displays a separate window containing Help about the page you are viewing Step 1 Point your browser to the IP address of the Access Control Server and log on to the Administrative Console Table 3 2 Installation Parameters Parameter Description Access Controller Module IP...

Page 40: ...er Module appears in the list of Access Controller Modules Figure 3 11 Initial Administrative Console Page Equipment Status Step 3 You can now use the Administrative Console to complete the Access Controller Module configuration such as setting the system time and date and configuring other necessary settings a Click the NETWORK button The System Components page appears as shown in Figure 3 12 Acc...

Page 41: ...ess 700wl Series Installation and Getting Started Guide 3 17 Network Setup Figure 3 12 System Components Page b Click the Local Networks tab below the Navigation bar This brings up the Local Networks page see Figure 3 13 ...

Page 42: ...d Setup sub tab you can configure Bridging IP broadcast forwarding and client polling from the SSL sub tab you can configure the address of a proxy server for HTTP requests e Click Save to save any changes you have made to any of the sub tabs on this page Step 4 Complete the installation by connecting one or more wireless access points to the Access Controller Module ports on the 5300xl switch usi...

Page 43: ...Guide 3 19 Network Setup See the next chapter Basic Configuration for instructions on configuring your 700wl Series system with a demonstration user account setting up wireless data privacy using PPTP and allowing a user to connect to the system as the demonstration user ...

Page 44: ......

Page 45: ...ew 4 1 Preparation 4 2 Creating a User Account in the Built In Database 4 2 User Authentication Through the Default Logon Page 4 3 PPTP Gateway Configuration 4 4 Configuring Access Policies for Encryption 4 5 PPTP Client Configuration 4 8 User Authentication Via PPTP Connection 4 11 External Authentication Service Configuration 4 11 Verify the External Authentication Service 4 15 Procedure Overvie...

Page 46: ...ified A management workstation running the Windows IE 6 or Netscape 7 1 browser to be used to perform configuration tasks on the 700wl Series system One Windows based PC or Laptop preset to obtain an IP address automatically via DHCP This system will be used to function as a client once the configuration is complete One standard Ethernet cable to connect the PC laptop to an Access Controller Modul...

Page 47: ... In this step you connect your Windows PC to an Access Controller Module downlink port and log onto your network using the username and password you added to the built in database If this is successful you should be able to access the Internet and other resources on your network as normal Note If you are using the same Windows PC as a client that you have been using for configuration and the PC s ...

Page 48: ...r to the URL http 1 1 1 1 The ProCurve Logon window appears showing the user as logged on and displaying a Logoff button at the top right of the window Step 6 Click the Logoff button to log the client off the system PPTP Gateway Configuration This step configures the 700wl Series system to act as a VPN termination for PPTP After configuring the PPTP client on your PC see PPTP Client Configuration ...

Page 49: ...olicies to allow the use of encryption You must allow encryption for the Unauthenticated Access Policy so that an unknown client using encryption can connect to the 700wl Series system and you must enable encryption for the relevant Access Policy that will take effect once the client has been successfully authenticated in this case the Authenticated Access Policy Step 1 From the Navigation toolbar...

Page 50: ...ation and Getting Started Guide Basic Configuration Figure 4 3 Access Policies page Step 3 Click on the name Unauthenticated in the list of Access Policies to bring up the Edit Access Policy page for the Unauthenticated Access Policy See Figure 4 4 ...

Page 51: ...ion drop down list select Allowed but not required Step 5 Under Encryption Protocols put a check mark in the PPTP check box Leave the other settings as they are Step 6 Click Save to save your changes to the Unauthenticated Access Policy You will be returned to the Access Policies page Step 7 Select the Authenticated Access Policy and make the same changes Steps 4 through 7 ...

Page 52: ...anel From the Control Panel window double click Network Connections The Network Connections dialog box appears Step 2 Click the New Connection Wizard link on the Network Connections dialog box The New Connection Wizard window appears Step 3 Click Next to go to the Network Connection Type dialog box Figure 4 5 Connection Wizard Network Connection Type Step 4 Select the Connect to the network at my ...

Page 53: ...hoose to add a shortcut to this connection on the desktop then click Finish An icon representing the new connection appears in the Network Connections window under the Virtual Private Network section In addition the Sign on dialog box should appear on the screen if it does not double click the new connection icon Figure 4 7 Connection Sign On Dialog Box Step 9 Click Properties to open the connecti...

Page 54: ...type of VPN Step 11 Select PPTP VPN from the drop down list for Type of VPN Make sure that Internet Protocol TCP IP is selected Step 12 Click the Security tab to customize the security protocols Step 13 Select Advanced custom settings on the Security tab and click Settings The Advanced Security Settings dialog box appears See Figure 4 9 Figure 4 9 Connection Dialog Box Advanced Security Settings ...

Page 55: ... connection you created in PPTP Client Configuration on page 4 8 by using the shortcut on your desktop or open the connection from the Network Connections dialog box in the Control Panel The Connect dialog box appears Step 2 Type demo and password or the user name and password you created in the built in database in the User name and Password text boxes and click Connect to connect You may choose ...

Page 56: ...your Access Control Server and logon to the Administrative Console The initial page of the Administrative Console appears Step 2 Click the RIGHTS button to go to the Rights Manager Step 3 Click Authentication Policies tab to go to the Authentication Policies page Figure 4 11 Figure 4 11 Authentication Policies Page Step 4 Click the Authentication Services link in the left panel The Authentication ...

Page 57: ...assign the authenticated user to an Identity Profile If you elect to use this field you must also create an Identity Profile to match the group name that will be returned and then add a row to the Rights Assignment Table to associate an Access Policy with that Identity Profile You can leave the default attribute name for the Reauthentication Field This field refers to the name of a RADIUS attribut...

Page 58: ...11 Use the row up down buttons to move the newly added RADIUS service ahead of the Built in service and put a check next to this service Leave the Built in service checked as well Step 12 Click Save The new RADIUS authentication service will now be the first service used to authenticate users who are being authenticated by the System Authentication Policy The System Authentication Policy is used b...

Page 59: ...uthentication Service drop down list and click Trace Transaction This function displays both the information sent to the Authentication Service and the returned results If something is incorrect the Results Parameters will indicate an error Possible reasons for the error include Invalid Username or Password or both RADIUS authentication service is not configured correctly RADIUS Server does not re...

Page 60: ......

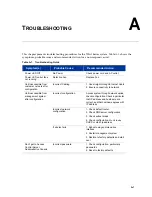
Page 61: ...ectivity to network Unit inaccessible from management system after configuration Incorrect configuration Access system through network uplink check configuration Check in particular that IP address and hostname are correct and that hostname agrees with IP address Incorrect network configuration 1 Check default router 2 Check DNS server configuration 3 Check subnet mask 4 Check configuration of uni...

Page 62: ...guration If Access point uses static IP or wants a dynamic IP address from network DHCP server make sure 700wl Series system system is not doing NAT for Access Point create Identity Profile for MAC address of Access Point that allows Real IP Mode No initial web page Access Controller Module sees no web request Use a browser to request http 1 1 1 1 Browser problems Internet Explorer 5 01 with DLL s...

Page 63: ...fault Display B 2 Main Menus B 2 System Shutdown B 3 Display Description The LCD display is located in the middle of the front panel of the Access Control Server It is a 16 character by two line display with six buttons located to the right of the display Figure B 1 LCD Controls Button Functionality Up and Down Arrows These arrows allow the user to navigate between menus Left and Right Arrows Thes...

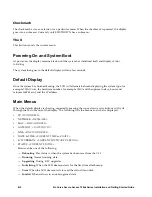
Page 64: ...s the hardware number for example 745wl and the uptime in days hours and minutes ddd hh mm and the IP address Main Menus When the default display is showing repeatedly pressing the up or down arrow buttons will cycle through the Main Menus of the display The following lists the menus and what is displayed IP IP ADDRESS NETMASK NETMASK MAC MAC ADDRESS GATEWAY GATEWAY IP DNS DNS IP ADDRESS DATE TIME...

Page 65: ...aneously System Shutdown Pressing the up or down arrow button selects the SHUTDOWN menu This allows you to shut down and power off the system After pressing the checkmark button ARE YOU SURE displays If you are sure you want to shut down and power off the system press left and right buttons simultaneously Otherwise press the X button and the display returns to the main display A system can take up...

Page 66: ......

Page 67: ...al Ranges Power Requirements Physical Dimensions Operating Temperature Range 5 to 50 C Storage Temperature Range 40 to 65 C Humidity Range non condensing 5 to 90 Operating Altitude Up to 10 000 ft 3000 m Storage Altitude Up to 15 000 ft 4570 m AC Voltage 100 240 VAC Power Supply Rating 6 3A max Frequency Range 50 60 Hz Heat Dissipation 580 BTU Hr Power Consumption Nominal 170W Weight 30 to 40 poun...

Page 68: ...No 60950 FCC Part 15 Class A CE EN 55022 1998 Class A EN 61000 3 2 2000 EN 61000 3 3 1995 To the Access Control Server RJ45 10 100 1000 Base T Downlink Interfaces 2 port 10 100 1000 Copper Ethernet card 2 port 1000 Base SX Fiber card LC connector 1 port 1000 Base LX Fiber card LC Connector Management Console port DB 9 male Encryption Acceleration Card LEDs Power Management Display 2 line LCD ...

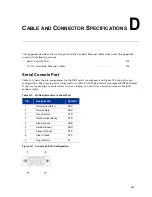
Page 69: ...re D 1 shows the pin configuration The console port is configured as an EIA TIA 232 data terminal equipment DTE adapter If you are connecting a console device such as a laptop you must use a serial crossover cable null modem cable Figure D 1 Console Port Pin Configuration Table D 1 Pin Assignments for Console Port Pin Assignment Symbol 1 Data Carrier Detect DCD 2 Receive Data RXD 3 Transmit Data T...

Page 70: ...f for any reason you need to plug a 48VDC IEEE 802 3af device into a 48VDC Cisco compatible port or vice versa you will need to use a crossover connector Figure D 2 Pin assignment for a power crossover connector Table D 2 Pin Assignment for Ethernet Cables Pin Number Standard Ethernet 1 Incoming Data RD 2 Incoming Data RD 3 Outgoing Data TD 4 No Connection NC 5 No Connection NC 6 Outgoing Data TD ...

Page 71: ...ndle exposed metal components of the network with caution Shielded Signal Cables Use only shielded cables for connecting peripherals to any HP ProCurve 700wl Series device to reduce the possibility of interference with radio communications services Using shielded cables ensures that you maintain the appropriate EMC classification for the intended environment Pluggable Equipment For pluggable equip...

Page 72: ...cing adjustment maintenance or repair must be performed only by service trained personnel Note for Service Personnel Caution There is a danger of a new battery exploding if it is incorrectly installed Replace the battery only with the same or equivalent type recommended by the manufacturer Discard used batteries according to the manufacturer s instructions ...

Page 73: ...uses telles que la foudre ou des perturbations dans le réseau d alimentation public Manipulez les composants métalliques du réseau avec précautions Aucune pièce contenue à l intérieur de ce produit ne peut être réparée par l utilisateur Tout dépannage réglage entretien ou réparation devra être confié exclusivement à un personnel qualifié Attention Ce produit contient une pile au Lithium remplacabl...

Page 74: ...ndteile des Netzwerkes Vorsicht walten lassen Dieses Gerät enthält innen keine durch den Benutzer zu wartenden Teile Wartungs Anpassungs Instandhaltungs oder Reparaturarbeiten dürfen nur von geschultem Bedienungspersonal durchgeführt werden Vorsicht Dieses Produkt enhalt eine wechselbare Lithium Batterie Es besteht Explosionsgefahr wenn die Batterie durch einen falschen Typ ersetzt wird Entsorgen ...

Page 75: ...pericolose tensioni transitorie ad esempio provocate da lampi o disturbi nella griglia d alimentazione della società elettrica siate cauti nel toccare parti esposte in metallo della rete Nessun componente di questo prodotto può essere riparato dall utente Qualsiasi lavoro di riparazione messa a punto manutenzione o assistenza va effettuato esclusivamente da personale specializzato Attenzione quest...

Page 76: ...dos de vez en cuando a voltajes momentáneos que entrañen peligro rayos o alteraciones en la red de energía eléctrica Manejar con precaución los componentes de metal de la LAN que estén al descubierto Este aparato no contiene pieza alguna susceptible de reparación por parte del usuario Todas las reparaciones ajustes o servicio de mantenimiento debe realizarlos solamente el técnico Curdado Este prod...

Page 77: ...ProCurve Secure Access 700wl Series Installation and Getting Started Guide E 7 Safety Information Japan ...

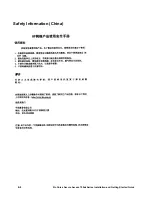
Page 78: ...E 8 ProCurve Secure Access 700wl Series Installation and Getting Started Guide Safety Information China ...

Page 79: ...d in a commercial environment This equipment generates uses and can radiate radio frequency energy and if not installed and used in accordance with the instruction manual may cause interference to radio communications Operation of this equipment in a residential area may cause interference in which case the user will be required to correct the interference at his own expense Canada This product co...

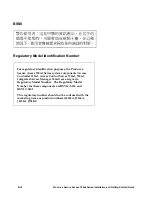
Page 80: ...urve Secure Access 700wl Series system components Access Controller 720wl Access Control Server 740wl 745wl Integrated Access Manager 760wl are assigned a Regulatory Model Number The Regulatory Model Number for these components areRSVLC 0206 and RSVLC 0601 This regulatory number should not be confused with the marketing name or product numbers J8153A J8154A J8155A J9038A ...

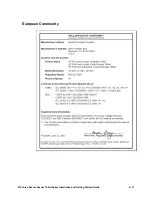
Page 81: ...ProCurve Secure Access 700wl Series Installation and Getting Started Guide E 11 European Community ...

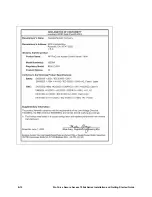
Page 82: ...E 12 ProCurve Secure Access 700wl Series Installation and Getting Started Guide ...

Page 83: ...ootel või selle pakendil olev sümbol näitab et kõnealust toodet ei tohi koos teiste majapidamisjäät metega kõrvaldada Teie kohus on oma seadmete jäätmed kõrvaldada viies need elektri ja elektrooni kaseadmete jäätmete ringlussevõtmiseks selleks ettenähtud kogumispunkti Seadmete jäätmete eraldi kogumine ja ringlussevõtmine kõrvaldamise ajal aitab kaitsta loodusvarasid ning tagada et ringlussev õtmin...

Page 84: ...i oppure il negozio presso il quale è stato acquistato il prodotto Απόρριψη άχρηστου εξοπλισµού από χρήστες σε ιδιωτικά νοικοκυριά στην Ευρωπαϊκή Ένωση Το σύµβολο αυτό στο προϊόν ή τη συσκευασία του υποδεικνύει ότι το συγκεκριµένο προϊόν δεν πρέπει να διατίθεται µαζί µε τα άλλα οικιακά σας απορρίµµατα Αντίθετα είναι δική σας ευθύνη να απορρίψετε τον άχρηστο εξοπλισµό σας παραδίδοντάς τον σε καθορι...

Page 85: ...rite sužinoti daugiau apie tai kur galima pristatyti perdirbtinas įrangos atliekas kreipkitės į savo seniūniją namų ūkio atliekų šalinimo tarnybą arba parduotuvę kurioje įsigijote gaminį Pozbywanie się zużytego sprzętu przez użytkowników w prywatnych gospodarstwach domowych w Unii Europejskiej Ten symbol na produkcie lub jego opakowaniu oznacza że produktu nie wolno wyrzucać do zwykłych pojemników...

Page 86: ...ida de residuos eléctricos y electrónicos para reciclado póngase en contacto con su ayuntamiento con el servicio de eliminación de residuos domésticos o con el establecimiento en el que adquirió el producto Bortskaffande av avfallsprodukter från användare i privathushåll inom Europeiska Unionen Om den här symbolen visas på produkten eller förpackningen betyder det att produkten inte får slängas på...

Page 87: ...hanging via browser interface 3 12 changing via CLI 3 5 3 7 default name and password 3 9 to browser interface 3 9 air flow 2 7 air space 2 7 audience 3 vii B boot prompt serial console 3 4 booting system booting message LCD B 2 browser interface accessing Access Control Server using3 6 3 8 accessing Control Server using 3 7 network installation using 3 8 browser interface login to 3 9 C cables nu...

Page 88: ...ess Controller 3 15 setting via CLI 3 5 grounding chassis 2 7 H hard disk drive 2 2 hardware and accessories kit 2 6 heat dissipation 2 6 C 1 hostname Access Control Server 3 3 setting via browser interface 3 11 setting via CLI 3 5 humidity 2 6 C 1 I I O ports See downlink ports Identity Profile A 2 Incorrect configuration A 1 Incorrect network configuration A 1 Incorrect password A 1 input voltag...

Page 89: ...ing 2 7 front panel button 2 3 input AC 2 6 input current AC 2 6 LED indicator A 1 rear chassis switch 2 3 2 4 site requirements 2 5 specifications 2 5 status LED 2 3 power button 2 3 power cord connecting 2 7 power cord caution 2 7 power switch 2 3 2 4 powering a system on off 2 3 R rack mounting 2 6 to 2 7 regulatory statements E 9 related publications 3 ix Reserved port 2 1 RJ45 connector 2 1 2...

Page 90: ...IX 4 ProCurve Secure Access 700wl Series Installation and Getting Started Guide V voltage input 2 2 output 2 2 W warranty 1 ii web interface see browser interface WEP Key A 2 ...

Page 91: ......
Page 92: ...out notice Copyright 2004 2006 Hewlett Packard Development Company L P Reproduction adaptation or translation without prior written permission is prohibited except as allowed under the copyright laws Printed in the US June 2006 Manual Part Number 5991 4756 5991 4756 ...

Reviews: