Installing the Switch
Installation Procedures
3. Verify the Switch Passes Self Test
Before mounting the switch in its network location, you should first verify it
is working properly by plugging it into a power source and verifying it passes
its self test.
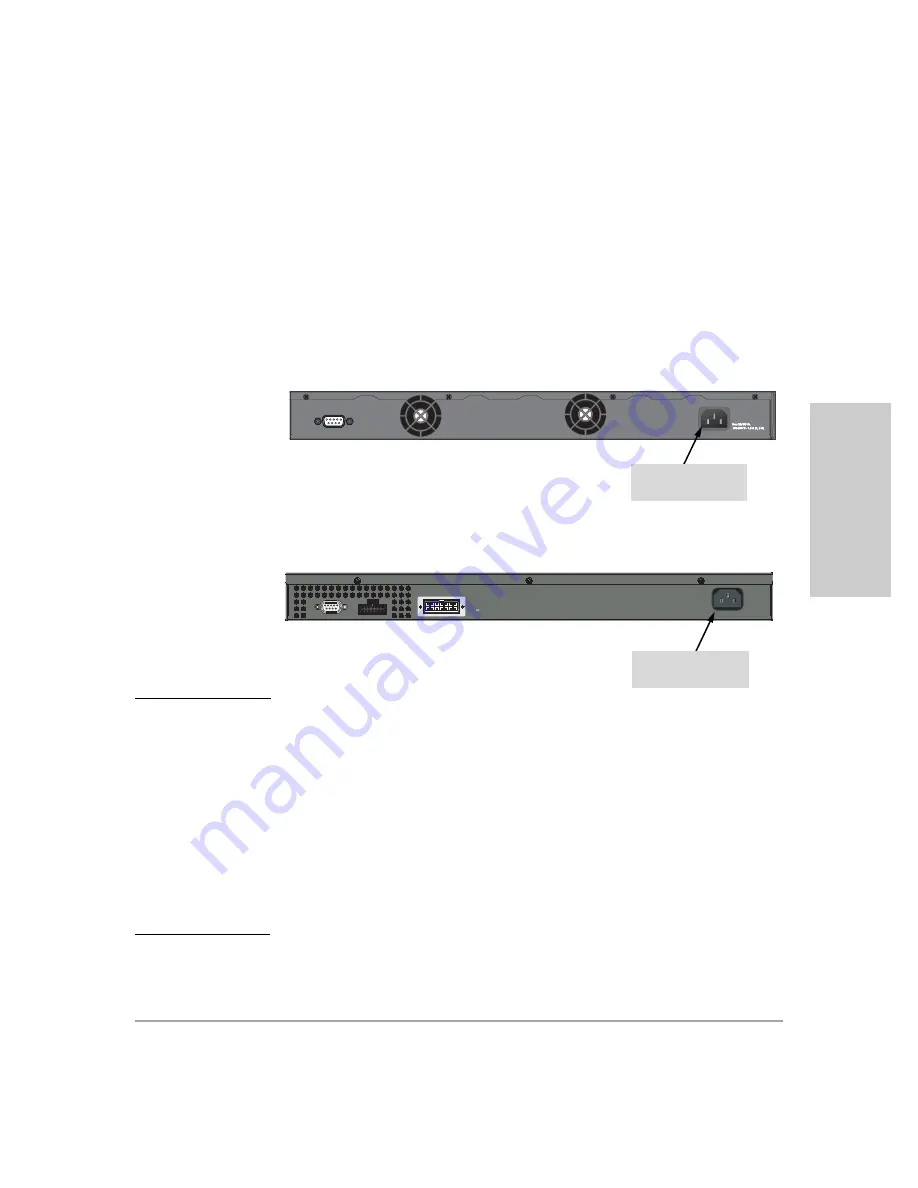
1. Connect the power cord supplied with the switch to the power connector
on the back of the switch, and then into a properly grounded electrical
outlet.
2626 and 2650 non-PWR switches
Console
Connect power cord to
the power connector
2626 PWR and 2650 PWR switches
12V
Console
EPS Input
HP ProCurve
RPS Input
7.5A
Line 50/60 Hz.
100-240 V~ 7.5 A
Connect power cord to
the power connector
N o t e
The Series 2600 Switches do not have a power switch. They are powered on
when the power cord is connected to the switch and to a power source. For
safety, the power outlet should be located near the switch installation.
The switch automatically adjusts to any voltage between 100-240 volts and
either 50 or 60 Hz. There are no voltage range settings required.
If your installation requires a different power cord than the one supplied with
the switch, be sure the cord is adequately sized for the switch’s current
requirements. In addition, be sure to use a power cord displaying the mark of
the safety agency that defines the regulations for power cords in your country.
The mark is your assurance that the power cord can be used safely with the
switch. If the PWR device’s supplied power cord does not fit, contact HP.
Insta
lli
ng th
e Swi
tch
2-9
Summary of Contents for ProCurve Series 2600
Page 2: ......
Page 3: ...ProCurve Series 2600 Switches Installation and Getting Started Guide ...
Page 60: ... This page is intentionally unused ...
Page 82: ... This page is intentionally unused ...
Page 92: ... This page is intentionally unused ...
Page 108: ... This page is intentionally unused ...
Page 115: ......


