8.
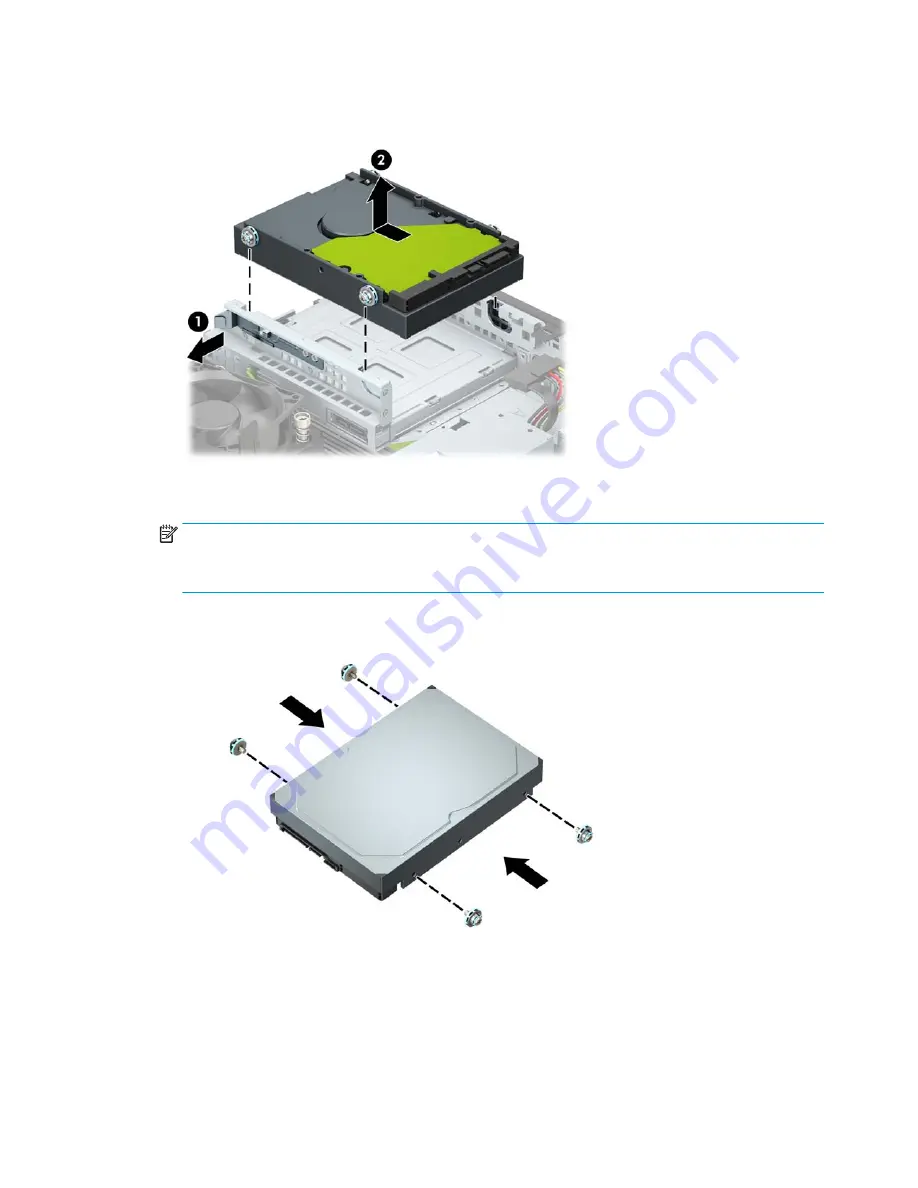
Pull the release lever next to the rear of the hard drive outward (1). While pulling the release lever out,
slide the drive forward until it stops, and then lift the drive up and out of the bay (2).
9.
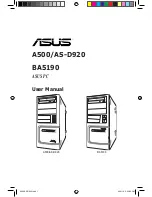
Install mounting screws on the sides of the hard drive using standard 6-32 silver-and-blue mounting
screws.
NOTE:
If replacing a 3.5-inch hard drive, transfer the mounting screws from the old hard drive to the
new hard drive.
You can purchase extra mounting screws from HP.
●
Install four silver-and-blue 6-32 mounting screws (two on each side of the drive).
●
You can also install a 2.5-inch hard drive into a 3.5-inch drive bay using an adapter bracket similar
to the example shown below.
—
Slide the 2.5-inch drive into the 3.5-inch adapter bracket.
28
Chapter 2 Hardware upgrades


