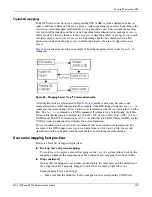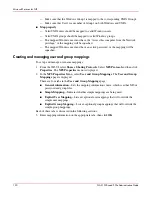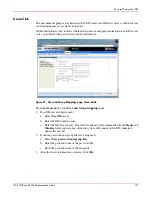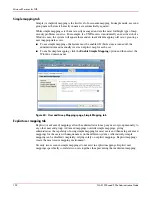
background image

Microsoft Services for NFS

117

NAS 1500s and 500s Administration Guide

Creating a new share

To create a new NFS file share:

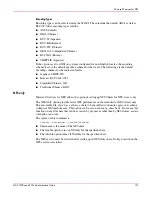
1. From the WebUI main menu, select the Shares tab and then select the Shares option. The 

Shares page is displayed. From the Shares page, click New. The General tab of the 
Create a New Share page is displayed.

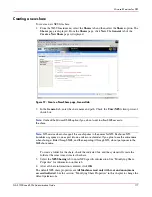
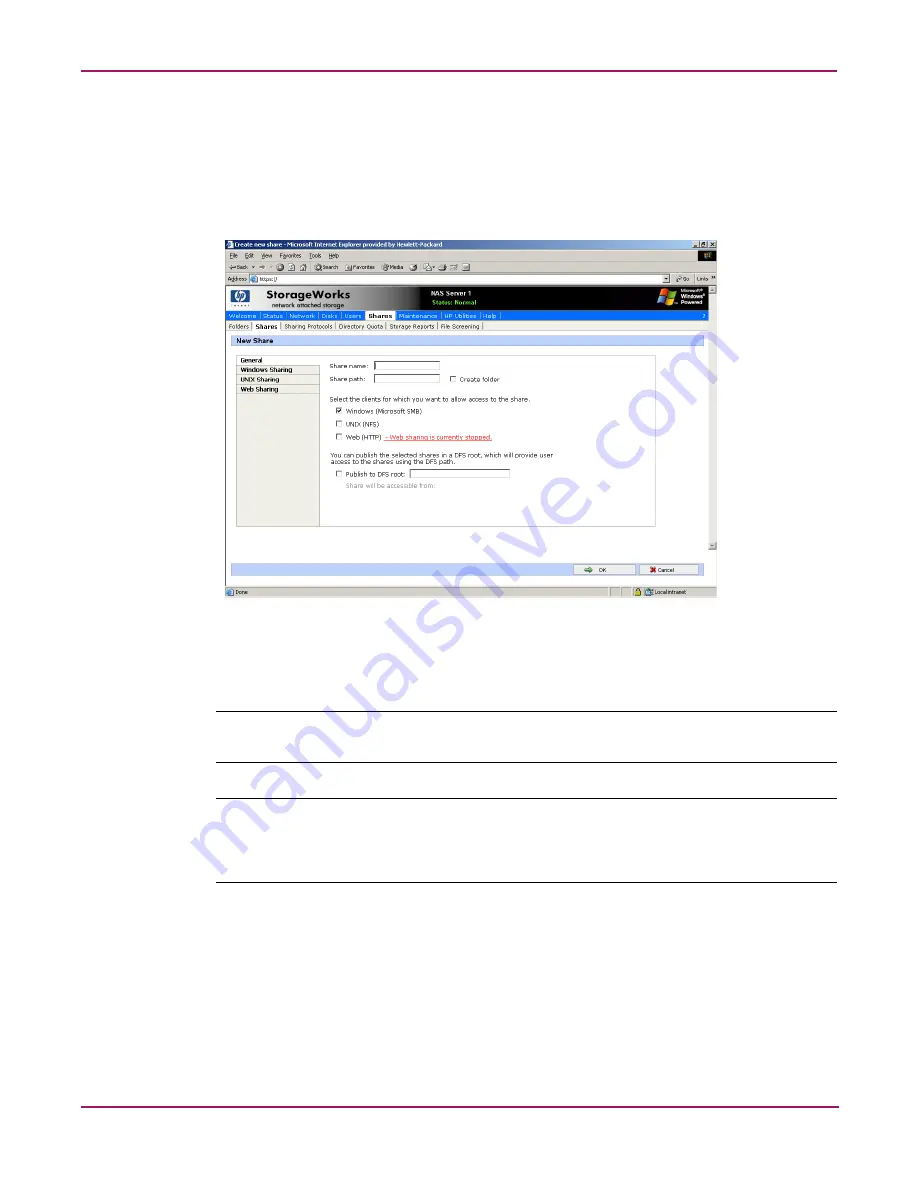
Figure 57:  Create a New Share page, General tab 

2. In the General tab, enter the share name and path. Check the Unix (NFS) client protocol 

check box.

Note:  

Uncheck the Microsoft SMB option if you do not want to allow SMB access to 

the share.

Note:  

NFS service does not support the use of spaces in the names for NFS file shares. NFS 

translates any spaces in an export into an underscore character. If you plan to use the same name 

when sharing a folder through SMB, and then exporting it through NFS, do not put spaces in the 

SMB share name.

To create a folder for the share, check the indicated box and the system will create the 
folder at the same time it creates the share.

3. Select the NFS Sharing tab to enter NFS specific information. See “Modifying Share 

Properties” for information on this tab.

4. After all share information is entered, click OK.

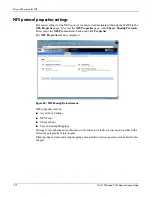
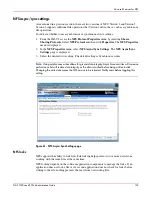
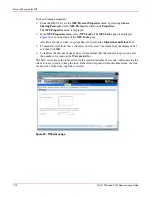
The default NFS share properties are All Machines read only with root and anonymous 
access disallowed
. See the section, “Modifying Share Properties” in this chapter to change the 
default permissions.

Summary of Contents for ProLiant StorageWorks NAS 1500s

Page 1: ...1 First Edition September 2004 Part Number 372607 001 This guide provides information on performing the administrative tasks necessary to manage the HP StorageWorks NAS 1500s and 500s servers Overview information as well as procedural instructions are included in this guide ...

Page 2: ...rranties for HP products and services are set forth in the express warranty statements accompanying such products and services Nothing herein should be construed as constituting an additional warranty HP shall not be liable for technical or editorial errors or omissions contained herein Microsoft MS Windows Windows and Windows NT are U S registered trademarks of Microsoft Corporation UNIX is a reg...

Page 3: ...11 HP authorized reseller 11 1 System Overview 13 Product definition and information 13 Server hardware and software features 13 Product information 13 Product manageability 14 Product redundancy 14 Deployment scenarios 16 Environment scenarios 17 Workgroup 17 Domain 17 User interfaces 18 NAS server web based user interface 18 Menu tabs 18 Status 18 Network 19 Disks 19 Users 19 Shares 19 Maintenan...

Page 4: ...etting up E mail alerts 26 Changing system network settings 27 Setup completion 28 Managing system storage 28 Creating and managing users and groups 28 Creating and managing file shares 28 3 Volume Management 29 WebUI Disks tab 29 Disk Management utility 31 Disk Management guidelines 32 Adaptec Storage Manager 33 Volumes page 34 Scheduling defragmentation 35 Disk quotas 36 Enabling quota managemen...

Page 5: ...Backup and shadow copies 60 5 User and Group Management 61 Overview 61 Domain compared to workgroup environments 61 User and group name planning 62 Managing user names 62 Managing group names 63 Workgroup user and group management 63 Managing local users 64 Adding a new user 65 Deleting a user 65 Modifying a user password 65 Modifying user properties 66 Managing local groups 67 Adding a new group ...

Page 6: ... Services for Macintosh 91 Setting AppleTalk Protocol Properties 92 Protocol parameter settings 92 DFS protocol settings 94 Deploying DFS 94 DFS Administration Tool 95 Accessing the DFS namespace from other computers 95 Setting DFS sharing defaults 96 Creating a local DFS root 96 Deleting a local DFS root 97 Publishing a new share in DFS 98 Publishing an existing share in DFS 99 Removing a publish...

Page 7: ...s access to an NFS share 120 Encoding Types 121 NFS only 121 NFS protocol properties settings 122 NFS async sync settings 123 NFS locks 123 NFS client groups 125 Adding a new client group 126 Deleting a client group 126 Editing client group information 127 NFS user and group mappings 128 Types of mappings 128 Explicit mappings 128 Simple mappings 128 Squashed mappings 129 User name mapping best pr...

Page 8: ...eating and managing NetWare users 142 Adding local NetWare users 142 Enabling local NetWare user accounts 143 Managing NCP volumes shares 144 Creating a new NCP share 144 Modifying NCP share properties 145 9 Remote Access Methods and Monitoring 147 Web based user interface 147 Remote Desktop 147 Telnet Server 148 Enabling Telnet Server 148 Sessions information 148 Index 149 ...

Page 9: ...documentation shipped with your server Conventions Conventions consist of the following Document conventions Text symbols Document conventions This document follows the conventions in Table 1 Table 1 Document conventions Convention Element Blue text Figure 1 Cross reference links Bold Menu items buttons and key tab and box names Italics Text emphasis and document titles in body text Monospace font...

Page 10: ...e to follow directions in the warning could result in bodily harm or death Caution Text set off in this manner indicates that failure to follow directions could result in damage to equipment or data Tip Text in a tip provides additional help to readers by providing nonessential or optional techniques procedures or shortcuts Note Text set off in this manner presents commentary sidelights or interes...

Page 11: ...mation available before calling Technical support registration number if applicable Product serial numbers Product model names and numbers Applicable error messages Operating system type and revision level Detailed specific questions HP storage web site The HP web site has the latest information on this product as well as the latest drivers Access storage at http www hp com country us eng prodserv...

Page 12: ...About this Guide 12 NAS 1500s and 500s Administration Guide ...

Page 13: ... Guide or the HP StorageWorks NAS 500s Installation Guide for a listing of server hardware and software features For specific software product recommendations go to the HP website http h18000 www1 hp com products storageworks nas supportedsoftware html Product information The NAS server provides performance gains over general purpose servers by integrating optimized hardware components and special...

Page 14: ... failure The NAS server is configured with dual boot capability When powered on the NAS server can boot using a primary OS or a secondary recovery OS The primary OS logical drive resides on disk 0 and is mirrored on disk 1 while the secondary OS logical drive resides on disk 2 and is mirrored on disk 3 If a single disk failure occurs the system will still function off the mirrored disk If the prim...

Page 15: ...drives including the data volume and restore them to a factory default state Note After system restoration data volume drive letters must be reassigned The secondary OS will need to be maintained in the same way as the primary OS Hotfixes installed on the primary OS are not mirrored to the secondary OS Any installations that are performed on the primary OS also need to be performed on the secondar...

Page 16: ...uture transition from Windows to Linux can deploy the NAS server with confidence that it can support both CIFS and NFS simultaneously assuring not only a smooth transition but also a firm protection of their investment Remote office deployment Frequently branch offices and other remote locations lack dedicated IT staff members An administrator located in a central location can use the WebUI of the...

Page 17: ...e workgroup Workgroups are typical for very small deployments where little or no computing environment planning is required Domain When operating in a Windows NT or Active Directory domain environment the NAS server is a member of the domain and the domain controller is the repository of all account information Client machines are also members of the domain and users log on to the domain through t...

Page 18: ...t share management and local storage management Refer to the HP StorageWorks NAS server installation guide for detailed information on using the Rapid Startup Wizard for initial setup To access the WebUI launch a Web browser and enter the following in the address field https your NAS machine name or IP Address 3202 The default user name is Administrator The default password is hpinvent Online help...

Page 19: ...ol parameters are entered in this Shares option See Chapter 6 for additional information Maintenance Maintenance tasks include setting date and time performing system restarts and shutdowns viewing audit logs setting up Email alerts linking to remote management and selecting and configuring your UPS HP Utilities Access File and Print Services for NetWare Help This option contains help information ...

Page 20: ... Remote Desktop in Chapter 2 Figure 3 NAS server desktop The NAS Management Console icon is available from the Desktop NAS Management Console Click this icon to access the following folders Core Operating System is used to manage local users and groups access performance logs and alerts and manage the event viewer Disk System contains access to local disk management including a volume list and a g...

Page 21: ...l procedures are performed using the NAS Web Based User Interface WebUI Note The NAS server desktop can be accessed via a directly connected keyboard mouse and monitor or through Remote Desktop Basic administrative procedures Basic administrative procedures include Setting the system date and time Shutting down or restarting the server Viewing and maintaining audit logs Using Remote Desktop Settin...

Page 22: ...ide Figure 4 Maintenance menu Setting the system date and time To change the system date or time 1 From the WebUI select Maintenance and Date Time The Date and Time Settings page is displayed 2 Enter the new values and then click OK The Maintenance menu is displayed Figure 5 Date and Time page ...

Page 23: ...e NAS server WebUI select Maintenance Shutdown Several options are displayed Restart Shut Down and Scheduled Shutdown Figure 6 Shutdown menu a To shut down and automatically restart the server click Restart b To shut down and power off the server click Shut Down c To schedule a shutdown click Scheduled Shutdown 2 Regardless of the choice a confirmation prompt is displayed After verifying that this...

Page 24: ...s from the WebUI select Maintenance Logs The Logs menu is displayed Figure 7 Logs menu A variety of logs are available and are listed in Figure 7 Each log has viewing clearing printing and saving options Note You should not use the WebUI to view log files greater than 2 MB Select Log properties to adjust the maximum file size or download the file to view Note NFS logging is disabled by default Ena...

Page 25: ...mote Desktop are allowed to operate at the same time After completing an application do not use the window close feature to close that session of Remote Desktop Click Start Log Off Administrator to exit Remote Desktop Improper closure of Remote Desktop Certain operations can leave the utilities running if the browser is closed versus exiting from the program via the application menu or logging off...

Page 26: ...ing in the status bar and page is limited to the following areas WebUI Alerts NTBackup backup started NTBackup restore started Defrag started UPS power failure Restart pending Shutdown pending DFS not configured Date and time not configured No certificate Quota management alerts Event Log Messages NTBackup Information UPS power failed UPS power restored UPS invalid config UPS system shutdown Quota...

Page 27: ...Network properties are entered and managed from the Network menu Most of these settings are entered as part of the Rapid Startup process Settings made from this menu include adding the NAS server to a domain Online help is available for these settings Figure 9 is an illustration of the Network settings menu Figure 9 Network menu ...

Page 28: ...mation on managing system storage Chapter 3 discusses disk management procedures Chapter 4 discusses snapshot shadow copy management procedures Chapter 6 discusses folder and share management procedures Creating and managing users and groups User and group information and permissions determine whether a user can access files If the NAS device is deployed into a workgroup environment this user and ...

Page 29: ...ted by the use of the WebUI This chapter documents the contents of the WebUI for volume management WebUI Disks tab The primary web page for facilitating disks and volume creation is illustrated in Figure 10 From this page the administrator can create and manage volumes via the WebUI To manage volumes via the WebUI click on Disks Figure 10 Disks tab ...

Page 30: ...view information about managed systems controllers disk groups and so on Volumes Manage disk space usage by enabling quotas scheduling disk defragmentation and performing detailed volume management using the Manage item Shadow Copies Manage shadow copies of shared folders on the volume Shadow copies are read only copies of shared data that provide users with a way to view and if necessary restore ...

Page 31: ...erant disk systems Most disk related tasks can be preformed in Disk Management without restarting the system or interrupting users most configuration changes take effect immediately A complete online help facility is provided with the Disk Management Utility for assistance in using the product Figure 11 Disk Management utility Note When the Disk Management utility is accessed the Remote Desktop co...

Page 32: ...rtition on the disk can be extended unless the disk is changed to dynamic Basic disks can be converted to dynamic without bringing the system offline or loss of data but the volume will be unavailable during the conversion Basic disks can contain up to four primary partitions or three primary partitions and one extended partition Format drives with a 16 K allocation size for best support of snapsh...

Page 33: ...ec Storage Manager Use the Adaptec Storage Manager to configure administer and monitor controllers that are installed locally or remotely in servers or storage enclosures There is an extensive Help system available in the application Figure 12 Adaptec Storage Manager ...

Page 34: ...s click the Manage button Figure 13 Volumes tab Table 3 Volumes Page Object Task Selector Option Task Advanced Volume Management Select to display the Disk Management utility Schedule Defrag Select to schedule defragmentation for the selected volume Set Default Quota Select to set quota limits to manage use of the volume Settings on this page apply to new users and any users for whom user quota en...

Page 35: ...On the Manage the defragmentation schedule for VolumeName page select the Schedule defragmentation for this volume check box 6 Select the frequency Once Weekly or Monthly 7 Use the remaining controls to specify when defragmentation will occur The available controls change according to the frequency that is selected 8 Click OK To disable defragmentation for a volume 1 On the primary navigation bar ...

Page 36: ...llowed to use The warning level specifies the point at which a user is nearing his or her quota limit For example a user s disk quota limit can be set to 50 megabytes MB and the disk quota warning level to 45 MB In this case the user can store no more than 50 MB on the volume If the user stores more than 45 MB on the volume the disk quota system logs a system event In addition it is possible to sp...

Page 37: ...enabling disk quotas on a volume any users with write access to the volume who have not exceeded their quota limit can store data on the volume The first time a user writes data to a quota enabled volume default values for disk space limit and warning level are automatically assigned by the quota system To disable quota management on a volume 1 On the primary navigation bar click Disks 2 Click Vol...

Page 38: ...as page allows the administrator to set delete or change disk quotas for any user on the server To set or change quota entries on the server 1 On the primary navigation bar click Disks 2 Click Volumes 3 Select the volume to manage 4 From the Tasks list click Set Quota Entries Figure 14 Setting user quotas ...

Page 39: ... Quota Entry 2 Select a user 3 Set the limit 4 Set the warning level 5 Click OK Figure 15 Add new quota entry To change a quota entry 1 Select the quota to change 2 Click Properties 3 Change the limit 4 Change the warning level 5 Click OK To delete a quota entry 1 Select the quota to change 2 Click Delete ...

Page 40: ...s to the specified disk assign Assigns a drive letter or mount point to the volume with focus convert basic Converts an empty dynamic disk to a basic disk convert dynamic Converts a basic disk into a dynamic disk Any existing partitions on the disk become simple volumes create volume simple Creates a simple volume After creating the volume the focus automatically shifts to the new volume exit Exit...

Page 41: ...and Support search on DiskPart Example of using DiskPart The following example shows how to configure a volume on the NAS server In the cmd window type c diskpart DISKPART Rescan DISKPART select disk 2 DISKPART convert dynamic DISKPART REM Create a simple volume DISKPART create volume simple size 4000 DISKPART REM Assign drive letter F to the volume DISKPART assign letter F DISKPART list vol DISKP...

Page 42: ...Volume Management 42 NAS 1500s and 500s Administration Guide ...

Page 43: ...me In the snapshot s original form it takes up no space since blocks are not moved until an update to the disk occurs By using shadow copies a NAS server can maintain a set of previous versions of all files on the selected volumes End users access the file or folder by using a separate client add on program which enables them to view the file in Windows Explorer Accessing previous versions of file...

Page 44: ...s when the shadow copies were taken For example if a user is denied permission to read a file that user would not be able to restore a previous version of the file or be able to read the file after it has been restored Although shadow copies are taken for an entire volume users must use shared folders to access shadow copies Administrators on the local server must also specify the servername share...

Page 45: ...he source volume Remember that when the storage limit is reached older versions of the shadow copies are deleted and cannot be restored When determining the amount of space to allocate for storing shadow copies consider both the number and size of files that are being copied as well as the frequency of changes between copies For example 100 files that only change monthly require less storage space...

Page 46: ...ease of setup and maintenance there may be a reduction in performance and reliability Caution If shadow copies are stored on the same volume as the user files note that a burst of disk input output I O can cause all shadow copies to be deleted If the sudden deletion of shadow copies is unacceptable to administrators or end users it is best to use a separate volume on separate disks to store shadow...

Page 47: ...tfsinfo command To change the cluster size on a volume that contains data backup the data on the volume reformat it using the new cluster size and then restore the data Mounted drives A mounted drive is a local volume attached to an empty folder called a mount point on an NTFS volume When enabling shadow copies on a volume that contains mounted drives the mounted drives are not included when shado...

Page 48: ...elect the check box next to the volume name and then choose a task from the Tasks list Copies Lists the number of shadow copies on the volume Used Space Lists the total disk space that is used by the shadow copies on the volume Shares Lists the number of shared folders that reside on the volume This information can help determine whether to enable shadow copies on a volume A greater number of shar...

Page 49: ...n can be altered to reside on a dedicated volume separate from the volumes containing files shares See Figure 18 Table 6 Shadow Copies Tasks Task Description Enable Click to enable Shadow Copies on the selected volume Disable Click to enable Shadow Copies on the selected volume New Shadow Copy Click to immediately create a new shadow copy on the selected volume View Shadow Copies Click to view a l...

Page 50: ...t too high takes up valuable storage space Setting the limit too low can cause shadow copies to be purged too soon or not created at all By storing shadow copies on a separate volume space for Shadow Copies may be manage separately limits can generally be set higher or set to No Limit See the properties tab of the shadow copy page for a volume to alter the cache file location covered later in this...

Page 51: ... to enable the Shadow Copies service on Note After the first shadow copy is created it cannot be relocated Relocate the cache file by altering the cache file location under Properties prior to enabling shadow copy See Viewing Shadow Copy Properties in this chapter 4 Click Enable To create a shadow copy on a volume 1 On the primary navigation bar click Disks 2 Click the Shadow Copies tab 3 On the M...

Page 52: ...volume 4 In the Tasks list click Set Schedule 5 On the Shadow Copy Schedules page click New 6 Select a frequency Once Daily Weekly or Monthly 7 Use the remaining controls to specify the recurrence pattern and the starting date and time The available controls change according to the frequency selected 8 Click OK Deleting a shadow copy schedule To delete a shadow copy schedule on a volume 1 On the p...

Page 53: ...lable disks and the space available on each is presented at the bottom of the page Managing the cache files on a separate disk is recommended Note If shadow copies have already been enabled the cache file location is grayed out To change this location after shadow copies have been enabled all shadow copies must be deleted and cannot be recovered Remember enabling Shadow Copies creates a Shadow Cop...

Page 54: ... bar click Disks 2 Click the Shadow Copies tab 3 On the Manage Shadow Copies page select one or more volumes on which to disable shadow copies 4 In the Tasks list click Disable The Disable Shadow Copies page identifies the volume for which shadow copies will be disabled 5 Click OK to delete all existing shadow copies and settings for the volume Caution When the Shadow Copies service is disabled al...

Page 55: ...te Desktop To access Shadow Copies from the NAS Desktop 1 From the WebUI select Remote Desktop from the Maintenance tab 2 Click on My Computer 3 Select the volume 4 Right click on the volume name and select Properties 5 Click the Shadow Copies tab The user interface provides the same functionality found in the WebUI but in Win32 form See Figure 20 Figure 20 Accessing Shadow Copies from My Computer...

Page 56: ...tWare shares Consequently users of these protocols cannot use Shadow Copies for Shared Folders to independently retrieve previous versions of their files However administrators can take advantage of Shadow Copies for Shared Folders to restore files on behalf of these users SMB shadow copies Windows users can independently access previous versions of files stored on SMB shares via the Shadow Copies...

Page 57: ...m the folder history and so on NFS shadow copies UNIX users can independently access previous versions of files stored on NFS shares via the NFS client no additional software is required Server for NFS exposes each of a share s available shadow copies as a pseudo subdirectory of the share Each of these pseudo subdirectories is displayed in exactly the same way as a regular subdirectory is displaye...

Page 58: ...stem for the arrival or removal of shadow copies and updates the root directory view accordingly Clients then capture the updated view the next time they issue a directory read on the root of the share Recovery of files or folders There are three common situations that may require recovery of files or folders Accidental file deletion the most common situation Accidental file replacement which may ...

Page 59: ... recover The view may be navigated multiple folders deep 6 Select restore to restore the file or folder to its original location Selecting copy will allow the placement of the file or folder to a new location Figure 22 Recovering a deleted file or folder Recovering an overwritten or corrupted file Recovering an overwritten or corrupted file is easier than recovering a deleted file because the file...

Page 60: ... on the network via the client application and only at a file or folder level as opposed to the entire volume Hence the standard backup associated with a volume backup will not work to back up the previous versions of the file system To answer this particular issue Shadow Copies are available for back up in two situations If the backup software in question supports the use of Shadow Copies and can...

Page 61: ...twork drive or a client machine a user sends a logon credential to the server This credential includes the username password and if appropriate domain information Using the credential the server authenticates and provides the corresponding access to the user When a NAS server is deployed into a workgroup environment all user and group account access permissions to file resources are stored locally...

Page 62: ... specific conventions following general guidelines makes administration simpler and more efficient Because CIFS SMB is dependent on users and groups to grant appropriate access levels to file shares CIFS SMB administration benefits from a consistent user and group administration strategy Managing user names Usernames should reflect a logical relationship between the username and the person who use...

Page 63: ...rator can create a Data Users ROnly group and a Data Users RWrite group to contain users that have read only or read write access on the share respectively Workgroup user and group management In a workgroup environment users and groups are managed through the WebUI of the NAS server Within the Users option there are two choices Managing local users Managing local groups User and group administrati...

Page 64: ...es When the Local Users page is initially displayed only the New option is available After an existing user is selected the additional actions are displayed Each of these options is discussed in the following paragraphs Existing user records can be retrieved in one of two ways By entering the user s User Name or Full Name in the Search fields to retrieve a specific user record To redisplay the com...

Page 65: ...ete a user 1 In the Local Users page select the user to delete and then click Delete The Delete User page is displayed including a warning note about deleting users 2 To delete the user click OK The user is deleted and the Local Users page is displayed again Modifying a user password Follow these steps to modify a user password 1 In the Local Users page select the user whose password needs to be c...

Page 66: ...fied Then click Properties The General information page of the Properties page is displayed Figure 25 is an illustration of the User Properties page Figure 25 User Properties page 2 The following information can be changed or set User name Full name Description Home Directory Disable this user account Password expiration 3 After completing the changes click OK The Local Users page is displayed aga...

Page 67: ...leting a group Modifying group properties including user memberships Local groups in a workgroup environment are managed through the Users option in the WebUI In the WebUI under Users Local Groups is the Local Groups on Server page All workgroup group administration tasks are performed in the Local Groups on Server Appliance page Figure 26 Local Groups page ...

Page 68: ...r members of this group click Members See Modifying Group Properties for procedural instructions on entering group members 4 After all group information is entered click OK The group is added and the Local Groups page is displayed again Deleting a group To delete a group 1 From the Local Groups page select the group to delete and then click Delete 2 The Delete Group page is displayed Verify that t...

Page 69: ...hese tabs is discussed in the following paragraphs 2 Enter the desired changes in each of the tabs Then click OK The Local Groups page is displayed again General Tab Within the General tab basic group information can be changed including Group name Description Members Tab To indicate or change the members of a group click the Members tab Within this page users are added and removed from a group Tw...

Page 70: ...K to save the changes To add user or group from a domain to this group the scroll bar at the right of the screen may need to be used to scroll up the screen display 1 Enter the user or group name to include in the indicated format domain username 2 Select Add 3 Enter a domain username and password 4 Click OK to complete adding the domain user or group Note To add domain users and groups to a local...

Page 71: ...rmation about Windows file system security is available on the Microsoft website www microsoft com All procedures in this chapter are documented using the WebUI In addition to this guide you may use the WebUI online help Folder management Volumes and folders on any system are used to organize data Regardless of system size systematic structuring and naming conventions of volumes and folders eases ...

Page 72: ...ame whether navigating to a volume or a folder 1 To navigate to a specific volume or folder from the WebUI select Shares and then Folders Initially the Volumes page is displayed This initial page displays all system volumes Figure 30 Volumes page 2 From this page navigate to a specific folder by selecting the appropriate volume and then clicking Manage Folders The Folders page is displayed with a ...

Page 73: ...en Repeat this searching and opening process until the desired folder is opened See Figure 31 for an example of Folders page Figure 31 Folders page After accessing the desired folder the following actions can be performed Creating a new folder Deleting a folder Modifying folder properties Creating a new share for the volume or folder Managing shares for the volume or folder ...

Page 74: ...a New Folder page General tab 3 In the Compress tab indicate whether and how this folder and its contents are to be compressed 4 After all information for the new folder is entered click OK Deleting a folder To delete a folder 1 From the Shares directory navigate to the folder to delete Select the folder and then click Delete The Delete Folder page is displayed Summary information about the deleti...

Page 75: ... After all changes have been completed click OK The Folders page is displayed again Creating a new share for a volume or folder Within the WebUI there are two access points to the same screens used to create file shares A share can be created for a folder while working with that folder in the Folders screens A share can be created and if necessary new folders can be created while working with file...

Page 76: ...al tab 3 Enter the information for the share including the name of the share the allowed protocols and corresponding permissions Note The Share path is the path of the previously selected volume or folder This field is automatically completed by the system 4 Select the appropriate tab to enter protocol specific information See the Managing Shares section for detailed information about these entrie...

Page 77: ... Shared Folders page is displayed All associated shares for that folder or volume are listed 2 To create a new share click New The Create a New Share page is displayed Because the screens are the same whether shares are managed through the Folders menu or the Shares menu the procedures are only documented once See Creating a New Share in the Share Management section for detailed procedural instruc...

Page 78: ...plorer navigate to the folder or file that needs to be changed and then right click the folder 2 Select Properties and then select the Security tab Figure 35 Security Properties dialog box Several options are available in the Security tab dialog box To add users and groups to the permissions list click Add Then follow the dialog box instructions To remove users and groups from the permissions list...

Page 79: ...d Figure 36 illustrates the properties available on the Advanced Security Settings page Figure 36 Advanced security settings To modify specific permissions assigned to a particular user or group for a selected file or folder in the Advanced screen 1 Select the desired user or group 2 Click Edit ...

Page 80: ...cally disabled Figure 37 illustrates the Edit screen and some of the permissions Figure 37 User or Group Permission Entry dialog box Other functionality available in the Advanced Security Settings tab is illustrated in Figure 36 and includes Add a new user or group Click Add and then follow the dialog box instructions Remove a user or group Click Remove Replace permission entries on all child obje...

Page 81: ... files or folders Users or groups can be added deleted viewed or modified through the advanced Advanced Security Settings Auditing tab The Auditing tab dialog box is illustrated in Figure 38 Figure 38 Advanced Security Settings Auditing tab dialog box 4 Click Add to display the Select User or Group dialog box Figure 39 Select User or Group dialog box Note Click Advanced to search for users or grou...

Page 82: ...reen that is displayed Figure 40 Auditing Entry dialog box for folder name NTSF Test 7 Select the desired Successful and Failed audits for the user or group as shown in Figure 40 8 Click OK Note Auditing must be enabled to configure this information Use the local Computer Policy Editor to configure the audit policy on the NAS server ...

Page 83: ...iles and then manually apply the appropriate security configurations Figure 41 illustrates the Owner tab Figure 41 Advanced Security Settings Owner tab dialog box The current owner of the file or folder is listed at the top of the screen To take ownership 1 Select the appropriate user or group from the Change owner to list 2 If it is also necessary to take ownership of subfolders and files enable ...

Page 84: ...s either having too many shares of a very specific nature or of having very few shares of a generic nature For example shares for general usage are easier to set up in the beginning but can cause problems later Frequently a better approach is to create separate shares with a specific purpose or group of users in mind However creating too many shares also has its drawbacks Take care to avoid creati...

Page 85: ...directory apply instead This method results in a hierarchical security model where the network protocol permissions and the file permissions work together to provide appropriate security for shares on the device Note Share permissions and file level permissions are implemented separately It is possible for files on a file system to have different permissions from those applied to a share When this...

Page 86: ...ients because some do not work with NFS exports that contain a space in the export name If you plan to use the same name when sharing a folder through CIFS and then exporting it through NFS do not put spaces in the CIFS share name NFS service does not support exporting a child folder when its parent folder has already been exported An NFS client can access a child folder by selecting the parent fo...

Page 87: ... path Client protocol types To create a folder for the new share check the indicated box and the system will create the folder at the same time it creates the share Protocol specific tabs are available to enter sharing and permissions information for each sharing type See Modifying Share Properties for detailed information on these tabs 3 After entering all share information click OK Deleting a sh...

Page 88: ... Properties page is displayed Figure 43 Share Properties page General tab The name and path of the selected share is displayed 2 To enter or change client protocol information check the appropriate boxes and then click the corresponding tabs Windows Sharing UNIX Sharing Web Sharing HTTP Each of these tabs is discussed in the following paragraphs 3 After all share information has been entered click...

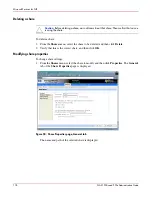
Page 89: ...s for this share To add a new user or group either select a user or group from the box at the bottom right of the screen or manually enter the user or group name in the Add a user or group box and then click Add That user or group is added to the Permissions box To remove access to a currently approved user or group select the user or group from the Permissions box and then click Remove To indicat...

Page 90: ...ad or write to the share No access Use this permission to restrict all access to the share 3 Select whether or not to allow root access Read only Root Use this permission to restrict write access to the share Use this permission to assign administrative access to the share This will allow the client computer to have root access to the NFS share Map the UNIX root user to the Windows user Administra...

Page 91: ...e AppleTalk Protocol 1 From the desktop of the NAS server click Start navigate to Settings Network Connections Right click Local Area Connection and then click Properties 2 Click Install The Select Network Component Type dialog box is displayed Figure 46 is an example of the Select Network Component Type dialog box Figure 46 Local Area Connection Properties page Install option 3 Select Protocol an...

Page 92: ...oose Apple Clear Text or Microsoft To set up AppleTalk shares from the WebUI 1 Click Shares 2 Click Shares again 3 Click New 4 Type in the share name and share path 5 Check Apple MacIntosh Uncheck other file types if necessary 6 Click AppleTalk Sharing 7 Enter a user limit 8 Enter password information 9 Indicate whether the share has read only permission or read write permission 10 After all Apple...

Page 93: ...tocols The File Sharing Protocols page is displayed Figure 47 File Sharing Protocols page 2 Protocols and their statuses are listed The following options are available Enabling a protocol Disabling a protocol Modifying Protocol Settings Because enabling and disabling a protocol are self explanatory only modifying protocol specific settings is described in this section ...

Page 94: ...as a domain root distributed file system The type of a distributed file system determines which client computers can access the distributed file system A stand alone DFS root Does not use Active Directory to manage DFS Cannot have more than one root on a server Does not support automatic file replication using the File Replication service FRS Is not fault tolerant and if the root fails the entire ...

Page 95: ...nline help In addition general information on DFS may be found at http www microsoft com windowsserver2003 techinfo overview dfs mspx Accessing the DFS namespace from other computers In addition to the server based DFS component of the Windows Storage Server 2003 family there is a client based DFS component The DFS client caches a referral to a DFS root or a DFS link for a specific length of time ...

Page 96: ... to the local DFS root select Publish new shares to the local DFS root To set the default to publish the share to another DFS root select Publish new shares to a domain DFS root or a stand alone DFS root on a different server In the DFS root box type the path of the default DFS root To not publish the share to a DFS root select Do not publish new shares to a DFS root 5 Choose OK Creating a local D...

Page 97: ...one DFS root on the server only The Distributed File System administrative tool must be used to manage Domain DFS Roots Hence if there is more than one root on the server the first root in alphabetical order with local stand alone roots grouped ahead of domain roots will be available to be deleted If only domain roots exist on the server the first domain root will be listed but it cannot be delete...

Page 98: ...h they exist on different NAS devices drives or shares points To publish a share in a DFS root Figure 51 DFS share example 1 Select Shares from the WebUI 2 Type in a new share name 3 Type in a folder name select the checkbox Create folder if appropriate 4 Verify that the Windows checkbox is selected DFS is dependent on the SMB protocol 5 Under DFS check the box if unchecked Note The default behavi...

Page 99: ...re in DFS To enable an existing shares for DFS perform the following steps 1 Select Shares from the WebUI 2 Select the target share from the table and select Publish in DFS 3 Enter the name of the DFS root to publish the share too 4 Click OK The share will appear in the DFS underneath the DFS root Removing a published share from DFS Once a share is published in DFS it may be removed from the virtu...

Page 100: ...ive limits with two real time space alarms The Directory Quota feature includes the following components Active and passive space limits on directories Best practice storage resource management policies A severe alarm threshold A warning alarm threshold Auto discovery of drives Customized messages Alarms sent to the event log Alarms sent to the user Storage reports that can be sent to an intranet ...

Page 101: ...ue However if the cluster size is 8 KB Windows Storage Server 2003 will actually allocate 8 KB for the file The user has now used 104 KB and while this is allowed future attempts to create or extend files will fail Establishing directory quotas Directory quotas are established in a two part fashion First a policy is defined using the policies selection from the Directories Policy Page After a poli...

Page 102: ...hares default policies can be set in advance for new devices added to the system via the preferences button on the Directory Quota Page File screening File screening allows the administrator to limit or monitor files based on extension for example disallow all pst and mp3 files It should be noted that the filter is merely based on extensions and not the content of the files Hence if a file extensi...

Page 103: ...s Storage reports allow the administrator to analyze the contents of the storage server via standard reports for common tasks The reports can be displayed using text simple HTML tables or Active HTML When using Active HTML the ActiveX control provides graphs A complete online help guide in the WebUI is provided for reporting via the in the right hand corner of the UI Reports can be scheduled or pr...

Page 104: ...is needed to choose the correct printer driver The manufacturer and model are usually enough to uniquely identify the printer and its language However some printers support multiple languages and the configuration printout usually lists them Also the configuration printout often lists installed options such as extra memory paper trays envelope feeders and duplex units 3 Choose a printer name Users...

Page 105: ...ppears and click Finish If the wizard is not able to connect the Additional Port Information Required page appears a Verify that the IP address or name that was entered is correct b Select Standard to identify the printer network adapter A list of manufacturers and models of the network adapters will be displayed Select the appropriate printer from the Standard list c If the printer network adapte...

Page 106: ... Add Standard TCP IP Printer Port Wizard starts Click Next 6 Type the name or IP address of the printer The IP address is usually listed on the printer configuration page The wizard completes the Port Name field Click Next 7 The wizard attempts to connect to the printer If the wizard is able to connect the Completing the Add Standard TCP IP Printer Port Wizard page appears and click Finish If the ...

Page 107: ...ab 4 Select Additional Drivers 5 Select the desired operating systems and click OK 6 A dialog will appear to add the additional drivers from disk Installing print services for UNIX 1 Log on as administrator or as a member of the Administrators group 2 Click Start Control Panel and then click Add or Remove Programs 3 Click Add Remove Windows Components 4 In the Components list click Other Network F...

Page 108: ...anagement software for remotely installing configuring and managing a wide variety of HP and non HP network peripherals using only a standard Web browser The following URL provides additional feature information plus a link to download the software http h10010 www1 hp com wwpc JAVA offweb vac us en en network_software wja_overvi ew html ...

Page 109: ... used by Windows platforms With Server for NFS properly configured the administrator can create shares that are simultaneously accessible by multiple client types For example some of the options for shares include configurations for CIFS SMB sharing only simultaneous NFS CIFS SMB sharing simultaneous NFS CIFS SMB HTTP sharing or simply NFS only sharing Authenticating user access NFS export access ...

Page 110: ...uals or groups and to squash all others down to restricted or no access Squashing enables the administrator to allow permissions instead of denying access to all the individuals who are not supposed to have access See NFS User and Group Mappings later in this chapter for specific information about creating and maintaining mappings S4U2 functionality Windows Server 2003 Active Directory now has sup...

Page 111: ...File System Click Settings Figure 54 is an example of the Server for NFS user interface 2 In the Computer name box of the user mapping screen type the name of the computer designated for user mapping and authentication 3 Localhost is the computer name assigned by default on the NAS server To control user mapping from a different computer enter the name of that computer Note If a machine other than...

Page 112: ...on 1 Use Remote Desktop to access the NAS Management Console click File Sharing Services for UNIX Server for NFS Click the Logging tab 2 To log events to the event viewer application log click the check box for Log events to event log 3 To log selected event types click the check box for Log events in this file on the screen 4 Enter a filename or use the default filename provided rootdrive MSNFS l...

Page 113: ...her Server for NFS server settings include those that affect how file names are presented to NFS clients such as allowing hidden files and allowing case sensitive lookups Note The NFS Server service needs to be restarted when changing these settings Notify users when stopping and restarting the NFS Server service Use Remote Desktop to access the NAS Management Console Click File Sharing Microsoft ...

Page 114: ...where the Authentication software is being installed use Windows Explorer to a Open the shared directory containing setup exe b Double click the file to open it Windows Installer is opened Note If the domain controller used does not have Windows Installer installed locate the file InstMSI exe on the SFU 3 5 directory and run it After this installation the Windows Installer program starts when open...

Page 115: ...he remaining instructions in the Wizard Note NFS users can be authenticated using either Windows domain accounts or local accounts on the Windows server Server for NFS Authentication must be installed on all domain controllers in the domain if NFS users will be authenticated using domain accounts Server for NFS Authentication is always installed on the computer running Server for NFS ...

Page 116: ...lders and Files permissions The UNIX execute bit is represented within NTFS as the Traverse Folder Execute File permission NFS file shares NFS file shares are created in the same manner as other file shares however there are some unique settings Procedures for creating and managing NFS file shares are documented in the same sections as creating file shares for other protocols See the Folder and Sh...

Page 117: ...does not support the use of spaces in the names for NFS file shares NFS translates any spaces in an export into an underscore character If you plan to use the same name when sharing a folder through SMB and then exporting it through NFS do not put spaces in the SMB share name To create a folder for the share check the indicated box and the system will create the folder at the same time it creates ...

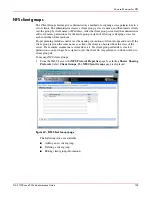
Page 118: ... 1 From the Shares menu select the share to be deleted and then click Delete 2 Verify that this is the correct share and then click OK Modifying share properties To change share settings 1 From the Shares menu select the share to modify and then click Properties The General tab of the Share Properties page is displayed Figure 58 Share Properties page General tab The name and path of the selected s...

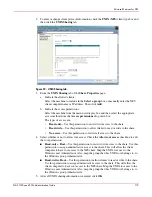
Page 119: ...ite to the share No access Use this permission to restrict all access to the share 4 Select whether or not to allow root access Check the Allow root access checkbox to add the root permission Read only Root Use this permission to restrict write access to the share Use this permission to assign administrative access to the share This will allow the client computer to have root access to the NFS sha...

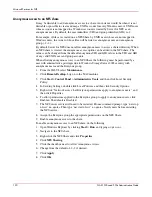
Page 120: ...administrative privileges due to Windows Storage Server 2003 security with anonymous users and the Everyone group 1 From the WebUI select Maintenance 2 Click Remote Desktop Log on to the NAS machine 3 Click Start Control Panel Administrative Tools and then click Local Security Policy 4 In Security Settings double click Local Policies and then click Security Options 5 Right click Network access Let...

Page 121: ...l Chinese BIG5 NFS only Microsoft Services for NFS allows the option of setting up NFS Shares for NFS access only The NFS Only option provides faster NFS performance and is intended for NFS clients only The executable file nfsonly exe allows a share to be modified to do more aggressive caching to improve NFS performance This option can be set on a share by share basis Do not use this function on a...

Page 122: ... Protocols Then select the NFS Protocol radio button and click Properties The NFS Properties menu is displayed Figure 60 NFS Sharing Protocols menu NFS properties include Async Sync Settings NFS Locks Client Groups User and Group Mappings Settings for asynchronous synchronous writes and service locks are discussed together in the following paragraphs of this chapter Client groups and user and grou...

Page 123: ...ings page is displayed 3 Select the desired write setting The default setting is Synchronous writes Note Using synchronous writes allows for greater data integrity Asynchronous writes will increase performance but will reduce data integrity as the data is cached before being written to disk Changing the write state causes the NFS service to be restarted Notify users before toggling this setting Fi...

Page 124: ...ge All clients that have locks on system files are listed in the Clients that hold locks box 3 To manually clear locks that a client has on files select the client from the displayed list and then click OK 4 To indicate the amount of time after a system failure that the locks are kept active enter the number of seconds in the Wait period box The NAS server keeps the locks active for the specified ...

Page 125: ...nning includes control over the naming conventions of client groups and users If the client group is given the same name as a client the client is obscured from the view of the server For example assume that a client d4 exists If a client group called d4 is created permissions can no longer be assigned to just the client d4 Any reference to d4 now refers to client group d4 To manage NFS client gro...

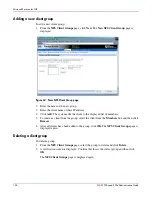
Page 126: ...lick Add The system adds the client to the displayed list of members 5 To remove a client from the group select the client from the Members box and then click Remove 6 After all clients have been added to the group click OK The NFS Client Groups page is displayed again Deleting a client group To delete a group 1 From the NFS Client Groups page select the group to delete and click Delete 2 A verifi...

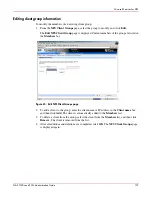
Page 127: ...bers of the group are listed in the Members box Figure 65 Edit NFS Client Groups page 2 To add a client to the group enter the client name or IP address in the Client name box and then click Add The client is automatically added to the Members list 3 To delete a client from the group select the client from the Members list and then click Remove The client is removed from the list 4 After all addit...

Page 128: ...th both UNIX and Windows clients Because the files are stored in the native Windows NT file system the server has to map the UNIX users to Windows users to determine the user access level of the files Note User mapping is not designed to address existing user database problems in the existing environment All UIDs and GIDs must be unique across all NIS Network Information Service domains and all us...

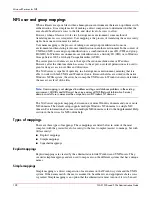
Page 129: ...s al command the return listing of files contains user information the user and group that own the file The ls al command is a UNIX command It returns a long or full listing of all files Because this information is contained in a Windows NT Access Control List ACL it is not UNIX ready The ACL information has to be converted back to UNIX UIDs and GIDs for the UNIX systems to understand and display ...

Page 130: ...manage user name mappings 1 From the WebUI select Shares Sharing Protocols Select NFS Protocol and then click Properties The NFS Properties menu is displayed 2 In the NFS Properties Menu select User and Group Mappings The User and Group Mappings page is displayed There are four tabs in the User and Group Mappings page General information Sets the mapping information source which is either NIS or p...

Page 131: ...d Group Mappings page General tab From the General tab of the User and Group Mappings page 1 If an NIS server is being used a Select Use NIS server b Enter the NIS domain name c Enter the NIS server name This field is optional but recommended In the Hours and Minutes fields indicate how often the system will connect to the NIS domain to update the user list 2 If custom password and group files are...

Page 132: ...xplicit map for each user To enable simple mapping click the Enable Simple Mapping option and then select the Windows domain name Figure 68 User and Group Mappings page Simple Mapping tab Explicit user mapping tab Explicit or advanced mappings allow the administrator to map any user or group manually to any other user and group Advanced mappings override simple mappings giving administrators the c...

Page 133: ...ess until all desired users have been mapped 3 To map a domain Windows user to a UNIX user enter the domain and the user name in the box in the middle of the screen use the Domain username format and highlight the UNIX user that you want to map and then click Add The map is added to the Explicitly mapped users box at the bottom of the screen Repeat this process until all desired users have been ma...

Page 134: ... local groups box and highlight the UNIX group to map and then click Add The Explicitly mapped groups box at the bottom of the screen is populated with the new mappings Repeat this process until all desired groups have been mapped 3 To map a domain Windows group to a UNIX group enter the domain and the group name in the box in the middle of the screen use the Domain groupname format and highlight ...

Page 135: ...ser Name Mapping screen as shown in Figure 71 Use Remote Desktop to access the NAS Management Console click File Sharing Microsoft Services for Network File System Click User Name Mapping then Map Maintenance Figure 71 User Name Mapping screen Map Maintenance tab Backing up user mappings 1 Select the Map Maintenance tab from the User Name Mapping screen 2 Type the path and name of the file to be u...

Page 136: ...Controllers and Active Directory Domain Controllers section Also see User and Group Mappings in this chapter for instructions on setting up user name mappings When planning to allow only anonymous access to an NFS share setting up user name mappings is not necessary 5 Verify the NTFS permissions are correct on the NFS share If the NFS share was assigned All Machines read write then the NTFS ACLs o...

Page 137: ... file as the mapped user example file1 8 Verify that the same permissions are set up for the user on both the UNIX side and the Windows side a List the permissions on the UNIX side ls l mount point file1 Example screen display r r unixuser1 unixgroup1 b List the permissions on the Windows side change to the nfs share directory From a command line interface accessed from Remote Desktop on the NAS s...

Page 138: ...dministrative tasks can be accomplished using Remote Desktop to access the Services for NFS user interface from the NAS Desktop or from a command prompt Remote Desktop is included in the WebUI of the NAS server To open a Remote Desktop session from the WebUI select Maintenance Remote Desktop See the Remote Access Methods and Monitoring chapter for information on setting up and using Remote Desktop...

Page 139: ...erver administration by making the NAS server emulate a NetWare file and print server FPNW eases the addition of the NAS server into a mixed infrastructure by providing a NetWare user interface UI to a Windows Storage Server 2003 based server administrators and users see their same familiar NetWare UI Additionally the same logon for clients is maintained without a need for any client configuration...

Page 140: ...y can be found at www microsoft com WINDOWS2003 guide server solutions NetWare asp To install Services for NetWare 1 From the desktop of the NAS server click Start Settings Network Connections Local Area Connection and then right click Properties 2 Click Install The Select Network Component Type dialog box is displayed Figure 72 is an example of the Select Network Component Type dialog box Figure ...

Page 141: ...rver Manager 2 Select FPNW then Properties Figure 74 File and Print Services for NetWare screen 3 Enter an FPNW Server Name and Description This name must be different from the server name used by Windows or LAN Manager based clients to refer to the server If you are changing an existing name the new name will not be effective until you stop and restart File and Print Services for NetWare For exam...

Page 142: ...es to See users connected to specific volume and to disconnect users from a specific volume 7 Click Files to View open files and close open files Creating and managing NetWare users To use Services for NetWare the Novell clients must be entered as local users on the NAS server Adding local NetWare users 1 From the NAS server desktop click the NAS Management Console icon click Core Operating System...

Page 143: ...t pane of the screen and then click Properties 2 Select the NetWare Services tab Figure 76 NetWare Services tab 3 Select Maintain NetWare compatible login 4 Set other NetWare options for the user and click OK Note The installation of File and Print Services for NetWare will also create a supervisor account which is used to manage FPNW The supervisor account is required if the NAS server was added ...

Page 144: ...ly after Microsoft Services for NetWare is installed See the previous section Installing Services for NetWare for instructions on installing SFN Creating a new NCP share To create a new file share 1 From the NAS server desktop choose Start Settings Control Panel Administrative Tools Server Manager 2 Choose FPNW Shared Volumes 3 Click Create Volume Figure 77 Create Shared Folder dialog box 4 Specif...

Page 145: ...Access from the drop down list Note Type of Access can also be set from the Access Through Share Permissions dialog box 9 Click OK when all users and groups have been added 10 Click OK on the Create Volume dialog box 11 Click Close Modifying NCP share properties To modify a file share 1 From the NAS server desktop choose Start Settings Control Panel Administrative Tools Server Manager 2 Choose FPN...

Page 146: ...NetWare File System Management 146 NAS 1500s and 500s Administration Guide ...

Page 147: ...p management shares management UNIX file system management and storage management To access the WebUI 1 Launch a Web browser 2 In the URL field enter https your NAS server machine name or IP address 3202 Extensive procedural online help is included in the WebUI Remote Desktop The NAS server supports Remote Desktop with a license for two concurrently running open sessions Remote Desktop provides th...

Page 148: ...s The first is to use Remote Desktop to access a command line interface and enter the following command net start tlntsvr The Telnet Server service needs to be enabled prior to running this command The service can be enabled by opening the services MMC 1 Select Start Run then type services msc 2 Locate the Telnet service right click on it then select Properties 3 In the startup type drop down box ...

Page 149: ... 125 conventions document 9 text symbols 10 creating NFS file shares 116 D date system changing 22 deployment scenarios 16 directory quotas establishing 101 document conventions 9 prerequisites 9 related documentation 9 domain controller configuring 62 domain environment 17 dual boot capability 14 E e mail alerts setting up 26 encoding types 121 environments domain compared to workgroup 61 overvie...

Page 150: ... 24 options 24 M Macintosh installing services for 91 managing system storage 28 mappings backup and restore 135 best practices 129 creating 130 data stored 131 explicit 128 132 NFS 128 simple 128 132 squashed 129 menu tabs described 18 Microsoft Feature Pack 16 mounted drives and shadow copies 47 multiprotocol environments 16 N NAS Management Console 20 NAS server defined 13 desktop 20 restarting...

Page 151: ...ver 23 S scheduled shutdown 23 security auditing 81 file level permissions 78 ownership of files 83 Server for NFS components 109 described 109 services for AppleTalk installing 91 services for Macintosh installing 91 Services for NFS commands 138 described 109 event logging 112 setup completing 28 e mail alerts 26 shadow copies accessing 48 backups 60 cache file 49 client access 56 creating 51 de...

Page 152: ...verting ACL 129 group ID 110 permissions 116 print services 107 sharing 90 user ID 110 user access authenticating 109 user credentials 110 user interfaces 18 user permissions for NFS 110 users adding to permission list 78 local adding 65 deleting 65 managing 64 modifying properties 66 names managing 62 NetWare adding 142 enabling 143 V Volume Shadow Copy Service 43 volumes creating new share 75 cr...

Reviews: