


14 2 Configuring the MBM for your work environment
ENWW
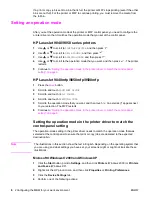
Windows NT 4.0
1
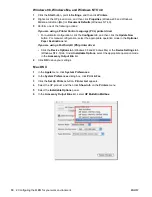
At the computer that belongs to the user that you are assigning, click the Start button, point
to Settings, and then click Printers.
2
Right-click the HP product icon, and then click Document Defaults.
3
Perform one of the following actions:
If you are using a PCL printer driver
• On the Output tab, select the appropriate output bin, and then click OK.
If you are using a PS printer driver
• Click the Advanced tab. Under Document Options, click Printer Features. Select the
appropriate output bin from the Output Bin list.
4
Repeat steps 1 through 3 for each user.
Macintosh
You can assign a default output bin to a user or a group of users for the Mailbox mode by
creating a preset in the printer driver that specifies the appropriate output bin set.
1
At the computer that belongs to the user that you are assigning, open a document and then
click Print on the File menu.
2
Select the appropriate output bin.
3
In the Presets pop-up menu, click Save As, and then type a name for the preset.
Summary of Contents for Q5693A
Page 1: ...Q5693A use ...
Page 2: ......
Page 3: ...HP 8 bin Mailbox User Guide _________________ ...
Page 5: ...ENWW iii ...
Page 6: ...iv ENWW ...
Page 12: ...4 1 Product basics ENWW ...
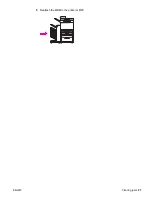
Page 35: ...ENWW Clearing jams 27 5 Reattach the MBM to the printer or MFP ...
Page 38: ...30 4 Support information ENWW ...
Page 40: ...32 A Operation modes summary table ENWW ...
Page 48: ...40 Appendix B Specifications ENWW ...
Page 53: ......
Page 54: ... 2005 Hewlett Packard Development Company L P www hp com ...


