4.
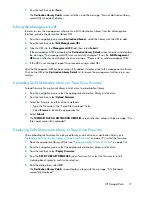
From the
Copy Pools
screen, select the newly created copy pool to open the
Echo Copy Pool
Details
screen. Note that the state of the copy pool is “Awaiting Initialization.”
5.
Allow your regularly scheduled full backups to complete. Cartridges that need to be transported
via physical tape become “Out of sync.”
6.
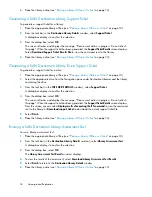
From the task bar, select
Initiate Tape Transport
. The
Create Tape Export Pool
screen opens.
7.
From the
SAN Automigration Library
list, select the physical library from which you want to copy
the tapes.
8.
Enter a Start and End Slot from the available slot range.
9.
Select
Submit
. The status of the copy pool changes to “Exporting.”
10.
From the navigation pane, select
Import/Export Pools
, and then select the newly created export
pool to see the
Tape Export Pool Details
screen.
The data from the selected library slots is copying to the physical tapes. When the data has
finished exporting to the tapes, the status of the copy pool changes to “Importing.” The screen
prompts you to load empty tapes and unload full tapes as needed.
11.
Once the export is finished, select
Import Handling Instructions
from the task bar. This produces
information needed for the data import process. Print this information and ship it to the remote
location with the physical tapes.
Stopping a Tape Export
1.
On the navigation pane, expand Destination Libraries and select
Import/Export Pools
to open
the list of all import and export pools.
2.
Select the export pool you wish to stop to open the
Tape Export Pool Details
screen.
3.
From the task bar, select
Stop Tape Export
.
The export process stops immediately and all echo copy pool cartridges move to the “Out of
sync” state.
4.
From the
Echo Copy Pool Details
screen, you can:
• Select
Initiate Tape Transport
in the task bar to restart the export.
• Select
Cancel Tape Transport
in the task bar to cancel the process and place the echo copy
pool into the “Ready” state.
Importing Data from Physical Tapes for Tape Initialization
1.
Complete the export process. See
“
Exporting Data to Physical tapes for Tape Initialization
” on page 79.
2.
On the target site, open the
Automigration/Replication
tab and select
Import Tapes
from the
navigation pane.
3.
Select the export pool you want to import.
4.
From the
Local Library
list, select the physical library from which to copy the tapes.
5.
Enter the start and end slots from the available slot range.
6.
Select
Submit
.
Automigration/Replication
80
Summary of Contents for StorageWorks 12000
Page 14: ...14 ...
Page 102: ...Operation 102 ...
Page 110: ...User Interfaces 110 ...
Page 150: ...Management 150 ...
Page 168: ...Monitoring 168 ...
Page 198: ...Component Identification 198 ...
Page 222: ...Support and Other Resources 222 ...
Page 232: ...Troubleshooting 232 ...
Page 236: ...Specifications 236 ...
Page 244: ...Bulgarian Notice Czech Notice Danish Notice Dutch Notice Regulatory Compliance Notices 244 ...
Page 245: ...Estonian Notice Finnish Notice French Notice German Notice HP StorageWorks 245 ...
Page 246: ...Greek Notice Hungarian Notice Italian Notice Latvian Notice Regulatory Compliance Notices 246 ...
Page 247: ...Lithuanian Notice Polish Notice Portuguese Notice Romanian Notice HP StorageWorks 247 ...
Page 249: ...Battery Replacement Notices Dutch Battery Notice HP StorageWorks 249 ...
Page 250: ...French Battery Notice German Battery Notice Regulatory Compliance Notices 250 ...
Page 251: ...Italian Battery Notice Japanese Battery Notice HP StorageWorks 251 ...
Page 252: ...Spanish Battery Notice Regulatory Compliance Notices 252 ...


