7 Connecting to the management module
Complete the procedures in this chapter if any of the following situations apply. Otherwise skip this
chapter.
•
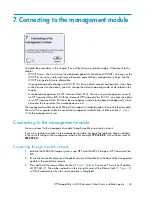
WOCP Access: You want to use the web-based operator control panel (WOCP). You can use the
WOCP to view array state and status information and edit basic configuration settings. See the
WOCP user guide for more information.
•
Array operating mode change (via WOCP): You have a direct connect configuration. If you have
a direct connect configuration, you must change the default operating mode, as described in this
chapter.
•
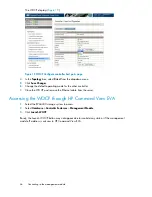
Array-based management (via HP Command View EVA): You are using a management server to
run HP Command View EVA. With the release of HP Command View EVA 8.1, you have the option
to run HP Command View EVA from the management module (array-based management), which
eliminates the requirement for a management server.
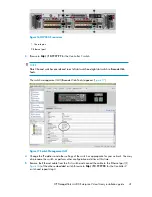
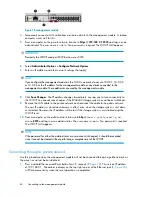
The management module has an MDI-X port that supports straight-through or crossover Ethernet cables.
Use a Cat 5e or greater cable to connect the management module from its Ethernet jack (1,
) to the management server.
Connecting to the management module
You can connect to the management module through a public or a private network.
If you use a laptop to connect to the management module, configure the laptop to have an address
in the same IP range as the management module (for example
192.168.0.2
, with a subnet mask of:
255.255.0.0
).
Connecting through a public network
1.
Initialize the EVA4400 storage system, using HP SmartStart EVA Storage or HP Command View
EVA.
2.
If currently connected, disconnect the public network LAN cable from the back of the management
module in the controller enclosure.
3.
Press and hold the recessed Reset button (2,
) for 4–5 seconds. This sets an IP address
of 192.168.0.1. The amber indicator on the top right corner of the Ethernet jack (1,
)
will flash momentarily when the reset operation is completed.
HP StorageWorks 4400 Enterprise Virtual Array installation guide
43
Summary of Contents for StorageWorks 4400
Page 16: ...Figure 4 Installation checklist cont d About this guide 16 ...
Page 20: ...Review and confirm your plans 20 ...
Page 24: ...Remove product from packaging 24 ...
Page 36: ...Connect cables and power cords 36 ...
Page 48: ...Configuring management servers using HP SmartStart EVA Storage 48 ...
Page 50: ...Configuring application servers for Windows using HP SmartStart EVA Storage 50 ...
Page 78: ...Configuring non Windows application servers 78 ...

