•
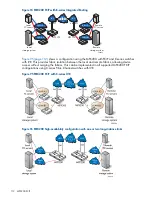
Bidirectional CHAP during discovery session and single-direction CHAP during normal session
•
Bidirectional CHAP during discovery session and during normal session
Enabling single-direction CHAP during discovery session and normal session
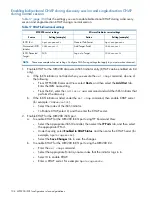
Table 15 (page 99)
lists the settings you use to enable single-direction CHAP during a discovery
session and normal session.
Table 15 CHAP single-direction settings
Microsoft initiator secret settings
1
MPX200 secret settings
1
Setting (example)
Action
Setting (example)
Source
N/A
General Tab Secret
N/A
iSCSI Port
CHAPsecret01
Add Target Portal
CHAPsecret01
Discovered iSCSI Initiator
CHAPsecret01
Log on to Target
N/A
iSCSI Presented Target
1
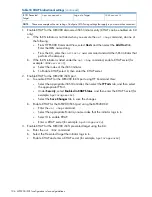
These are examples of secret settings. Configure CHAP using settings that apply to your network environment.
To enable CHAP for the MPX200-discovered iSCSI initiator entry:
•
If the iSCSI initiator is not listed when you execute the
set chap
command, do one of the
following:
◦
From HP P6000 Command View, select
Hosts
, and then select the
Add Host
tab. Enter
the IQN string.
◦
From the CLI, use the
add
command to add the iSCSI initiator that will perform the
discovery.
•
If the iSCSI initiator is listed when you execute the
set chap
command, then enable the
CHAP secret (for example, CHAPsecret01):
1.
Select the index of the iSCSI initiator.
2.
Enable CHAP by selecting 0 and then entering the CHAP secret.
•
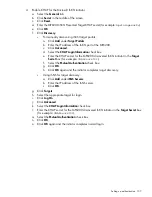
To enable CHAP for the Microsoft iSCSI initiator:
1.
Click
Discovery
•
To discover iSCSI target portals manually:
a.
Click
Add
under Target Portals.
b.
Enter the IP address of the MPX200 iSCSI port.
c.
Click
Advanced
.
d.
Select the
CHAP Login Information
check box.
e.
Enter the CHAP secret for the MPX200-discovered iSCSI initiator in the Target Secret box
(for example,
CHAPsecret01
).
f.
Click
OK
.
The initiator completes target discovery.
•
To discover iSCSI target portals using iSNS:
a.
Click
Add
under iSNS Servers.
b.
Enter the IP address of the iSNS server.
c.
Click
OK
.
2.
Click
Targets
, and then select the appropriate target for login.
3.
Click
Log On
.
4.
Click
Advanced
.
5.
Select the
CHAP Login Information
check box.
Setting up authentication
99


