Installation and Configuration
35
SSL1016 Tape Autoloader Reference Guide
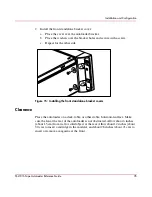
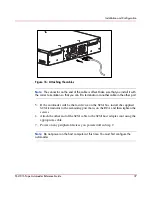
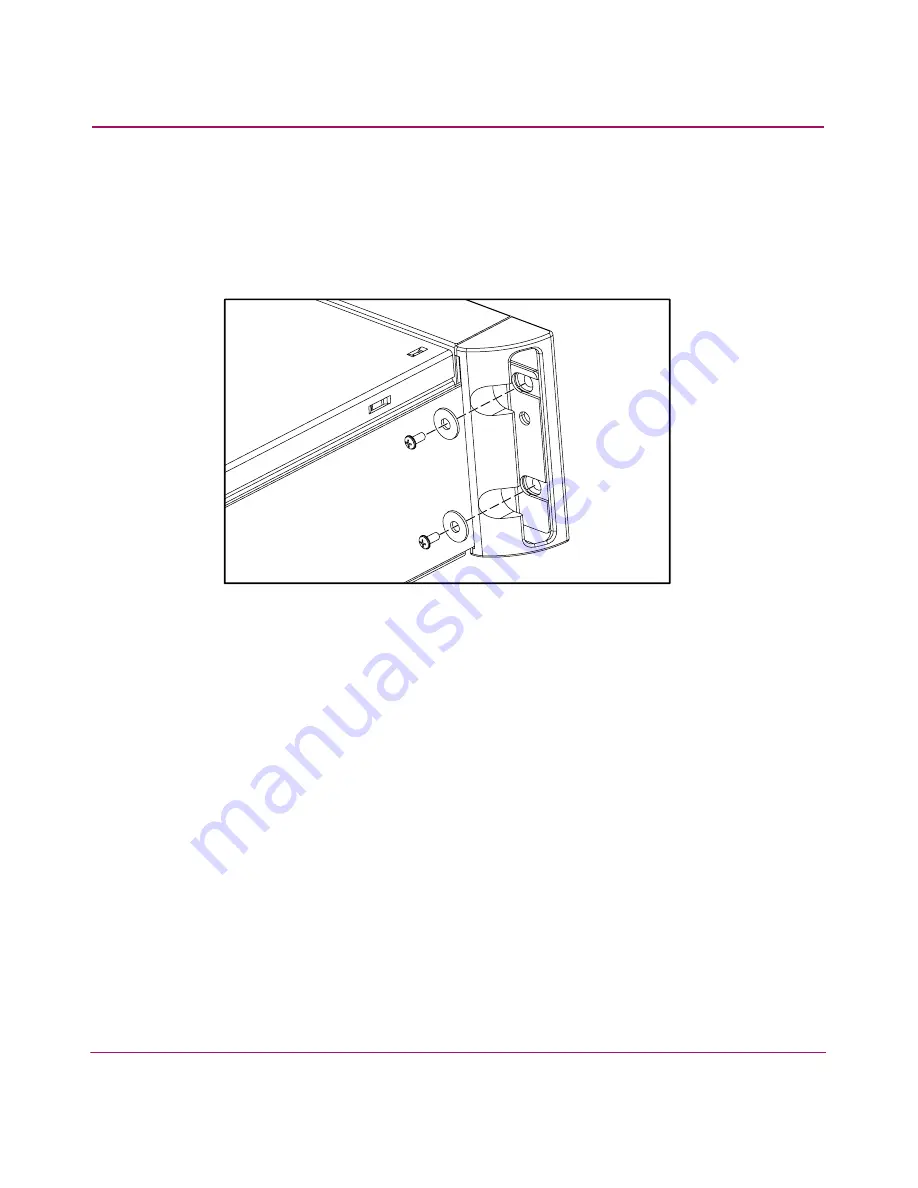
2. Install the front standalone bracket cover:
a.
Place the cover over the autoloader bracket.
b.
Place the washers over the bracket holes and secure with a screw.
c.
Repeat for the other side.
Figure 15: Installing the front standalone bracket covers
Clearance
Place the autoloader on a desk, table, or other stable, horizontal surface. Make
sure the fan at the rear of the autoloader is not obstructed. Allow about 6 inches
(about 15 cm) from wall or solid object at the rear. Allow about 12 inches (about
30 cm) to insert a cartridge in the mailslot, and about 28 inches (about 71 cm) to
insert or remove a magazine at the front.
Summary of Contents for StorageWorks SSL1016
Page 8: ...Contents 8 SSL1016 Tape Autoloader Reference Guide ...
Page 14: ...About this Guide 14 SSL1016 Tape Autoloader Reference Guide ...
Page 22: ...Overview 22 SSL1016 Tape Autoloader Reference Guide ...
Page 60: ...Installation and Configuration 60 SSL1016 Tape Autoloader Reference Guide ...
Page 118: ...Autoloader Operation 118 SSL1016 Tape Autoloader Reference Guide ...
Page 126: ...Tape Drive Cleaning 126 SSL1016 Tape Autoloader Reference Guide ...
Page 143: ...Regulatory Compliance Notices 143 SSL1016 Tape Autoloader Reference Guide Japanese Notice ...
Page 144: ...Regulatory Compliance Notices 144 SSL1016 Tape Autoloader Reference Guide ...
Page 156: ...Upgrading or Replacing the DCA 156 SSL1016 Tape Autoloader Reference Guide ...
Page 160: ...Index 160 SSL1016 Tape Autoloader Reference Guide ...

