Secure the drive
NOTE:
The server latches and side views of your server model may not be exactly the same as shown in the
illustrations. Please refer also to you server documentation.
Mounting hardware used (HP ProLiant)
Ensure that you use the correct mounting rails or locating screws, as described in
Attach mounting
hardware
. The server also incorporates a locking mechanism to hold the tape drive in place.
1.
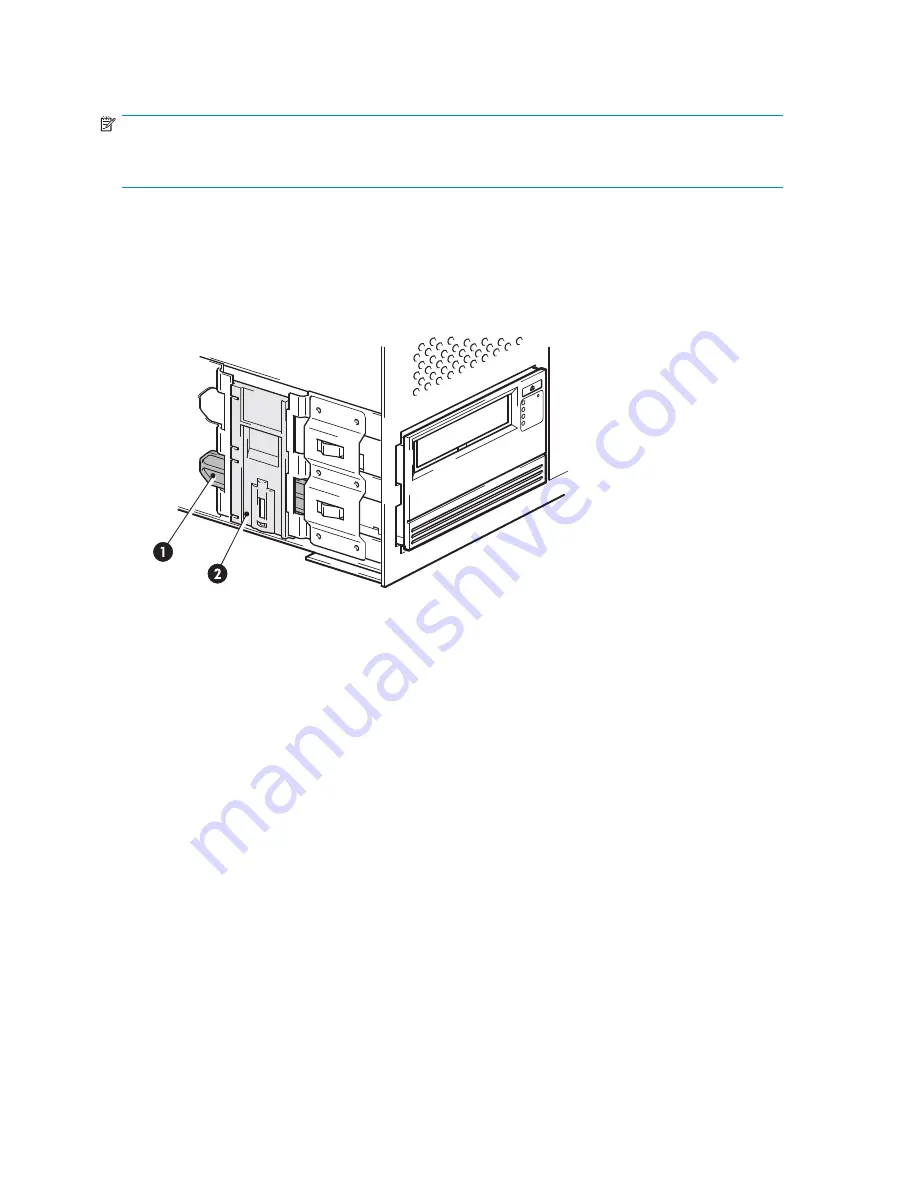
Push the server latch down to lock the tape drive into position, as shown in
Figure 9
.
1
Plastic rail
2
Server latch
Figure 9 Securing drive, mounting hardware used
2.
Ensure blanking plates are in place over empty bays and replace the cover on the server.
No mounting hardware used
1.
Use the M3 screws provided with the tape drive in the screw pack labeled ‘General Mounting
Screws’. Check that the holes in the chassis are aligned with the holes in the sides of the drive and
use a regular Phillips screwdriver to secure the M3 screws, as shown in
Figure 10
.
If you cannot tighten the screws, use the washers provided in the pack.
28
Installing an internal tape drive
Summary of Contents for StorageWorks Ultrium 460
Page 8: ...8 ...
Page 12: ...12 About this guide ...
Page 18: ...18 Before you start ...
Page 30: ...30 Installing an internal tape drive ...
Page 40: ...40 Installing a removable Ultrium tape drive ...
Page 42: ...42 Verify installation ...
Page 56: ...56 Using HP OBDR ...
Page 60: ...60 Diagnostic Tools and Performance ...
Page 64: ...64 Troubleshooting ...
Page 66: ...66 Replacing a tape drive ...


