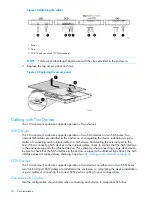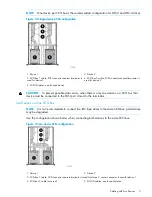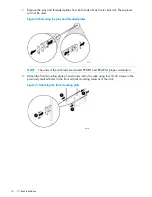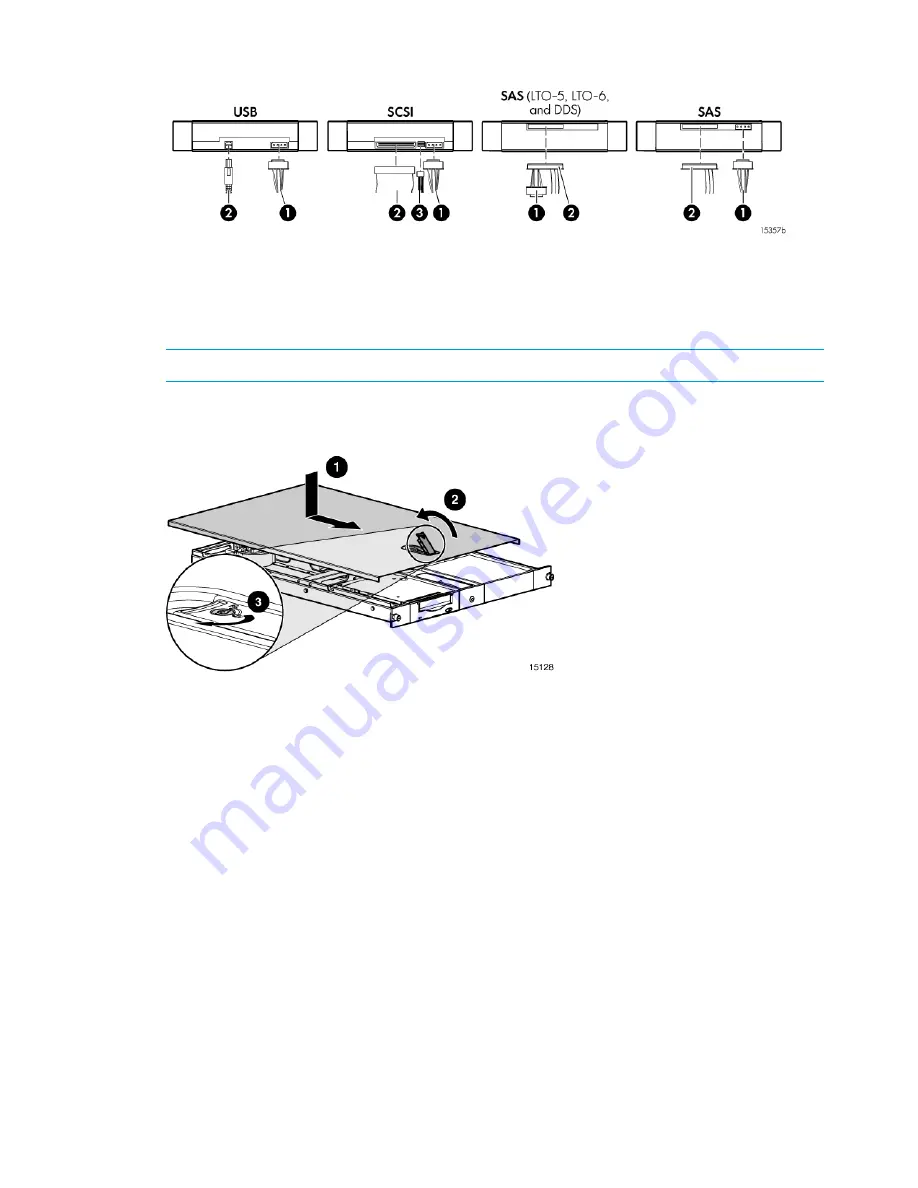
Figure 12 Attaching the cables
1. Power
2. Data
3. SCSI ID selector switch (SCSI drives only)
NOTE:
Fold excess cable length and secure with the clips provided in the enclosure.
7.
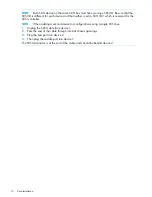
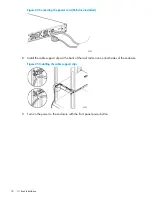
Replace the top access panel as shown.
Figure 13 Replacing the access panel
Cabling with Two Devices
The 1U rack-mount enclosure supports operation of two devices.
SAS Devices
The 1U rack-mount enclosure supports operation of two SAS devices on two SAS buses. Two
internal SAS cables are installed in the enclosure, so completing the device installation is just a
matter of connecting each internal cable to a SAS device and cabling the external port to the
host. When connecting SAS devices to the internal cables, check to confirm that the SAS interface
in the enclosure supports the attached device. (For example, when connecting a tape drive device,
be sure to check that the SAS interface in the enclosure supports the attached tape drive.) The SAS
interface does not support daisy chaining. See also
SAS cabling recommendations (page 4)
.
SCSI Devices
The 1U rack-mount enclosure supports operation of two devices on either one or two SCSI buses.
Two internal 2-port SCSI cables are installed in the enclosure, so completing the device installation
is just a matter of connecting the correct SCSI port according to your configuration.
One Device per SCSI Bus
Use the configuration shown below when connecting each device to a separate SCSI bus.
10
Drive Installation


