103
Chapter 7
Replacing Parts
5. When the latch is fully lifted, the access panel slides back towards the rear of the server. The panel can then
be lifted off the server chassis.
6. Remove the front bezel by pushing in on the tabs at the top of the bezel on both sides and pulling the bezel
out away from the chassis. Do the same to release the bottom part of the bezel.
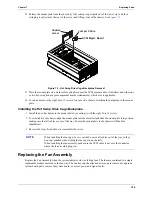
7. Remove blue plastic Air Scoop that is attached to the fan cage and the System Board by pulling it straight
out.
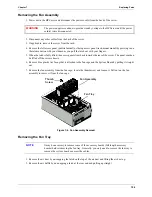
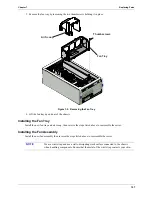
8. Remove the fan assembly from the fan cage; locate the thumbscrew and loosen it. Pull out on the fan
assembly to remove it from the fan cage.
9. Disconnect the IDE cable and the power cable from the back of the CD-ROM drive
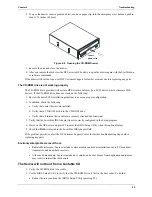
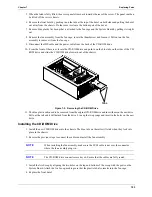
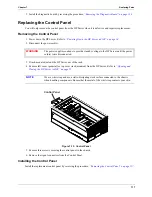
10. .From the front of the server, locate the CD-ROM drive and push in on the blue tabs on the sides of the CD-
ROM drive and slide the CD-ROM drive forward out of the chassis.
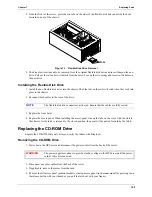
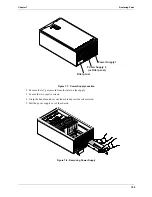
Figure 7-2. Removing the CD-ROM Drive
11. The blue plastic rails need to be removed from the original CD-ROM drive and insert them on the new drive.
Pull out the rail and it will detach from the drive. Line up the two prongs and insert in the holes on the new
drive.
Installing the CD-ROM Drive
1. Install the new CD-ROM drive into the chassis. The blue tabs on the rails will click when they lock into
place in the chassis.
2. Reverse the previous steps to connect the cables and install the fan assembly
3. Install the Air Scoop by aligning the two holes on the top and bottom of the scoop with the posts on the
System Board. Attach the Air Scoop, making sure that the plastic tab also inserts into the fan cage.
4. Replace the front bezel.
NOTE
When installing the fan assembly, make sure the SCSI cable is not over the connector
where the fan assembly plugs in..
NOTE
The CD-ROM drive connectors are keyed. Ensure that the cables are fully seated.
Tabs

