26
Chapter 3
Installing and Configuring
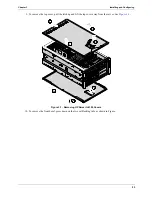
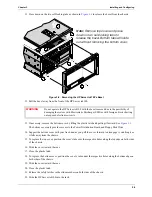
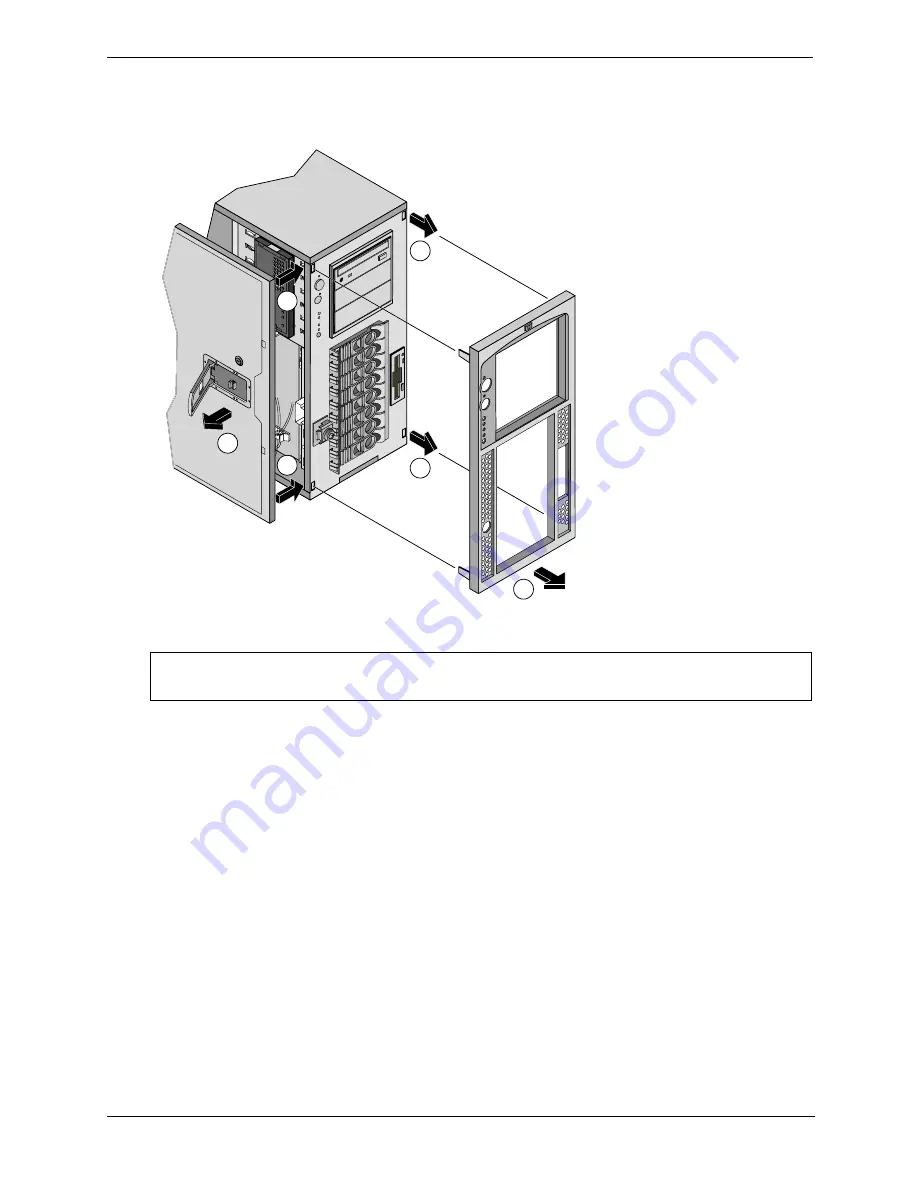
5. To remove the bezel, first remove the left cover by pulling the plastic latch out. Then press down the two
self-locking tabs to release the bezel. The right tabs slide out without removing the right cover. See
Figure 3-3
.
Figure 3-3. Removing the HP Server tc4100 Bezel
6. If necessary, remove the right side cover by lifting the plastic latch.
The right cover only provides access to the Power Distribution Board and Floppy Disk Drive.
7. Pull the cover forward and then slightly sideways to disengage it.
8. Move it to the right and away from the chassis.
CAUTION
To prevent damage to the covers, support the cover as you remove it from the HP Server
tc4100. The Server’s covers can be easily damaged.
Note:
Remove left cover and press
in on two self-locking tabs to release
the bezel. Right tabs will slide out
without removing the right cover.
2
2
4
1
3
3

