37
Chapter 3
Installing and Configuring
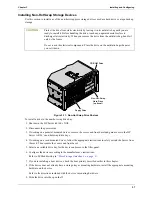
Installing Non-Hot Swap Storage Devices
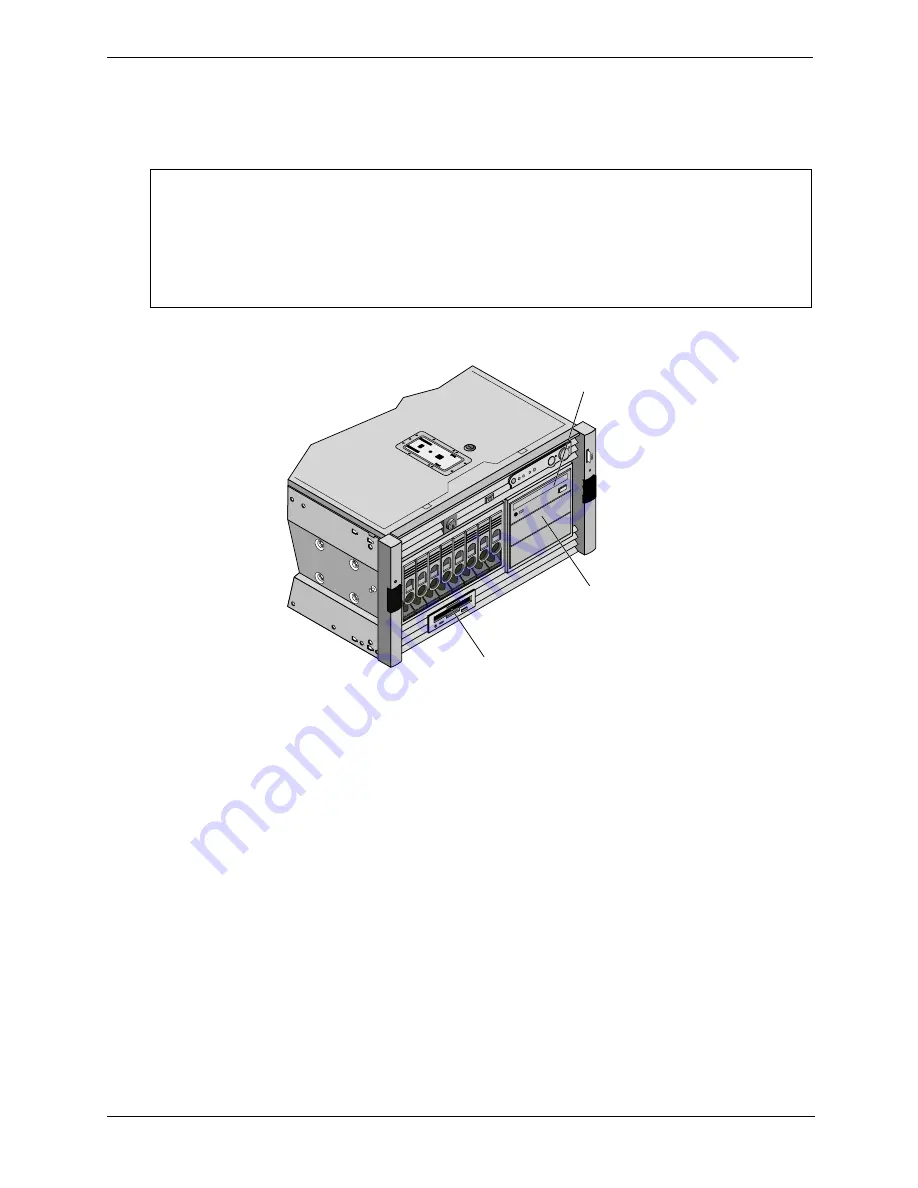
Use this section to install any of the non-hot swap mass storage devices used as a hard drive or a tape backup
storage.
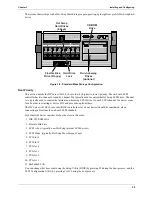
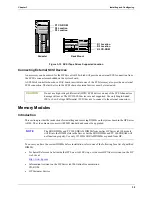
Figure 3-11. Non-Hot Swap Drive Shelves
To install a drive in the non-hot swap drive bay:
1. Shut down the HP Server tc4100’s NOS.
2. Disconnect the power cords.
3. If working on a pedestal-mounted Server, remove the covers and front bezel and gain access to the HP
Server tc4100’s non-hot swap-drive bays.
4. If working on a rack-mounted Server, follow the appropriate instructions to safely extend the Server from
the rack. Then remove the covers and front bezel.
5. Select an available drive bay for the device and remove the filler panel.
6. Configure the device according to the manufacturer’s instructions.
Refer to SCSI addressing in
“Mass Storage Guidelines” on page 31
.
7. If you are installing a boot device, check the boot priority described earlier in this chapter.
8. If the device does not already have a storage tray or mounting hardware, install the appropriate mounting
hardware on the device.
Refer to the directions included with the device’s mounting hardware.
9. Slide the drive into the open shelf.
CAUTION
Protect the drive from static electricity by leaving it in its antistatic bag until you are
ready to install it. Before handling the drive, touch any unpainted metal surface to
discharge static electricity. When you remove the drive from the antistatic bag, handle it
only by the frame.
Do not touch
the electrical components. Place the drive on the antistatic bag whenever
you set it down.
Non-Hot-Swap
Hard Drive
(optional)
Floppy Drive
CD-ROM Drive

