


26
Getting Started Guide
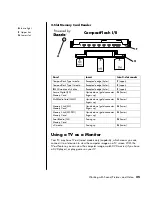
Cables You May Need
To connect a TV to the PC, you may need a video cable and an audio cable (not
provided; purchase separately). The type of video cable you need depends on
your TV:
•
If your TV has an S-video jack, you need an S-video cable.
•
If your TV has a composite video jack, you need a composite video cable and,
depending on the jacks on the back of your PC, you may also need an S-video
adapter cable.
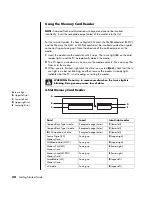
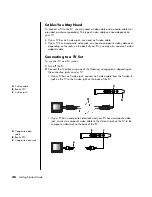
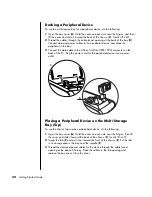
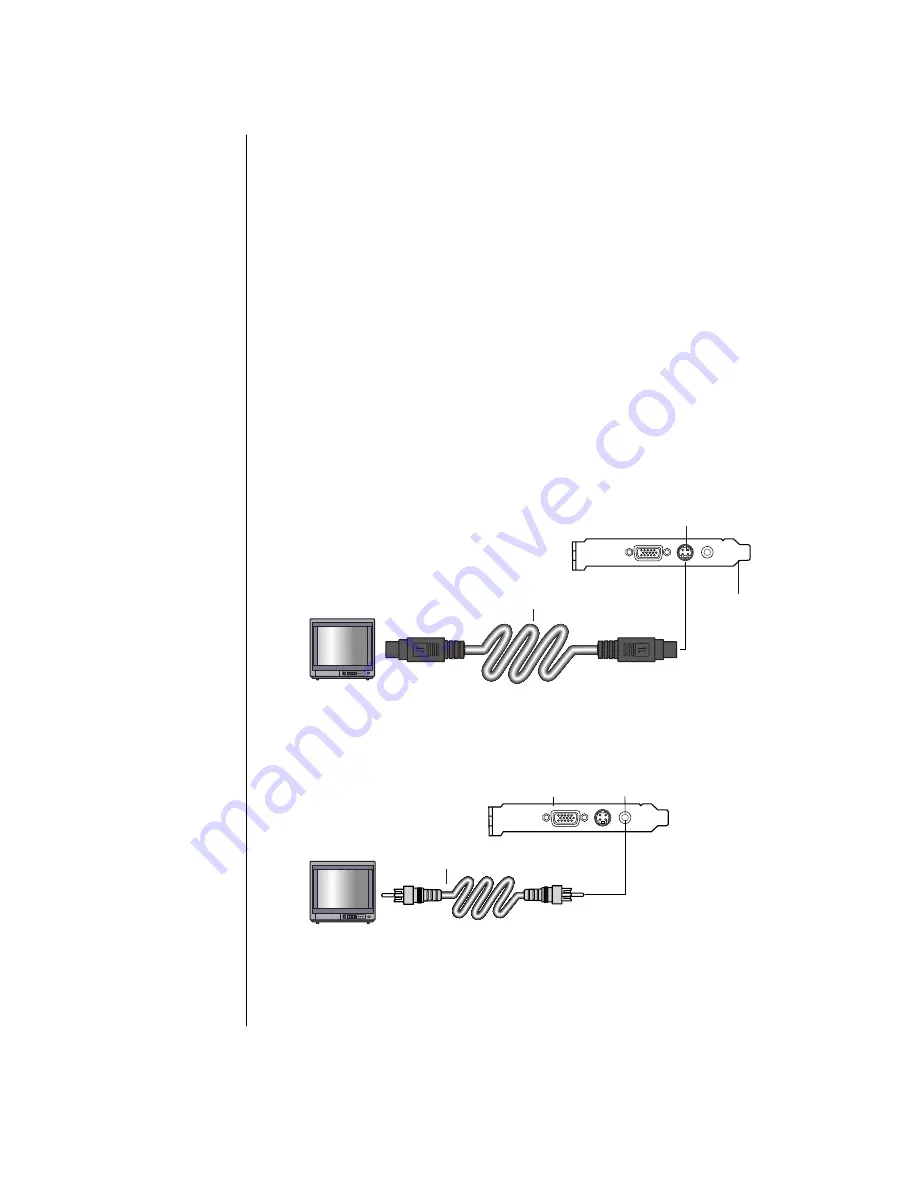
Connecting to a TV Set
To use your TV as a PC screen:
1
Turn off the PC.
2
Connect the TV cable using one of the following arrangements, depending on
the connection jacks on your TV:
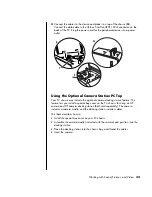
•
If your TV has an S-video jack, connect an S-video cable from the S-video In
jack on the TV to the S-video jack on the back of the PC.
A
B
C
•
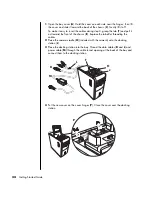
If your TV has a composite video jack and your PC has a composite video
jack, connect a composite video cable to the Video In jack on the TV to the
composite video jack on the back of the PC.
A
B
C
A
S-video cable
B
Back of PC
C
S-video jack
A
Composite video
cable
B
Back of PC
C
Composite video jack
Summary of Contents for VH677UA#ABA - Pavilion Dv6-1244sb Entertainment
Page 1: ...Getting Started Guide ...
Page 6: ...vi Getting Started Guide ...
Page 8: ...2 Getting Started Guide ...
Page 42: ...36 Getting Started Guide ...
Page 48: ...42 Getting Started Guide ...
Page 66: ...60 Getting Started Guide ...


