5.
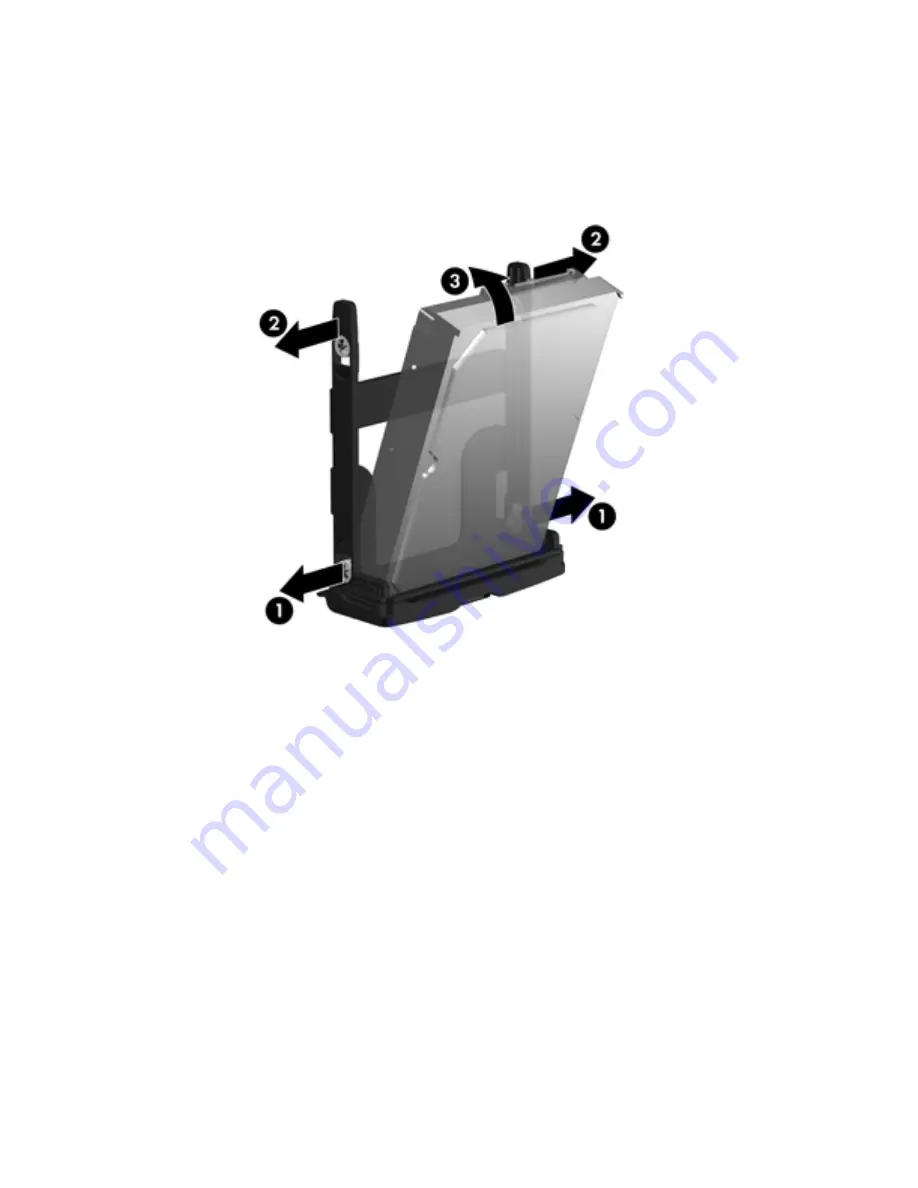
Set the hard drive in the carrier at an angle. Carefully separate the lower hard drive carrier rails
(1), and then lower the drive between them, as shown in the following figure.
Align the carrier pins with the drive mounting holes and release the rails to secure the lower-end of
the drive in place.
Figure 5-43
Installing the drive in the carrier
6.
Carefully separate the upper hard drive carrier rails (2), and then rotate the drive upright (3), as
shown above.
Align the carrier pins with the drive mounting holes and release the rails to secure the upper-end
of drive in place.
120
Chapter 5 Replacing components
ENWW


