4.
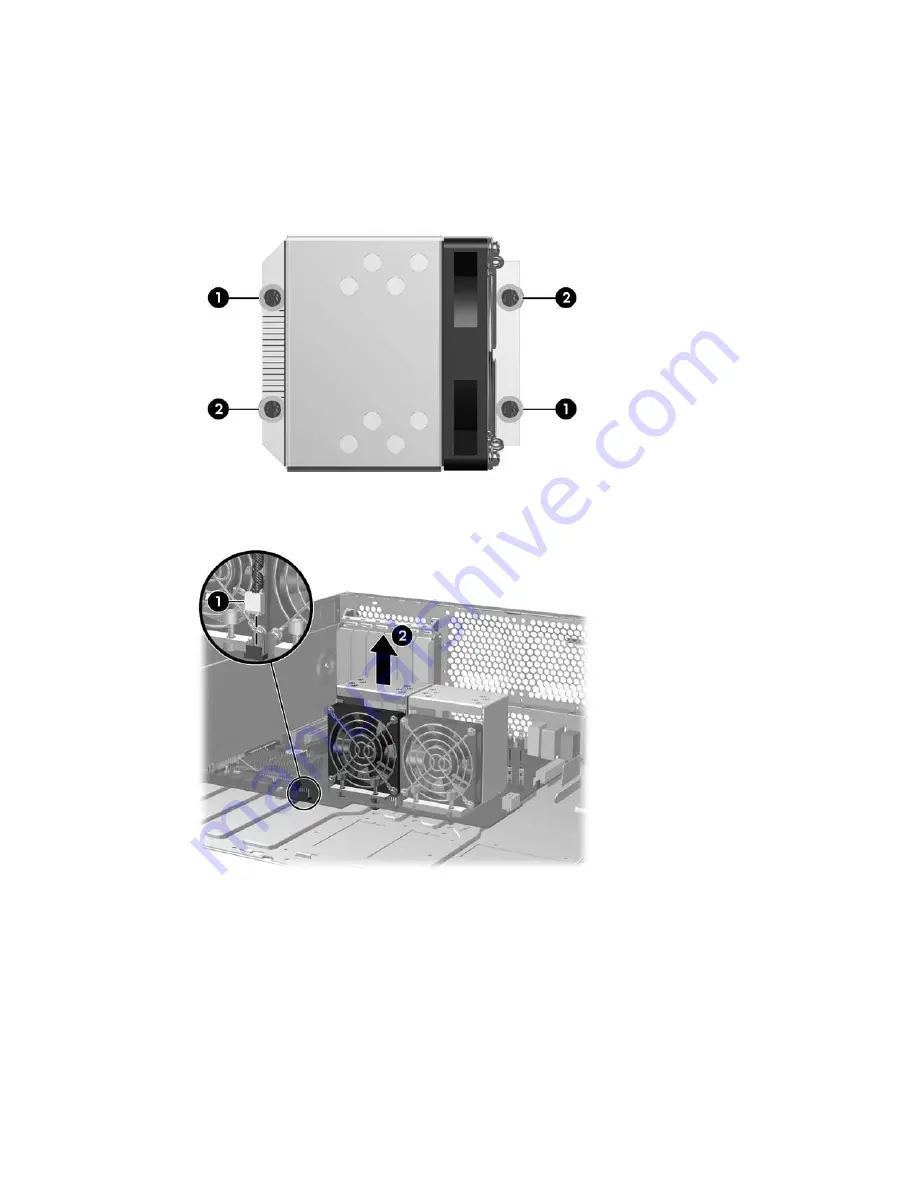
As shown in the following figure, slowly and evenly loosen one pair of diagonally opposite screws
(1) from the processor heat sink until the screw shanks disengage from the system board, and then
loosen the remaining pair (2).
Do not fully loosen one screw, and then move on to the next. Loosen all screws a little at a time,
ensuring that the processor remains level.
Figure 4-57
Identify proper screw loosening sequence
5.
Disconnect the processor heatsink fan cable from the system board (1), as shown:
Figure 4-58
Removing the processor heatsink
6.
Gently twist the heatsink to break the thermal grease binding.
7.
Lift the processor heatsink out of the chassis (2).
8.
Use alcohol and a soft cloth to clean all of the thermal interface residue from the processor and
the heatsink, allowing the alcohol on the processor and heatsink to dry completely.
ENWW
Removing and replacing components
97
Summary of Contents for Xw6600 - Workstation - 2 GB RAM
Page 1: ...HP xw6600 Workstation Service and Technical Reference Guide ...
Page 10: ...x ENWW ...
Page 114: ...104 Chapter 4 Removal and replacement procedures ENWW ...
Page 154: ...144 Chapter 7 Configuring password security and resetting CMOS ENWW ...
Page 166: ...156 Appendix A Appendix A Connector pins ENWW ...


