4.
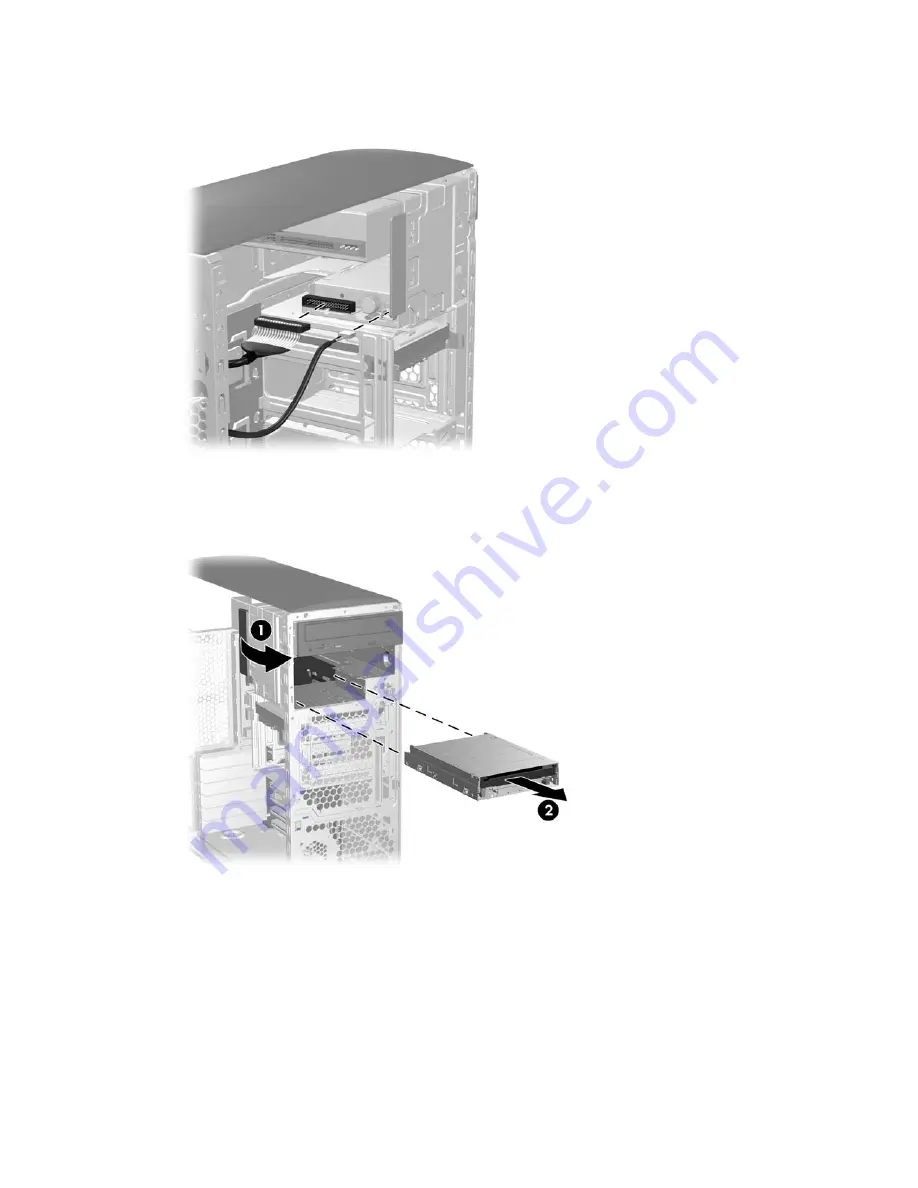
Disconnect the power (1) and data (2) cables from the back of the diskette drive, as shown:
Figure 4-20
Disconnecting the diskette drive cables
5.
As shown in the following figure, lift the green drive-lock release tab (1) and gently slide the drive
out of the chassis at the same time (2).
Figure 4-21
Removing the diskette drive from chassis
6.
If not reinstalling or replacing the diskette drive, install an EMI filler in the diskette drive bay and
add a diskette drive bay blank to the front bezel.
To install a diskette drive, reverse the previous steps. You might need to remove the front bezel to install
the drive.
70
Chapter 4 Removal and replacement procedures
ENWW
Summary of Contents for Xw6600 - Workstation - 2 GB RAM
Page 1: ...HP xw6600 Workstation Service and Technical Reference Guide ...
Page 10: ...x ENWW ...
Page 114: ...104 Chapter 4 Removal and replacement procedures ENWW ...
Page 154: ...144 Chapter 7 Configuring password security and resetting CMOS ENWW ...
Page 166: ...156 Appendix A Appendix A Connector pins ENWW ...


