Blitz
™
No. 1200CMB
7
a
ttentIon
: P
lease
read
before
ProceedIng
.
r
e
-
calIbratIon
of
sPace
NO RE-ADJUSTMENT of space is required when changing from one code
card to another. The space indicator marks on each code card are positioned
for correct lateral alignment when using the factory cutter wheels. No special
spacing washers are required on either side of the cutter.
The need to re-adjust the space is rare and should be done only after the more
common causes for mis-cut keys are eliminated.
Remember, when originating a key by code you do not have access to
an operable key. Quite often code numbers are mis-read, locks are coded
incorrectly when they are new and code books occasionally have typographical
errors. Be aware of these unintentional errors that detract from the successful
cutting of keys by code. After eliminating the above mentioned causes for
mis-cut keys and checking for correct depth calibration - then proceed.
If re-adjustment of space is needed, follow the instructions for tip-gauged
space adjustments first. Then proceed with shoulder-gauged space adjustments.
Because the tip gauges are built into the bottom jaw and the shoulder gauge is
mounted on its own pivot, re-adjusting the shoulder gauge may not properly
re-calibrate your 1200CMB.
Summary of Contents for Blitz 1200CMB
Page 6: ...Blitz No 1200CMB 1 0 Code Cards...
Page 9: ...Blitz No 1200CMB Visit us at www hpcworld com...
Page 10: ...Blitz No 1200CMB 2 0 Cutters...
Page 18: ...Blitz No 1200CMB 17 3 0 Gauging and Holding Keys...
Page 35: ...Blitz No 1200CMB 34 Visit us at www hpcworld com...
Page 36: ...Blitz No 1200CMB 35 4 0 Depth and Space Crank Controls...
Page 40: ...Blitz No 1200CMB 39 5 0 Cutting the Key...
Page 41: ...Blitz No 1200CMB 40 Select the correct Code Card and insert it beneath the lens as shown above...
Page 42: ...Blitz No 1200CMB 41 Change the cutter and jaw if necessary to those indicated on the Code Card...
Page 44: ...Blitz No 1200CMB 43 Gauge the key...
Page 46: ...Blitz No 1200CMB 45 Turn machine ON...
Page 50: ...Blitz No 1200CMB 49 Rotate the lateral crank to the second space indicator...
Page 54: ...Blitz No 1200CMB 53 Turn motor back on to deburr key...
Page 56: ...Blitz No 1200CMB 55 6 0 Angle Cut Keys...
Page 62: ...Blitz No 1200CMB 61 Cut first center cut...
Page 63: ...Blitz No 1200CMB 62 Back off...
Page 64: ...Blitz No 1200CMB 63 Move to next center angle cut and plunge...
Page 65: ...Blitz No 1200CMB 64 Back off...
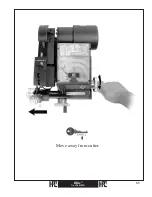
Page 66: ...Blitz No 1200CMB 65 Move away from cutter...
Page 67: ...Blitz No 1200CMB 66 Turn off the machine...
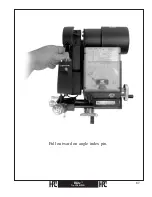
Page 68: ...Blitz No 1200CMB 67 Pull outward on angle index pin...
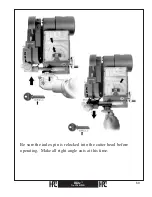
Page 69: ...Blitz No 1200CMB 68 Swivel cutter head by the angle pivot pin as indicated by the arrows...
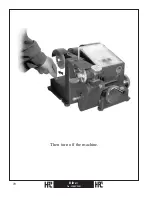
Page 71: ...Blitz No 1200CMB 70 Then turn off the machine...
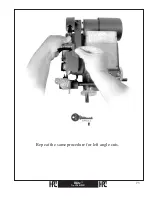
Page 72: ...Blitz No 1200CMB 71 Repeat the same procedure for left angle cuts...
Page 74: ...Blitz No 1200CMB 73 7 0 Re calibration of Depth...
Page 78: ...Blitz No 1200CMB 77 8 0 Re calibration of Space...
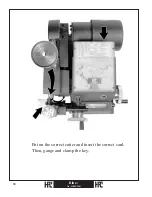
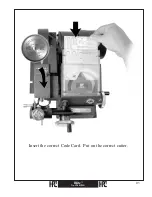
Page 92: ...Blitz No 1200CMB 91 Insert the correct Code Card Put on the correct cutter...
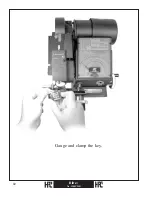
Page 93: ...Blitz No 1200CMB 92 Gauge and clamp the key...
Page 100: ...Blitz No 1200CMB 99...
Page 102: ...Blitz No 1200CMB 101 9 0 Preventive Maintenance Lubrication Repairs and Guarantee...
Page 103: ...Blitz No 1200CMB 102 visit us online at www hpcworld com...
Page 106: ...Blitz No 1200CMB 105 10 0 Exploded Views Part Listings...
Page 108: ...Blitz No 1200CMB 107 1200CMB 25 111704 18 45 46...
Page 110: ...Blitz No 1200CMB 109 1200CMBACDC 14 25 37 52 53 012302 18 54 55...
Page 114: ...Blitz No 1200CMB 113 Visit us at www hpcworld com...
Page 115: ......


