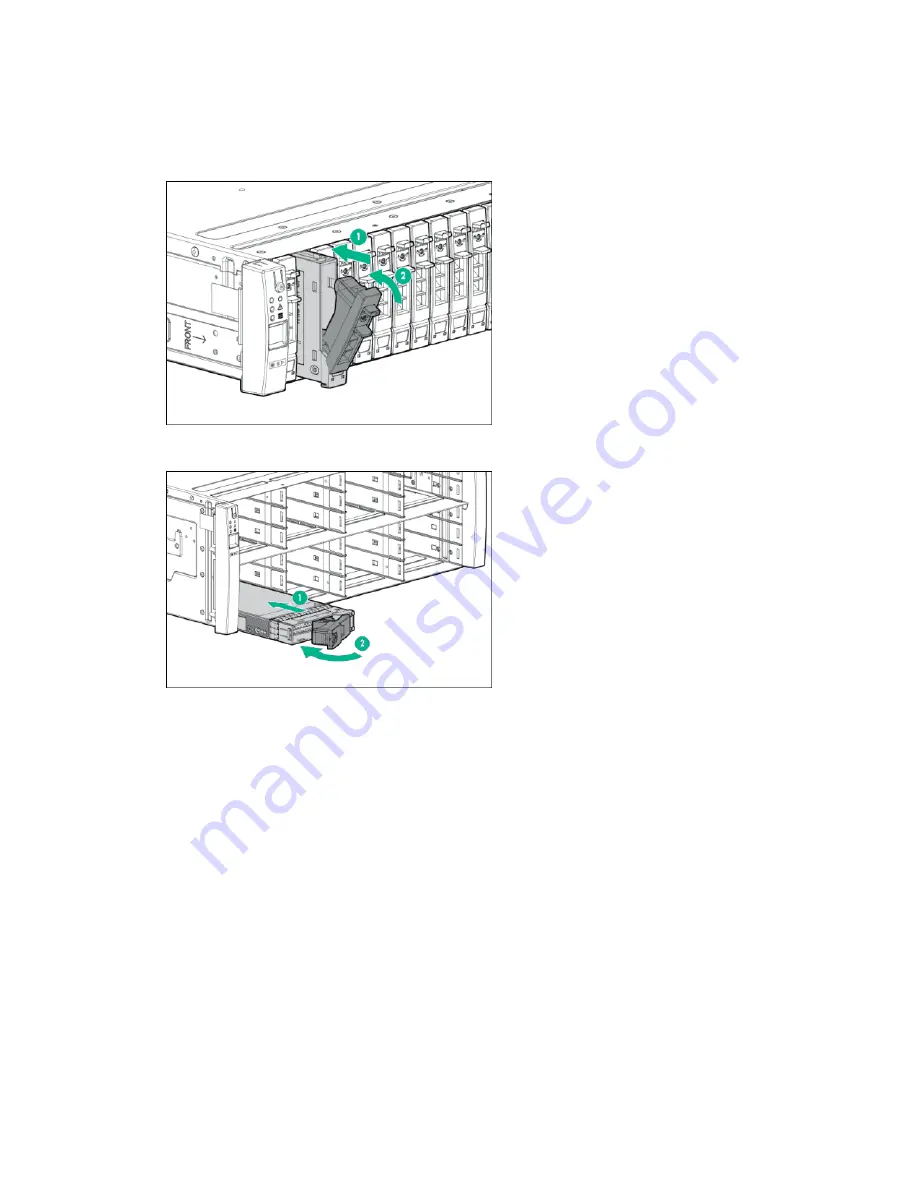
a.
On the drive, press the release button to open the handle.
b.
With the latch handle of the drive fully extended, align and slide the drive into the bay until the
handle begins to engage (1).
c.
To seat the drive into the drive bay, close the handle (2).
Figure 17: Installing an SFF drive
Figure 18: Installing an LFF drive
Verification
11.
Observe the newly installed drive and confirm that the fault LED is off and the status LED is solid
green.
The change in the LEDs may take several minutes as the drive is prepared for use by the system.
12.
Verify the state of the replacement drive.
From the Service Console interface, the drive ID that you just replaced will be removed from the list,
and the replacement drive will be assigned a new drive ID and be in a healthy state. The
Schematic
view automatically refreshes.
13.
From the Service Console interface, verify that the
State
of the component and the storage system
are
Normal
(green).
14.
After the component replacement, initiate
Check Health
on the storage system.
a.
From the Service Console interface, select
Systems
.
b.
Select
Actions
>
Check health
.
24
Service


