66
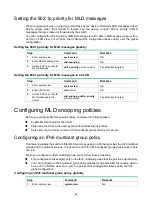
Setting the 802.1p priority for MLD messages
When congestion occurs on outgoing ports of the Layer 2 device, it forwards MLD messages in their
802.1p priority order, from highest to lowest. You can assign a higher 802.1p priority to MLD
messages that are created or forwarded by the switch.
You can configure the 802.1p priority of MLD messages for all VLANs in MLD-snooping view or for a
VLAN in VLAN view. For a VLAN, the VLAN-specific configuration takes priority over the global
configuration.
Setting the 802.1p priority for MLD messages globally
Step Command
Remarks
1.
Enter system view.
system-view
N/A
2.
Enter MLD-snooping view.
mld-snooping
N/A
3.
Set the 802.1p priority for
MLD messages.
dot1p-priority priority-number
The default setting is 0.
Setting the 802.1p priority for MLD messages in a VLAN
Step Command
Remarks
1.
Enter system view.
system-view
N/A
2.
Enter VLAN view.
vlan vlan-id
N/A
3.
Set the 802.1p priority for
MLD messages in the
VLAN.
mld-snooping dot1p-priority
priority-number
The default setting is 0.
Configuring MLD snooping policies
Before you configure MLD snooping policies, complete the following tasks:
•
Enable MLD snooping for the VLAN.
•
Determine the ACLs to be used by the IPv6 multicast group policies.
•
Determine the maximum number of IPv6 multicast groups that a port can join.
Configuring an IPv6 multicast group policy
This feature enables the switch to filter MLD reports by using an ACL that specifies the IPv6 multicast
groups and the optional sources. It is used to control the IPv6 multicast groups that receiver hosts
can join.
When you configure an IPv6 multicast group policy, follow these guidelines:
•
This configuration takes effect only on the IPv6 multicast groups that the port joins dynamically.
•
You can configure an IPv6 multicast group policy globally for all ports in MLD-snooping view or
for a port in interface view. For a port, the port-specific configuration takes priority over the
global configuration.
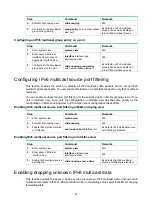
Configuring an IPv6 multicast group policy globally
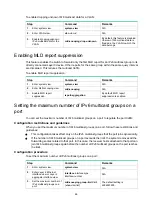
Step Command
Remarks
1.
Enter system view.
system-view
N/A

