Page
14 of 21
NOTE: Usage will also be a factor for filter changes – if your pressure begins to drop and the water slows down
through the filters it can be an indication that the filters are blocking and may be due for a replacement. These
guidelines are based on appropriately sized/quoted systems for the intended application. Systems purchased
without recommendation by the supplier may not perform to the above expectations.
III. Testing Filters
Differential pressure is a good test to determine if the filters are beginning to block and need replacement. When new
filters are installed, record the pressure on each gauge while the water is static (no flow) then again measure the
pressure with an outlet running (such as a shower). This will give you a baseline for static and flowing differential
pressure. There is no set rule as to when filters need replacing due to high differential loss, it more comes down to
personal preference. Filters should be replaced at least every 12 months.
IV. UV System Replacement Parts & Maintenance
The 48W lamp in this system is rated for an effective lifespan of 9000 hours (12 months). They are designed for
continuous running, not for intermittent operation. Lamp replacement is recommended every 9000 hours of
operation (approx. 365 days of constant runtime). After 9000 hours, the lamp may still light, but the UV intensity has
diminished. Cleaning of the Thimble is recommended once every 3-6 months with alcohol or a mild detergent.
Lamp replacement | Every 12 Months
Replace Quarts Sleeve and O-Rings | Every 2 years
H7-90-Lamp
48W HO UV Lamp to suit H7-90-AT
H7-90-Thimble
470mm x 23mm OD Quartz Domed End Thimble
H7-90-OR
23mm OD O-Rings
Replacement Ballast
H7-90-PS
HPF Electronic Ballast | 33W – 120W with Countdown Timer
V. Lamp Replacement
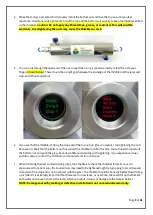
CAUTION: DO not touch the Lamp with your fingers. Handle by the ends only or wear soft non-abrasive heat-resistant
gloves to prevent any finger marks or burning.
1.
No need to shut off water supply to UV system.
2.
Disconnect main power source and allow the unit to power down for 30 seconds.
3.
Remove the cover cap.
4.
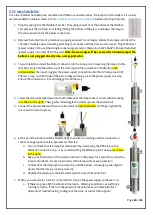
Withdraw wire with lamp carefully until approximately 2 inches of the lamp is exposed. Lamp case can be
very hot - be careful and do not drop the Lamp into the Thimble as both are easily broken.
5.
Remove the 4-pin electrical socket from the lamp pins and keep a firm hold of the UV lamp.
6.
Withdraw Lamp from Thimble carefully. Be sure to withdraw lamp straight out without angling until
completely clear of Thimble.
7.
Follow up Lamp installation steps (UV Lamp Installation Steps 2 to step 6) to reinstall new lamp.
8.
Reset the Ballast Timer per Ballast Operation Instructions “Lamp II. Replacement Due”.
VI. Thimble (Quartz Tube) Replacement
1.
Turn off power.
2.
Shut off water supply to UV system via inlet and outlet valves.
3.
Drain the chamber.
4.
Follow lamp replacement steps (above) to remove UV lamp.
5.
Twist off nuts from reactor chamber.
6.
Remove O-ring.
7.
Remove quartz sleeve and withdraw it from chamber carefully.
8.
If the thimble is broken, please follow next steps before reinstallation.

