background image


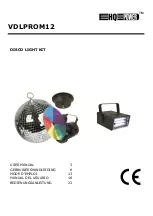
VDLPROM12 

V. 01 

 08/12/2014 

©Velleman nv 


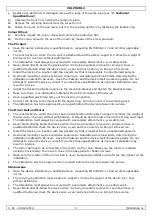
Install the device in a location with few passers-by that is inaccessible to unauthorised persons. 


Overhead mounting requires extensive experience: calculating workload limits, determining the 

installation material to be used… Have the material and the device itself checked regularly. Do not 

attempt to install the device yourself if you lack these qualifications as improper installation may 
result in injuries. 


Adjust the desired inclination angle via the mounting bracket and tighten the bracket screws. 


Make sure there is no flammable material within a 0.5 m radius of the device. 


Have a qualified electrician carry out the electric connection. 


Connect the device to the mains with the power plug. Do not connect it to a dimming pack. 


The installation has to be approved by an expert before the device is taken into service. 

5.


Use 

After connecting the devices to the mains, the mirror ball motor will rotate at 3 RPM, the lamp will be on, 
the colour wheel will be turning and the stroboscope will flash. By aiming the spot towards the mirror 
ball, you will obtain a beautiful, colourful effect. 

6.


Cleaning and Maintenance 


All screws should be tightened and free of corrosion. 


The housing, the lenses, the mounting supports and the installation location should not be deformed, 
modified or tampered with e.g. do not drill extra holes in mounting supports, do not change the 

location of the connections, …


Mechanically moving parts must not show any signs of wear and tear. 


The electric power supply cables must not show any damage. Have a qualified technician maintain 
the device. 


Disconnect the device from the mains prior to maintenance activities. 


Wipe the device regularly with a moist, lint-free cloth. Do not use alcohol or solvents. 


There are no user-serviceable parts, apart from the lamp and the colour wheel (see 

4. Installation

”).


Contact your dealer for spare parts if necessary. 


Check regularly if the key ring or chain shackles have been deformed. If so, demount the mirror ball 
immediately. 

7.


Technical Specifications 

motor 

power supply 

240 VAC, 50 Hz 

power consumption 

4 W 

rotation speed 

1.5 RPM 

dimensions 

 110 x 58 mm 

total weight 

0.3 kg 

max. diameter of mirror ball 

30 cm (12") 

max. load 

3 kg 

PAR-36 pin spot 

power supply 

240 VAC, 50 Hz 

power consumption 

30 W 

dimensions 

150 x 120 x 115 mm 

weight 

1 kg 

lamp 

PAR-36 [order code 

LAMP36/2

colour wheel with motor 

rotation speed 

2.5 RPM 

dimensions 

 220 mm 

colours 

red, yellow, blue, green, purple 

Summary of Contents for VDLPROM12

Page 1: ...VDLPROM12 DISCO LIGHT KIT USER MANUAL 3 GEBRUIKERSHANDLEIDING 8 MODE D EMPLOI 13 MANUAL DEL USUARIO 18 BEDIENUNGSANLEITUNG 23...

Page 2: ...VDLPROM12 V 01 08 12 2014 2 Velleman nv...

Page 3: ...ith liquids on top of or close to the device Risk of electroshock when opening the cover Touching live wires can cause life threatening electroshocks Do not disassemble or open the housing yourself Ha...

Page 4: ...unauthorised users 3 General Guidelines Refer to the Velleman Service and Quality Warranty on the last pages of this manual This set includes a mirror ball and pin spot for use at home on stages in d...

Page 5: ...wer plug Do not connect it to a dimming pack The installation has to be approved by an expert before the device is taken into service The Mirror Ball and Motor The construction to which the mirror bal...

Page 6: ...Cleaning and Maintenance All screws should be tightened and free of corrosion The housing the lenses the mounting supports and the installation location should not be deformed modified or tampered wit...

Page 7: ...rrect use of this device For more info concerning this product and the latest version of this manual please visit our website www hqpower eu The information in this manual is subject to change without...

Page 8: ...ten gevuld met vloeistof op of naast het toestel Elektrocutiegevaar bij het openen van het toestel Raak geen kabels aan die onder stroom staan om dodelijke elektroshocks te vermijden Open de behuizing...

Page 9: ...latie en de bediening van dit toestel Installeer het toestel weg van extreme temperaturen zie 7 Technische specificaties vochtigheid en stof Zorg voor een minimumafstand van 50 cm tussen de lichtuitga...

Page 10: ...het monteert verwijdert of schoonveegt Laat het toestel controleren door een geschoolde technicus voor u het in gebruik neemt en laat het 1 x per jaar volledig nakijken Installeer dit toestel op een...

Page 11: ...et gebinte mogen niet vervormd zijn of aangepast worden geen extra gaten in montagebeugels aansluitingen niet verplaatsen etc Mechanisch bewegende delen mogen geen sporen van slijtage vertonen en moge...

Page 12: ...r dit product en de laatste versie van deze handleiding zie www hqpower eu De informatie in deze handleiding kan te allen tijde worden gewijzigd zonder voorafgaande kennisgeving AUTEURSRECHT Velleman...

Page 13: ...eillez ce que les enfants ne puissent pas jouer avec l appareil Utiliser cet appareil uniquement l int rieur Prot ger de la pluie de l humidit et des projections d eau Ne jamais placer d objets rempli...

Page 14: ...Directives g n rales Se r f rer la garantie de service et de qualit Velleman en fin de notice Cet ensemble consiste d une boule facettes et un projecteur pour utiliser la maison sur la sc ne Employez...

Page 15: ...flammable dans un rayon de 50 cm autour de l appareil Un lectricien qualifi doit tablir la connexion lectrique Branchez l appareil sur le r seau lectrique par la fiche d alimentation Ne le branchez pa...

Page 16: ...en service 5 Emploi Quand vous avez branch les appareils sur le r seau lectrique le moteur de la boule tournera 3 RPM la lampe sera allum e le disque tournera et le stroboscope mettra des clats En di...

Page 17: ...responsable des dommages ou l sions directs ou indirects pouvant r sulter de l utilisation de cet appareil Pour plus d information concernant cet article et la derni re version de cette notice visiter...

Page 18: ...ng n tipo de salpicadura o goteo Nunca ponga un objeto con l quido en el aparato Riesgo de descargas el ctricas al abrir la caja Puede sufrir una peligrosa descarga el ctrica al tocar un cable conecta...

Page 19: ...Introduzca frecuentemente una pausa para prolongar la vida del VDLPROM12 No agite el aparato Evite usar excesiva fuerza durante la instalaci n y la reparaci n Seleccione un lugar de montaje donde el...

Page 20: ...ico especializado debe revisar el aparato antes de la puesta en marcha Despu s debe revisarlo una vez al a o Instale el aparato fuera del alcance de personas no autorizadas y en un lugar con poca gent...

Page 21: ...ique que las piezas m viles no est n us ndose o rompi ndose No da e los cables de alimentaci n Contacte con un t cnico especializado para instalar el aparato Desconecte el aparato de toda fuente antes...

Page 22: ...nformaci n sobre este producto y la versi n m s reciente de este manual del usuario visite nuestra p gina www hqpower eu Se pueden modificar las especificaciones y el contenido de este manual sin prev...

Page 23: ...esondere Vorsicht walten Verwenden Sie das Ger t nur im Innenbereich Sch tzen Sie das Ger t vor Regen und Feuchte Stellen Sie keine mit Fl ssigkeit bef llten Gegenst nde auf das Ger t Stromschlaggefah...

Page 24: ...cotheken Theater usw Das VDLPROM12 ist nur f r den Anschluss an einen AC Strom von 230 VAC 50 Hz zugelassen und wurde ausschlie lich zur Verwendung in Innenr umen konzipiert Lichteffekte eignen sich n...

Page 25: ...ie Schrauben gut fest Entfernen Sie alle entflammbaren Materialen in einem Abstand von 50cm Der elektrische Anschluss darf nur von einer Fachkraft durchgef hrt werden Schlie en Sie das Ger t ber den S...

Page 26: ...ehen 3 U Min die Lampe brennen das Farbrad drehen und das Stroboskop blitzen Indem Sie den Punkstrahler auf die Kugel richten bekommen Sie einen wundersch nen farbigen Effekt 6 Reinigung und Wartung A...

Page 27: ...tung f r Schaden oder Verletzungen bei falscher Anwendung dieses Ger tes F r mehr Informationen zu diesem Produkt und die neueste Version dieser Bedienungsanleitung siehe www hqpower eu Alle nderungen...

Page 28: ...volledig terug te betalen In dat geval krijgt u een vervangend product of terugbetaling ter waarde van 100 van de aankoopsom bij ontdekking van een gebrek tot n jaar na aankoop en levering of een ver...

Page 29: ...de transporte de y a Velleman si el aparato ya no est cubierto por la garant a Cualquier art culo que tenga que ser reparado tendr que ser devuelto a su distribuidor Velleman Devuelva el aparato con l...

Reviews: