background image

VDPLW1308


VELLEMAN 

VDPLW1308 – 8 LED SPOTS WITH DMX CONTROLLER 


1. Introduction & Features 


To all residents of the European Union 

Important environmental information about this product 

This symbol on the device or the package indicates that disposal of the device after its lifecycle could harm 

the environment. 

Do not dispose of the unit (or batteries) as unsorted municipal waste; it should be taken to a specialised 

company for recycling. 

This device should be returned to your distributor or to a local recycling service. 

Respect the local environmental rules. 

If in doubt, contact your local waste disposal authorities. 


Thank you for buying the 

VDPLW1308

! This LED colour system contains a control unit and 8 lighting fixtures. The 

device was designed for easy installation, multi-purpose hanging, safe, energy-efficient and long-life operation. There 

is an acrylic filter in front of the LED bulbs to soften the lighting effect. If the device was damaged in transit, do not 

install or use it and contact your dealer. This system includes 8 LED spots, 4 x 6m DC/signal cables, 4 x 3m DC/signal 

cables, 1 controller/DMX interface and this manual. Please read the manual thoroughly before bringing this device into 

service. 


2. Safety Instructions 


Damage caused by disregard of certain guidelines in this manual is not covered by the warranty and the dealer 

will not accept responsibility for any ensuing defects or problems. 


A qualified technician should install and service this device. 


Do not switch the device on immediately after it has been exposed to changes in temperature. Protect the device 

against damage by leaving it switched off until it has reached room temperature. 


This device falls under protection class I. It is therefore essential that the device be earthed. Have a qualified 

person carry out the electric connection. 


Make sure that the available voltage does not exceed the voltage stated in the specifications of this manual. 


Do not crimp the power cord and protect it against damage. Have an authorised dealer replace it if necessary. 


Disconnect the device from the mains to clean it or when it is not in use. Handle the power cord by the plug only. 


Do not look directly at the light source as sensitive people may go into epileptic seizure if they do. 


Note that damage caused by user modifications to the device is not covered by the warranty. 


Lamps and mechanical wear are not covered by the warranty. 


Keep the device away from children and unauthorised users. 


3.  General Guidelines 


This device is designed for professional use on stage, in discos, theatres, etc. The 

VDPLW1308

 should only be 

used indoors with an alternating current of max. 230VAC / 50Hz. 


Lighting effects are not designed for permanent operation: regular operation breaks will prolong their lives. 


Do not shake the device. Avoid brute force when installing or operating the device. 


Select a location where the device is protected against extreme heat (see “

Technical Specifications

”), dust and 

moisture. Respect a minimum distance of 0.5m between the device’s light output and any illuminated surface. 


Use an appropriate safety cable to fix the device (e.g. 

VDLSC8

). 

Be very careful during the installation: touching live wires can cause life-threatening electroshocks.


Keep this device away from rain and moisture.


Unplug the mains lead before opening the housing.


Summary of Contents for VDPLW1308

Page 1: ...erature Protect the device against damage by leaving it switched off until it has reached room temperature This device falls under protection class I It is therefore essential that the device be earth...

Page 2: ...rranty 4 Installation and Use of the VDPLW1308 a Setup Connect the spots using the supplied DC signal cables and set each fixture address as illustrated b Front and Side Panel Functions c Stand alone...

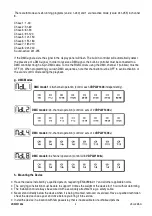
Page 3: ...e mode select chase 9 and adjust the audio input level using the sensitivity control dial on the rear panel of the VDPLW1308 In DMX mode use channel 6 to select sound active operation f DMX Operation...

Page 4: ...und control mode during the playback g DMX Modes DMX mode 1 48 channel operation control each VDPLW1308 independently DMX mode 2 24 channel operation control 4 sets of 2 VDPLW1308s DMX mode 4 12 chann...

Page 5: ...ally noisy environment e g discos The terminator prevents corruption of the digital control signal by electrical noise The DMX terminator is simply an XLR plug with a 120 resistor between pins 2 and 3...

Page 6: ...en LED systeem met bestuureenheid en 8 verlichtingstoestellen Het toestel is ontworpen voor een eenvoudige installatie op verscheidene manieren veilig energiebesparend en langdurig gebruik Om de verli...

Page 7: ...nimumafstand van 0 5m tussen de lichtuitgang van het toestel en het belichte oppervlak Maak het toestel vast met een geschikte veiligheidskabel bvb VDLSC7 of VDLSC8 Leer eerst de functies van het toes...

Page 8: ...kleur te selecteren en stel uw waarde in met UP en DOWN Geeft aan ROOD van donker naar helder Geeft aan GROEN van donker naar helder Geeft aan BLAUW van donker naar helder De laatste instelling van h...

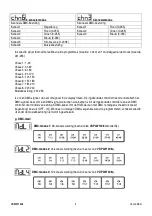
Page 9: ...0 Chase 8 221 240 Muziekbesturing 241 255 Is er een DMX signaal dan zal dit signaal in de display flitsen De ingebouwde controller neemt automatisch het DMX signaal waar Om een DMX signaal te kunnen w...

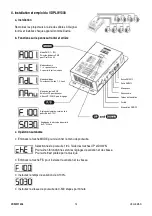
Page 10: ...an Verwijder alle brandbaar materiaal in een straal van 0 5m rond het toestel Een geschoolde elektricien moet het toestel aansluiten Sluit het toestel via de stekker aan op het lichtnet Sluit het niet...

Page 11: ...elen mogen geen sporen van slijtage vertonen en mogen niet onregelmatig bewegen 4 De voedingskabels mogen niet beschadigd zijn Laat het toestel onderhouden door een geschoolde technicus 5 Ontkoppel he...

Page 12: ...ez la fiche pour d brancher l appareil non pas le c ble Ne regardez pas directement la source lumineuse comme ceci peut entra ner des crises d pilepsie chez certains gens Les dommages occasionn s par...

Page 13: ...est pilot e par la musique Enfoncez la touche F S pour instaurer la variation et la vitesse Instaurez le temps de variation de 0 100 Instaurez la vitesse de poursuite de 0 500 tapes par minute Mode DM...

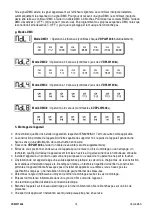
Page 14: ...lectionnez l adresse de d part pour le contr leur incorpor l aide des touches UP et DOWN S lectionnez le mode DMX en enfon ant MODE Ensuite enfoncez F S pour acc der utilisez les touches UP et DOWN po...

Page 15: ...ion de la construction en r sulte Fixez votre VDPLW1308 l aide d un c ble de s curit s curit suppl mentaire vitez de vous positionner en dessous de l appareil pour l enlever ou lors du montage ou du n...

Page 16: ...s r agissent sur les signaux de contr le Cette adresse de d part num rique indique le num ro de canal sur lequel l appareil coute le contr leur DMX D terminez cette adresse avec les interrupteurs DIP...

Page 17: ...naci n con LEDs contiene una unidad de control y 8 aparatos de iluminaci n El aparato ha sido dise ado para una f cil instalaci n de diferentes maneras y le ofrece un uso seguro un ahorro de energ a y...

Page 18: ...te aparato es un efecto de luz para uso profesional en una discoteca un teatro etc Utilice este aparato en interiores y con ctelo a una fuente de corriente CA de m x 230VCA 50Hz No ha sido dise ado pa...

Page 19: ...Seleccione el tiempo de regulaci n de luz de 0 100 Seleccione la velocidad del chase de 0 500 pasos por minuto Modo DMX 1 512 Selecci n de direcci n DMX para Pixel Drive 80 Modo aut nomo stand alone 1...

Page 20: ...direcci n DMX Seleccione la direcci n inicial para el controlador incorporado con las teclas UP y DOWN Seleccione el modo DMX al pulsar MODE Luego pulse F S para entrar utilice las teclas UP y DOWN p...

Page 21: ...zca una deformaci n de dicho soporte Fije el VDPLW1308 con un cable de seguridad seguridad adicional Evite ponerse debajo del aparato durante el montaje la limpieza etc Un t cnico especializado debe r...

Page 22: ...rol correctas Esta direcci n inicial digital es el primer canal en el cual el aparato reaccionar a las se ales DMX del controlador DMX Determine esta funci n con los interruptores DIP de la parte tras...

Page 23: ...on Aufh ngung ist sicher sparsam und hat eine lange Lebensdauer Es gibt einen Acrylfilter vor den LED Birnen um das Licht zu mildern berpr fen Sie ob Transportsch den vorliegen Sollte dies der Fall se...

Page 24: ...ngern Vermeiden Sie Ersch tterungen Vermeiden Sie rohe Gewalt w hrend der Installation und Bedienung des Ger tes Achten Sie bei der Wahl des Installationsortes darauf dass das Ger t keinem Staub kein...

Page 25: ...asegeschwindigkeit von 0 500 Schritte pro Minute d Manuelle RGB Regelung Dr cken Sie die MODE Taste f r die manuelle RGB Regelung Dr cken Sie F S um die gew nschte Farbe zu w hlen Dr cken Sie die UP u...

Page 26: ...f r das integrierte Steuerger t mit den UP und DOWN Tasten W hlen Sie den DMX Kanalmodus indem Sie die MODE Taste dr cken Dr cken Sie F S zum ffnen verwenden Sie die UP und DOWN Tasten zum Selektiere...

Page 27: ...m Gewicht des Ger ts tragen k nnen ohne dass Verformung verursacht wird Das Ger t muss immer mit einer zweiten Befestigung z B mit einem Sicherheitskabel gesichert werden Stehen Sie w hrend der Montag...

Page 28: ...on der das Ger t die Befehle der DMX Steuerung empf ngt und ausf hrt Sie k nnen dieselbe Startadresse f r eine ganze Gruppe von Ger ten verwenden oder eine separate Startadresse f r jedes Ger t eingeb...

Page 29: ...versorgung max 230VAC 50Hz Stromaufnahme max 115W Sicherung F1 6A 250VAC Artikelnummer FF1 6N Steuerger t Abmessungen 360 x 200 x 85mm Gesamtgewicht 3 7kg Scheinwerfer Abmessungen 175 x 139 x 163mm Ge...

Reviews: