-15-
6)
Withdraw the terminated wire from the tool, holding it by the wire. Excersise caution not to catch the contact in any part of
the tool while doing it.
7)
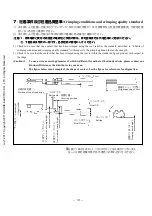
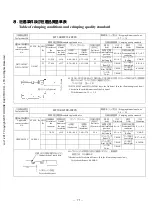
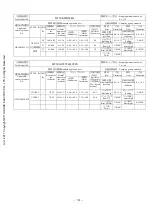
Verify the crimp correct dimensions refer to paragraph 7. “Table of crimping conditions and crimping quality standard”.
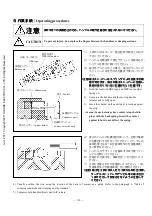
(Caution) When inserting the contact into the tool or taking it out from the tool be careful that the contact is not caught
with the cable stopper, anvil, etc., and is not deformed.
6
6
6
6
.
クリンパの
クリンパの
クリンパの
クリンパの交換方法
交換方法
交換方法
交換方法
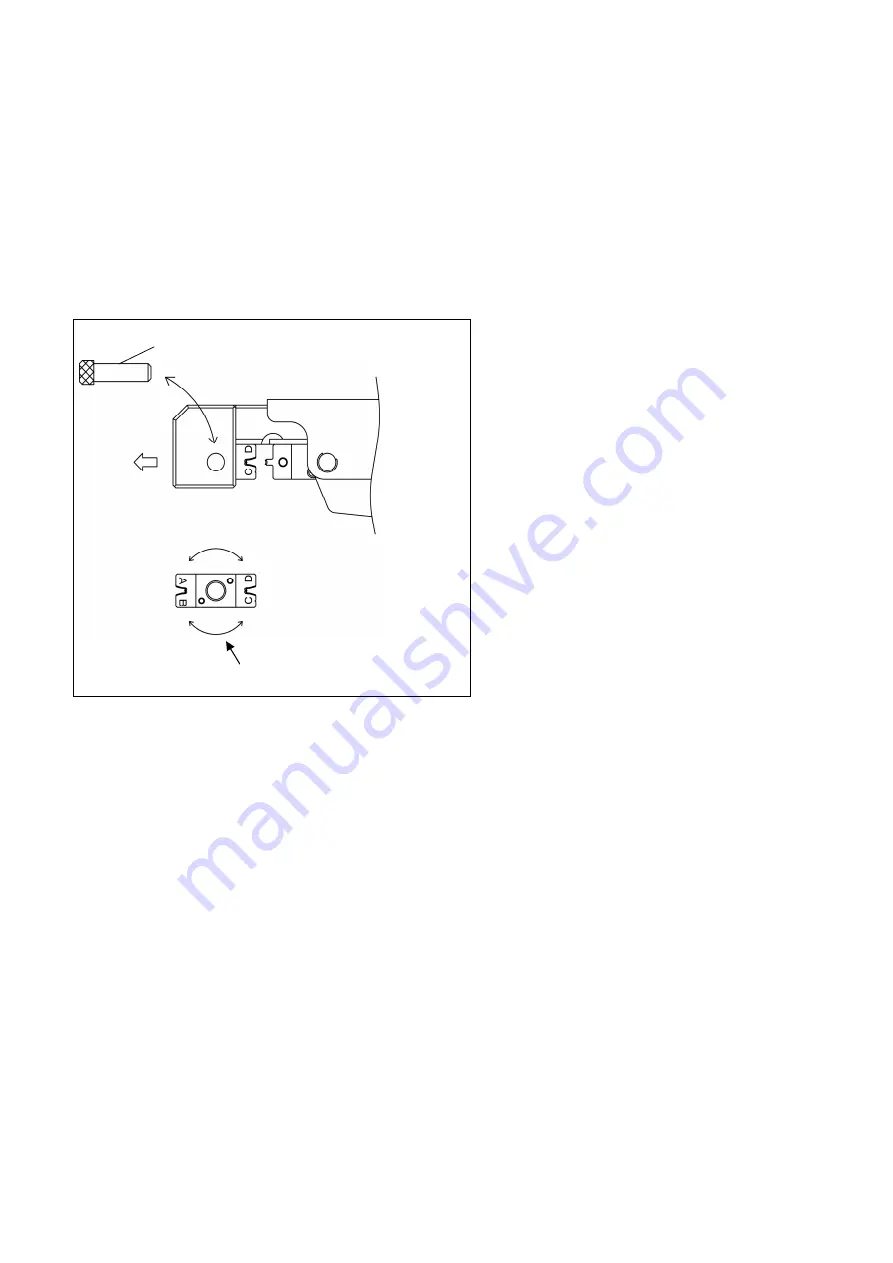
/ Replacing the crimper
手動圧着工具は、ご使用になるケーブルサイズにより、クリンパを交換してご使用ください。(アンビルは共用です。)
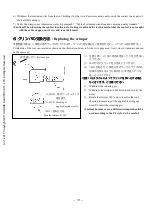
Crimp side of the tool can rotated as shown on the illustration below to fit the wire gage used. Anvil side is stationary and can
not be removed.
1)
圧着 工具 ヘ ッド 部に あ る抜 き差 しピ ン を引 き抜 い
てください。
2)
矢印方向にクリンパを引き抜いてください。
3)
180
˚
回転させ、ご使用になるケーブルサイズの刻
印表示が見えるように取り付け、抜き差しピンを
差し込んでください。
(
(
(
( 注意
注意
注意
注意 ) UL
) UL
) UL
) UL スタイルによってクリンパを
スタイルによってクリンパを
スタイルによってクリンパを
スタイルによってクリンパを 使
使
使
使 い
い
い
い 分
分
分
分 ける
ける
ける
ける 場合
場合
場合
場合
もございます
もございます
もございます
もございます 。
。
。
。 ご
ご
ご
ご 注意
注意
注意
注意 ください
ください
ください
ください。
1)
Withdraw the releasing pin.
2)
Withdraw the crimper in the direction shown by the
arrow.
3)
Rotate the crimper 180
°
and re-insert in the tool,
showing the marking of the applicable wire gage
used. Re-insert the releasing pin.
(Caution) In some cases, a different crimper should be
used according to the UL style. So, be careful.
抜き差しピン/
Release pin
A,B,C,D
:
適 合 ケ ー ブ ル サ イ ズ
番号表示
A,B,C,D : Marking of
applicablecable size No.
180°回転させる
Turn the crimper by 180
°
Jul.1.2017 Copyright 2017 HIROSE ELECTRIC CO., LTD. All Rights Reserved.


