background image


 Page 

6/134


Summary of Contents for S4 Standup 2007

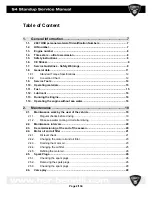
Page 1: ...Page 1 134 ...

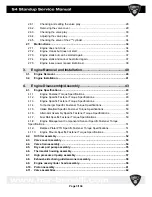
Page 2: ...ning the Engine 16 1 14 Operating the engine without sea water 16 2 Maintenance 18 2 1 Maintenance work by the user of the vehicle 19 2 1 1 Regular checks before driving 19 2 1 2 Rinse sea water cooling circuit after driving 19 2 2 Maintenance intervals 20 2 3 Decommissioning at the end of the season 20 2 4 Motor oil and oil filter 21 2 4 1 Oil level check 21 2 4 2 Changing the motor oil and oil f...

Page 3: ...ons 48 4 1 3 Engine Specific Fastener Torque Specifications 49 4 1 4 Turbocharger Specific Fastener Torque Specifications 49 4 1 5 Intake Manifold Specific Fastener Torque Specifications 50 4 1 6 Alternator Assembly Specific Fastener Torque Specifications 50 4 1 7 Fuel Rail Specific Fastener Torque Specifications 50 4 1 8 Engine Management Components Sensor Specific Fastener Torque Specifications ...

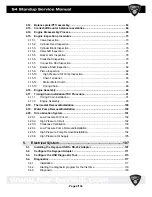
Page 4: ...6 Engine Assembly 86 4 17 Timing Chain Installation TDC Procedure 91 4 17 1 Timing Chain Installation 91 4 17 2 Engine Assembly 95 4 18 Thermostat Removal Installation 100 4 19 Water Pump Removal Installation 100 4 20 Oil Lubrication System 101 4 20 1 Low Pressure Oil Circuit 102 4 20 2 High Pressure Circuit 102 4 20 3 Crankcase Ventillation 103 4 20 4 Low Pressure Pump Removal Installation 103 4 ...

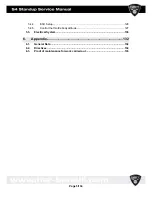
Page 5: ...4 4 ECU Setup 126 5 4 5 Control the throttle body attitude 127 5 5 Electrical System 130 6 Appendix 132 6 1 General Data 132 6 2 Directives 132 6 3 Proof of maintenance for work carried out 133 Page 5 134 ...

Page 6: ...Page 6 134 ...

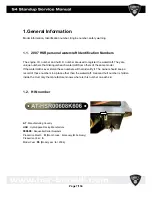
Page 7: ...f the same model If the watercraft is ever stolen these numbers will help identify it The owner should keep a record of these numbers in a place other than the watercraft A second hull number is hidden inside the Hull only the manufacturer knows where is this number on each ski 1 2 HIN number AT Manufacturing Country HSR HydroSpace Racing Manufacture 000608 Sequential Serial Numbers Production Mon...

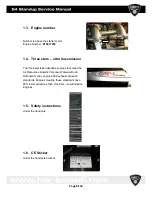
Page 8: ...label identifies engines that meet the Air Resources Board s Personal Waterwraft and Outboard marine engine 2008 exhaust emission standards Engines meeting these standards have 65 lower emissions than One Star Low Emission Engines 1 5 Safety instructions Under the handpole 1 6 CE Sticker Under the handpole bracket Page 8 134 ...

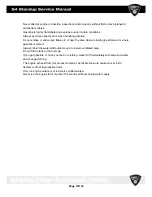
Page 9: ...embling components Never reuse Oetikert clamps when removed from fuel lines Replace with small gear clamps Always use Hydrospace authorized lubricants greases and locking agents when assembling components Failure to do so may cause severe engine or vehicle damage Always disconnect the black negative cable first from the battery when removing the battery When installing the battery attach the red p...

Page 10: ...med or where gasoline is stored Always refuel the watercraft outdoors and in a well ventilated area Do not fill the tank to the fuel cap If you get gasoline or oil on your skin or clothing wash it off immediately with soap and water and change clothing The engine exhaust from this product contains chemicals known to cause cancer birth defects or other reproductive harm Only run engine outdoors or ...

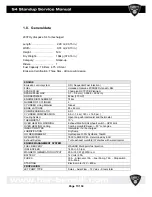
Page 11: ...DER COMPRESSION 9 6 1 bar 140 14 5 psi Cooling System Open loop with intercooler and thermostat THERMOSTAT 70 c OVER HEATING WARNING Exhaust Manifold Overheart switch RPM limit OVER HEATING Cooling Cooling manifold Sensor 90 cut engine INDUCTION TYPE Intercooler Turbo charged LUBRIFICATION Dry Sump OIL REQUIREMENT Hydrospace 100 Synthetic 10w60 RPM LIMITER 7800 to 8400 RPM Determined by ECU Exhaus...

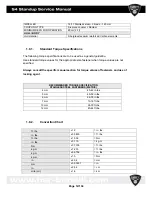
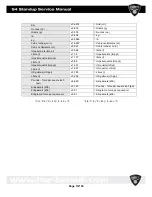
Page 12: ...ner when torque values are not specified Always consult the specific manual section for torque values of fasteners and use of locking agent RECOMMENDED TORQUE SPECIFICATION STAINLESS STEEL FASTENERS METRIC 4 mm 40 42 in lbs 5 mm 45 52 in lbs 6 mm 66 78 in lbs 7 mm 13 16 ft lbs 10 mm 26 30 ft lbs 12 mm 40 44 ft lbs 1 8 2 Convertion Chart ft lbs x 12 in lbs in lbs x 0 0833 ft lbs ft lbs x 1 356 Nm i...

Page 13: ...ts Imp qt x 1 137 liters l Liters l x 0 88 Imperial quarts Imp qt Imperial quarts Imp qt x 1 201 US quarts US qt Liters l x 1 057 US quarts US qt US gallons US gal x 3 785 Liters l Liters l x 0 264 US gallons US gal Pounds force per square inch psi x 6 895 Kilopascals kPa Kilopascals kPa x 0 145 Pounds force per square inch psi Kilopascals kPa x 0 01 Kilograms force per square cm Kilograms force p...

Page 14: ...99_20_002 Diagnostic cable and Software HSR00_9920_003 Impeller tool HSR00_99_01_076 Flywheel removal tool HSR00 Torx 50 for Head cylinder Chain Remover tool Not Available Balance Shaft Remover tool Not Available Page 14 134 ...

Page 15: ...leaded gasoline according to DIN 51607 superunleaded with an octane rating of at least 95 ROZ RON or 85 MOZ MON In case of emergency unleaded fuel with 91 ROZ RON or 82 5 MOZ MON may be used for a short time Lower quality fuels should only be used in case of emergency If used regularly they cause decreases in performance and possibly damage to the engine Page 15 134 ...

Page 16: ...erate the engine over 6 000 U min RPM This protective running in has a positive effect on the engine s lifespan 1 14 Operating the engine without sea water If it is necessary to operate the engine longer than 30 seconds without sea water the vehicle s rinsing equipment must be used See chapter Maintenance Rinse sea water cooling circuit after driving The engine may only be operated at idle speed f...

Page 17: ...Page 17 134 ...

Page 18: ... on the engine described in this manual must be carried out by trained service personnel During the warranty period maintenance and repair work may only be carried out in Weber Motor service stations or in associated shops If necessary contact your vehicle dealer Weber Motor AG reserves the right to demand that proof of warranty be provided in writing for warranty service See Proof of maintenance ...

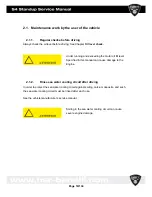
Page 19: ...ill level Specified in this manual can cause damage to the Engine 2 1 2 Rinse sea water cooling circuit after driving In order to protect the sea water cooling circuit against soiling calcium deposits and such the sea water cooling circuit must be rinsed after each use See the vehicle manufacturer s service manual Soiling in the sea water cooling circuit can cause severe engine damage Page 19 134 ...

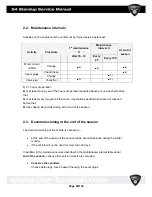
Page 20: ...3 or at least every two years if the hours of operation specified above are not reached before that 4 See chapter Decommissioning at the end of the season 2 3 Decommissioning at the end of the season The decommissioning of the vehicle is necessary at the end of the season if the vehicle will be decommissioned during the winter months if the vehicle will not be used for more than 30 days In additio...

Page 21: ...stabilizer in order to maintain the fuel quality 2 4 Motor oil and oil filter 2 4 1 Oil level check IMPORTANT Use a clean lint free cloth The oil level must be measured with oil warm from operation approx 80 C 176 F and with the motor at a standstill Measurements with cold oil are not meaningful The desired motor temperature is achieved after a driving time of approx 10 minutes at 4000 4500 U min ...

Page 22: ...Then remove it again and read the oil level With a motor warm from operation the oil level must be just below the MAX marking The difference between MIN and MAX is approx 0 5 liter 0 53 qt US Under running the MIN marking and exceeding the MAX marking can cause severe and under some circumstances irreparable damage to the engine Page 22 134 ...

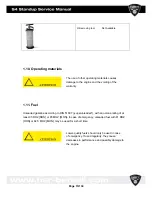
Page 23: ...or oil Motor oil see chapter Operating materials Oilfilter see spareparts catalogue 2 4 3 Draining the motor oil IMPORTANT With a motor warm from operation the greatest oil volume is sucked out of the motor 1 Unscrew the oil dipstick from the oil tank See Chapter Oil level check 2 Insert the suction hose of the oil extraction pump into the oil tank through an opening in the cover 1 until it reache...

Page 24: ...d hose 2 on one side of the oil tank If necessary extend the oil feed hose Æ Tightening torque 3 Nm 10 2 2 ft lb 7 Activate the engine s starter every 10 seconds in order to let the engine crank and wait 30 seconds 8 Repeat this procedure until the motor oil is pumped completely out Do not let engine crank longer than necessary To prevent damage due to insufficient lubrication and overloading of t...

Page 25: ...tercover 4 Æ Tightening torque 24 Nm 10 17 7 ft lb 11 Replace the oilfilter 5 and O ring 6 12 Coat the O ring 6 lightly with motor oil Æ During reassembly make sure that the oil filter snaps in IMPORTANT Assembly occurs in reverse order Please note instructions after this symbol Æ Page 25 134 ...

Page 26: ...h a motor warm from operation until just below the MAX marking 2 5 Spark Plugs 2 5 1 Checking the spark plugs IMPORTANT Socket wrench 16mm 5 8 Feeler gauge measurement range 0 69 mm 0 84 mm 0 0272 0 0331 in Torque wrench 2x spark plugs 2 5 2 Removing the spark plugs 1 Remove cable harness on the ignition coils 1 2 Loosen the cable harness on the cable holders 2 3 Remove the cable harness on the in...

Page 27: ...ashers 4 5 Remove the ignition coils 5 Æ Install the spark plugs only in a cold engine Æ Grease the threads of the spark plugs with commercial graphite grease Æ Tightening torque 10 Nm 10 7 4 ft lb 6 Unscrew the spark plugs 6 Æ Tightening torque 27 Nm 20 19 9 ft lb Assembly occurs in reverse order Please note instructions after this symbol Æ Page 27 134 ...

Page 28: ...surement range 0 08 mm 0 25 mm 0 0031 0 0098 in Valve adjustment tool see spare parts catalogue Combination wrench 24mm 15 16 Bar magnet Measurement tool for adjustment plate reading 0 01mm 0 0003 in Adjustment plates from 2 5 3 7 mm 0 0984 0 1457 in see spare parts catalogue Valve cover seals see spare parts catalogue 2x O rings see spare parts catalogue To get correct measurement values check an...

Page 29: ...k plugs 3 Unscrew the valve cover 2 along with bracket and valve 3 Æ Tightening torque 10 Nm 10 7 4 ft lb Æ The sequence of the connection Occurs according figure Æ Replace the valve cover seals 4 Æ Clean seal areas of the valve cover and cylinder head Assembly occurs in reverse order Please note instructions after this symbol Æ Page 29 134 ...

Page 30: ...ointing upwards The rocker of the first cylinder demonstrates a little play 5 Using a feeler gauge measure the valve play 6 of all four valves of the first cylinder between the adjustment plates and the rockers Permissible valve play Intake side 0 08 0 15 mm 0 0031 0 0059 in Exhaust side 0 18 0 25 mm 0 0071 0 0098 in Page 30 134 ...

Page 31: ...ve play on the intake side it is necessary to remove the fuel distributor rail Remove the cable harness on the coolant sensor 7 7 Loosen the screws and washers 8 and remove the fuel distributor rail 9 Æ Tightening torque 10 Nm 10 7 4 ft lb Page 31 134 ...

Page 32: ... valves Coat the O rings lightly with motor oil 8 Mount the valve adjustment tool 11 with two screws Tightening torque 10 Nm 10 7 4 ft lb The engine may not be turned over until all valve Plays of the first cylinder are adjusted Page 32 134 ...

Page 33: ...th the bar magnet 12 Measure the strength of the adjustment plate and replace with an adjustment plate with which the permissible tolerance is adhered to 13 Replace the adjustment plate in the spring seat 14 Remove the sliding piece 13 and to check the valve play measure again 15 Repeat this procedure with all Valves of the first cylinder Page 33 134 ...

Page 34: ...e play of the second cylinder in the same way you did the first cylinder 2 7 Malfunctions If you cannot correct a malfunction yourself using the table below contact your vehicle dealer s customer service In case of improperly made repairs the warranty is voided and HSR is not liable for any resulting subsequent damage 2 7 1 Engine does not crank Possible cause Remedy Main power switch not plugged ...

Page 35: ...rectly With non maintenance free batteries check water level Charge battery with external battery charger Engine mass point 1 not connected or not connected properly Check connection Defective fuse Check the fuses in the cable harness Drive or jet pump blocked Remove blockage Cable harness plug connections not plugged in or not plugged in correctly Check plug connections Page 35 134 ...

Page 36: ...oo little or no fuel in the tank Fill up fuel Check the engine for signs of leaky fuel lines and if necessary have it checked by a professional shop Cable harness plug connections not plugged in or not plugged in correctly Check plug connections Spark plugs defective Check the spark plugs and if necessary replace them See Chapter Spark plugs Page 36 134 ...

Page 37: ...apter Oil level check Excessive motor oil must be pumped out as quickly as possible 2 7 4 Engine stalls and cannot be started again Possible cause Remedy Lanyard not plugged in Plug in lanyard Defective fuse Check the fuses in the cable harness Too little or no fuel in the tank Fill up fuel Check the engine for signs of leaky fuel lines and if necessary have it checked by a professional shop Cable...

Page 38: ...wer speed limitations Fault Possible cause Remedy Engine speed limited to 1800 U Min RPM and the water temperature warning lamp lights up Overheating of exhaust manifold DO NOT LET THE ENGINE RUN LONGER THAN 30 SECONDS Rinse and check the sea water cooling circuit See Chapter Rinse sea water cooling circuit after driving Check the sea water pump Page 38 134 ...

Page 39: ...Page 39 134 ...

Page 40: ...to disconnect the wires on the start relay Cut the cable tie over the oil cooler 4 Engine mounts bolts The use of an engine hoist or overhead crane system is required to both remove and install the engine assembly Always disconnect the positive RED and negative BLACK battery cables from the battery after removing the engine oil and prior to performing any engine work Failure to do so may cause sev...

Page 41: ... Carefully lift the oil storage tank out of the engine compartment 7 Locate and remove the four engine mounting nuts and washers NOTE The hoist chains must allow the engine to be moved in any direction and at any pitch CAUTION The lifting hoist must be able to lift at least 250 lbs 113 kg 3 2 Engine Installation The installation of the engine and engine subsystems is the reverse of their removal D...

Page 42: ...Page 42 134 ...

Page 43: ...r Stroke Displacement 749cc Bore X Stroke 85 x 66mm 3 346 x 2 598 Compression Ratio 9 0 1 Cylinder Compression Sea Level 140 14 psi 9 6 1 bar Sea Level Recommended Fuel Premium Unleaded 91 92 93 Octane Engine Oil Requirement HSR 100 Synthetic Four Stroke Engine Oil Oil Grade Requirement 10W 60 Synthetic API A3 B3 Engine Oil Capacity With Oil Filter Replacement Dry Engine After Rebuild 3 4 3 7 US Q...

Page 44: ... 14_ BTDC 50_ ABDC Valve Diameter Exhaust Valves Intake Valves 29 5mm 1 161 32 5mm 1 279 Valve Seat Contact Width IV EV 1 1mm 1 2mm 043 047 1 3mm 1 4mm 051 055 Valve Face Width IV EV 2 0mm 2 0mm Valve Margin Thickness IV EV 5 472mm 2154 5 463mm 2150 Valve Seat Angle 45 Valve Outer Correction Angle 30 Valve Inner Correction Angle 75 Valve Clearance COLD IV 0 08 0 15mm 003 006 Page 44 134 ...

Page 45: ...KE EXHAUST 38 2mm 1 5 38 2mm 1 5 Valve Spring Installed Length INTAKE EXHAUST 32mm 1 26 32mm 1 26 Cylinder Head Warpage Limit 04mm 001 Cylinder Specifications BORE SIZE TAPER LIMIT OUT OF ROUND LIMIT WEAR LIMIT 85 00 85 01mm 3 34 008mm 0003 008mm 0003 N A Camshaft Specifications CAMSHAFT WIDTH IN CAM LOBE HEIGHT EX CAM LOBE HEIGHT MAXIMUM CAMSHAFT RUNOUT RADIAL PLAY 108 85mm 109 00mm 4 28 4 29 48 ...

Page 46: ...10mm Balance Shaft Specifications AXIAL PLAY RADIAL PLAY BEARING DIAMETER RUN OUT 15mm 25mm 005 009 014mm 066mm 0005 002 24 975mm 24 990mm 983 014mm 066mm 0005 002 Piston Specifications PISTON TO CYL CLEARANCE PISTON DIAMETER WEAR LIMIT PISTON PIN BOSS I D PIN O D PIN WEAR LIMIT TOP RING INSTALLED RING GAP 041mm 059mm 0016 0023 84 961mm 84 979mm Measured 15mm from bottom 90_ from pin 3 34 3 345 04...

Page 47: ...oid SPRING FREE LENGTH 2 7 69mm PISTON O D 43 10 9mm PISTON LENGTH 1 10 27 7 28mm 21 IDLE 80 MAX PSI 1 5 5 5 BAR 4 1 1 Engine Fastener Torque Specifications Standard Torque Guide mm FT LBS Nm 5 1 5 3 6 3 4 4 9 6 4 3 5 7 5 9 7 8 8 10 14 14 19 10 18 25 25 34 12 322 45 44 61 14 54 72 73 98 16 85 114 115 155 18 122 166 165 225 20 166 240 225 325 Page 47 134 ...

Page 48: ...lter Cover Cap 17 24 Dry Sump Oil Filter Screen 7 10 Loctite 243 M6 x 20 Dry Sump Cover to Lower Crankcase 7 10 M6 x 20 M6 x 35 M6 x 60 Dry Sump Pump Gear 28 38 Loctite 272 M8 x 25 Dry Sump Pump to Cover 7 10 M6 x 20 M6 x 25 Dry Sump Hose Connector 7 10 M6 x 16 Balance Shaft Drive Gear Nut 51 70 Loctite 272 M10 Connecting Rod Bolts Step 1 Step 2 Step 3 7 14 90 10 20 90 M10 x 1 32 Camshaft Clamps 7...

Page 49: ...4 1 4 Turbocharger Specific Fastener Torque Specifications Component FT LBS Nm Notes Fastener s Segments 7 10 M6 x 16 Compressor Housing Clamping 7 10 M6 x 12 Oil Return Flange 7 10 M6 x 16 Turbocharger Lower Crankcase Bracket 17 24 M8 x 40 Turbocharger Bracket to Manifold 17 24 M8 x 50 Wastegate Actuator Locknut 7 10 Wastegate Bracket to Manifold 7 10 Torx E8 Wastegate to Bracket 7 10 M6 Actuator...

Page 50: ...Specific Fastener Torque Specifications Component FT LBS Nm Notes Fastener s Magnet Rotor Fastener 73 100 M12 x 90 Cable Clamp 3 4 Loctite 272 M4 x 6 Sprague Clutch 7 10 Loctite 2752 M6 x 16 Stator Fasteners 7 10 M6 x 35 Stator Cover 7 10 M6 x 20 M6 x 25 M6 x 65 4 1 7 Fuel Rail Specific Fastener Torque Specifications Component FT LBS Nm Notes Fastener s Fuel Rail Fasteners 7 10 Loctite 243 M6 x 20...

Page 51: ...oil Fasteners 7 10 M6 x 20 Spark Plugs 20 27 Dielectric Grease Starter Motor Fasteners 7 10 Nyogel M6 x 50 4 1 9 Balance Plate PTO Specific Fastener Torque Specifications Component FT LBS Nm Notes Fastener s Balance Plate to Crankshaft 51 70 Loctite 577 M10 x 1 x 45 4 1 10 Engine Mounts Specific Fastener Torque Specifications Component FT LBS Nm Notes Fastener s Front Engine Mount to Lower Crankca...

Page 52: ...embly Notes Filter Cap Torque 18 ft lbs 25 Nm Apply a light film of engine oil to sealing o ring and filter cap threads during installation OIL FILTER CHANGE INTERVAL BREAK IN 10 TO 12 HOURS EVERY 25 HOURS THEREAFTER Page 52 134 ...

Page 53: ...ue 6 6 ft lbs 9 Nm Always use new gaskets and o rings when removing or replacing parts Torque valve cover fasteners in a criss cross pattern beginning with the four inside fasteners Cam phase sensor port faces exhaust side of engine Verify valve cover sealing surface is dry and clean from containments Page 53 134 ...

Page 54: ...m Rocker Arm Tower Fastener Torque 9 ft lbs 13 Nm VALVE CLEARANCE COLD IN 08 0 15MM 003 006IN EX 18 25MM 007 010IN Verify camshaft orientation during installation Hole in camshaft is located on the PTO side of engine Always replace camshaft sprocket and timing chain together Page 54 134 ...

Page 55: ...bs 38 Nm Apply Loctitet 272 to threads Plug Fastener Torque 11 ft lbs 15 Nm Oil Supply Elbow Fastener Torque 7 ft lbs 10 Nm Clean bedplate and lower crankcase mating surfaces prior to apply silicone Verify surfaces are free from any oil residue Apply a thin bead of Three Bondt 1215 to mating surfaces of bedplate and lower crankcase Dry sump oil pump is not serviceable Replace component if operatio...

Page 56: ...Pipe Fastener Torque 7 ft lbs 10 Nm Thermostat Opening Temperature 158_F 70_C Snap ring chamfer faces outward towards rear of engine Always use new o rings during installation and reassembly Elbow pipe points down and toward the heat exchanger Page 56 134 ...

Page 57: ...pump assembly Snap ring chamfer must face outwards towards rear of engine when installed Verify retaining cap does not move when snap ring is installed An audible click must be heard and alignment pin must be inserted properly into engine case when installing the timing rotor into the oil pump bore Verify balance shaft timing key is oriented properly inside shaft keyway Page 57 134 ...

Page 58: ...stener Torque 17 ft lbs 24 Nm Apply Loctitet 243 to threads Replace replace tensioner rail if damaged or unevenly worn Press tensioner into housing until flush with plug to set tensioner Tensioner should remain in locked position Activate tensioner by pushing tensioner in and past flush Tensioner should activate and extend outwards Replace if function is incorrect Page 58 134 ...

Page 59: ...4 9 Engine case cylinder head assembly Page 59 134 ...

Page 60: ...ds 1st STEP Torque cylinder head nuts in sequence 15 ft lbs 20 Nm Torque crankcase fasteners in sequence 12 ft lbs 16 Nm 2nd STEP Torque cylinder head nuts in sequence 30 ft lbs 40 Nm 3rd STEP Torque cylinder head nuts in sequence 180 Torque crankcase fasteners in sequence 18 ft lbs 24 25 Nm Page 60 134 ...

Page 61: ... 2 000mm 3 BLUE 0787 0789IN 2 000 2 005mm Rod Cap Fastener Torque 1st Step 7 ft lbs 10 Nm 2nd Step 14 ft lbs 20 Nm 3rd Step Turn 90 _ APPLY ENGINE OIL TO FASTENER THREADS PRIOR TO INSTALLATION Connecting rod caps feature a cracked mating surface Cap must be marked during removal and installed correctly Page 61 134 ...

Page 62: ...4 11 Valve assemblies Page 62 134 ...

Page 63: ...4 12 Balance plate PTO assembly Assembly Notes Balance Plate Fastener Torque 51 ft lbs 70 Nm Apply Loctite 577 to threads Page 63 134 ...

Page 64: ...4 13 Crankshaft Counter balancer assemblies Page 64 134 ...

Page 65: ...ve cover from engine 2 Remove the coolant outlet manifold oil filter cover and electric starter motor from engine case 3 Remove the two high pressure oil feed hose banjo bolts from the cylinder head exhaust side rear mounting location Page 65 134 ...

Page 66: ...side of the cover Note the two alignment dowels as circled in photo 5 Photo of stator inside of cover Photo E 6 Remove the water pump cover and impeller Photo F NOTE The impeller can be removed by turning the nut counter clockwise Hold the flywheel stationary while removing the impeller Page 66 134 ...

Page 67: ...istant place a pry bar across these two bolts to prevent the crankshaft from rotating Photo H 9 Remove the flywheel bolt and washer from the front of the engine Install flywheel puller bolt into flywheel HSR00_99_01_076 Carefully tighten puller bolt until flywheel comes off of crankshaft nose Photo I 10 Remove the flywheel timing key and roller bearings from crankshaft Page 67 134 ...

Page 68: ...o the inside of the sump cover 13 Install crankshaft hand crank PN PW 46981 into nose of crankshaft Tighten lock nut against crankshaft 14 The high pressure oil pump is located on the PTO side of the engine It is connected to the balance shaft Remove the snap ring from the high pressure oil pump cover Carefully extract the cap outer and inner rotors timing key and timing rotor from engine Illustra...

Page 69: ... is axial free play in each of the rocker arms 18 Place rocker arm assemblies and rocker arm pins on a clean towel or piece of paper Identify each part for use during assembly Photo M NOTE The MAG exhaust side rocker arm features a cam phase sensor pickup nose as circled in photo M 19 Remove the valve shims Place valve shims with corresponding rocker arm and location 20 Remove the chain tensioner ...

Page 70: ...chain removed from the engine the crankcase can be split in two To begin loosen and remove the four case bolts located in the oil sump gallery Photo O 26 The lower case bolt located on the PTO side also holds the oil pump relief piston cover in place Photo P 27 Once the plate is removed use a magnet to remove the spring and piston from inside the bore Page 70 134 ...

Page 71: ... up and off of the crankcase 30 Remove the chain guide fastener and chain guide Photo S 31 Rotate the engine assembly 180 Remove the tensioner chain guide from the crankcase 32 Using a soft faced hammer carefully tap the lower section of the crankcase loose from upper crankcase Once loose pull the lower crankcase up and away from the upper case Photo T Page 71 134 ...

Page 72: ...reating a unique mating surface between the connecting rod and cap Always verify that the lower cap matches the connecting rod 35 Always keep the connecting rod plain bearings rod caps and bolts with the piston assembly the engine was manufactured with 36 Remove the crankshaft assembly from the crankcase Remove each crankshaft plain bearing from both crankcase halves and place with its original cr...

Page 73: ...asure valve face width Out of specification Replace valve Measure valve seat contact width 1 Apply light coating of Prussian Blue or similar dye compound to valve face 2 Install valve into valve guide 3 Tap valve several times to make a clear impression on the valve face Do not rotate valve 4 Remove valve and measure valve seat width Out of specification Recondition or re place cylinder head Page ...

Page 74: ...valve margin thickness Out of specification Replace valve Measure valve stem diameter Out of specification Replace valve Measure valve guide inside diameter Out of specification Replace valve guide Page 74 134 ...

Page 75: ... of specification Replace valve Measure valve spring free and installed length Out of specification Replace spring 4 15 2 Cylinder Head Inspection Measure cylinder head warpage Out of specification Replace cylinder head Page 75 134 ...

Page 76: ...plated with NiCaSil Measure cylinder for taper and out of round limits 1 BORE Maximum diameter of Da Df 2 TAPER Maximum of Da De and Db Df 3 Out of Round Maximum of Da Db and De Df Out of specification Replace cylinder block 4 15 4 Camshaft Inspection Measure camshaft width Out of specification Replace camshaft Page 76 134 ...

Page 77: ...pecification Replace camshaft Measure camshaft run out Out of specification Replace camshaft Measure camshaft bearing hole inside diameter Out of specification Replace camshaft NOTE Bearings must be removed to measure I D Page 77 134 ...

Page 78: ...eter Out of specification Replace axle Measure camshaft axle clamp inside diameter Out of specification Replace cylinder head 4 15 5 Rocker Arm Inspection Measure rocker arm axial play Out of specification Replace rocker arm Page 78 134 ...

Page 79: ...ut of specification Replace rocker arm shaft Measure rocker arm post bore inside diameter Out of specification Replace rocker arm post 4 15 6 Crankshaft Inspection Measure crankshaft deflection Out of specification Replace crankshaft Page 79 134 ...

Page 80: ...f specification Replace main bearings crankcase or crankshaft Crankshaft Main Bearing Replacement Guide Replacement of the crankshaft main bearings is required when the bearing oil clearance is out of specification Use this guide to select new bearings NOTE Bearing color code is imprinted on the side of each bearing REPLACEMENT BEARING THICKNESS YELLOW 0679 0681 1 726 1 731mm BLUE 0681 0683 1 731 ...

Page 81: ...tion Replace connecting rod bearings Measure small end inside diameter Out of specification Replace connecting rod Connecting Rod Bearing Replacement Guide Replacement of the connecting rod bearings is required when the bearing oil clearance is out of specification Use this guide to select new bearings NOTE Bearing color code is imprinted on the side of each bearing REPLACEMENT BEARING THICKNESS R...

Page 82: ...nce shaft run out at several locations Out of specification Replace balance shaft Measure bearing diameter Out of specification Replace balance shaft 4 15 9 Piston Inspection Measure piston diameter Out of specification Replace piston Page 82 134 ...

Page 83: ... piston Measure piston pin outside diameter Out of specification Replace piston pin Confirm piston to cylinder clearance specification Out of specification Replace piston pin Measure installed ring end gap Out of specification Replace rings or cylinder block Page 83 134 ...

Page 84: ...rove clearance Out of specification Replace piston ring or piston 4 15 10 High Pressure Oil Pump Inspection Measure relief spring free length and piston dimensions Out of specification Replace spring and piston Page 84 134 ...

Page 85: ...ring outwards Replace tensioner assembly if tensioner will not lock then engage when pushed inward from locked position Chain Tensioner Guides Visually inspect both chain guides Replace guides if any cracking or abnormal wear and tear is found NOTE Tensioner chain guide shown 4 15 12 Starter Motor Clutch Inspect clutch function Clutch should move freely when rotated clockwise Clutch should not rot...

Page 86: ...Upper Lower Crankcase Cylinder Head Bedplate Lower Sump Crankshaft Balance Shaft 4 After cleaning parts blow dry with compressed air 5 With the engine facing up on stand lubricate cylinders with engine oil 6 Obtain both piston assemblies Lubricate piston assemblies with engine oil 7 Install the upper and oil control rings with the markings facing upwards 8 Place ring compressor tool on top of one ...

Page 87: ...scribed in this chapter 13 Coat all bearings and journals with engine oil Install water pump drive gear into crankcase 14 Install the chain tensioner guide into the exhaust side of the crankcase Tighten fastener to specification 15 Install the balance shaft with the gear facing the front of the engine NOTE Verify bearing surfaces are centered within journals 16 Install crankshaft so that the two s...

Page 88: ...urface with the appropriate connecting rod Loosely install each fastener then tighten evenly 20 Torque connecting rod cap bolts to specification 21 Verify the lower and upper crankcase mating surfaces are free from engine oil or foreign material 22 Apply a thin even bead of Three Bond 1213t case sealant to the upper crankcase mating surface 23 Apply sealant as outlined in photo Page 88 134 ...

Page 89: ...led on the four studs as outlined in the photo NOTE Verify stud jackets are installed in the middle of each stud 25 Carefully install the lower crankcase on to the upper crankcase 26 Loosely install two of the four lower crankcase fasteners Page 89 134 ...

Page 90: ...er head mating surface free from oil and foreign material Install a new cylinder head gasket with the part numbers and markings facing up and the larger coolant slots located on the exhaust side of the engine NOTE Always use a new cylinder head gasket re gardless of original condition 30 Install the cylinder head over the stud bolts with the exhaust manifold studs facing the oil filter side of the...

Page 91: ...e timing chain into the engine Four service tools are required when installing the timing chain and setting the engine timing They are Timing Chain Installation Guide PN PW 47079 Timing Chain Hook Stuffer PN PW 47108 Crankshaft Turning Hand Crank PN PW 46981 Camshaft Alignment Tool PN PW 47077 4 17 1 Timing Chain Installation 1 Remove the rocker arm pins and rocker arms from the cylinder head 2 In...

Page 92: ...wn through the engine and protrudes from the bottom of the cylinder head CAUTION Do not drop the chain into the engine 6 Insert the stuffer end of the Timing Chain Hook Stuffer PN PW 47108 tool into the chain gallery NOTE The stuffer wedge will prevent the chain from catching on the sprocket 7 Allow three to four chain links to fall past the cylinder head parting line NOTE Verify the chain is not ...

Page 93: ...ankcase support member NOTE The hooked end of the Timing Chain Hook Stuffer Tool will simplify pulling the chain around the sprocket 10 Carefully drop the chain UNDERNEATH the crankshaft and around the chain guide NOTE Do not drop the chain around the OUT SIDE of the crankshaft When performed prop erly the chain should drop easily through the engine and protrude from the cylinder head Page 93 134 ...

Page 94: ... the correct timing position in relation to the crankshaft and balance shaft 13 Wrap chain around camshaft sprocket and secure links with new pins and plate assembly NOTE Do not use the chain crimper to as semble chain links at this time 14 Rotate the engine 180 Cylinder Head Up 15 Carefully rotate the crankshaft until the timing marks on the gears are pointing at each other The valve train should...

Page 95: ...the locked position To set the chain tensioner grasp end in palm of hand and press assembly down on a hard surface The tensioner is set in the locked position when it is flush with the tensioner housing 3 Install the chain tensioner into the crankcase Tighten housing cap to specification 4 Insert the blade of a flat head screwdriver between the tensioner and the tensioner rail guide Page 95 134 ...

Page 96: ...stall low pressure pump and screen into bedplate Clean bedplate and lower crankcase mating surfaces 9 Apply a thin bead of Three Bond 1215t to the mating surface and Install the bedplate Tighten fasteners to specification 10 Install the high pressure oil pump assembly as outlined on page 4 12 11 Rotate the engine 180 Cylinder Head Up 12 Coat the gears located at the front of the engine with engine...

Page 97: ...s the water pump shaft into the mechanical seal 17 Apply a thin bead of Three Bond 1215t to the front gear cover mating surface 18 Install the front gear cover Tighten fasteners to specification 19 Install the water pump impeller Tighten impeller nut to specification 20 Install water pump housing and coolant hose Tighten fasteners to specification Page 97 134 ...

Page 98: ...nkshaft 23 Install the flywheel on to the crankshaft Verify flywheel fits over key 24 Apply Loctitet 262 to flywheel bolt and install 25 Install two of the PTO coupler bolts into the PTO end of the crankshaft Have an assistant place a pry bar across these two bolts to prevent the crankshaft from rotating 26 Tighten flywheel bolt to specification Page 98 134 ...

Page 99: ...il supply hoses and banjo bolt to the top of the cylinder head 30 Tighten banjo bolt to specification NOTE Before installing the valve cover and gaskets the valve clearance must be checked Follow the procedure outlined in chapter Replace any valve clearance shims that are out of specification or worn After completing the valve clearance adjustment reinstall the valve cover using new gaskets and o ...

Page 100: ...Remove and replace thermostat 5 Insert thermostat with bleed hole up 6 Reinstall the elbow Reinstall the snap ring Verify the snap ring chamfer faces out when installing 4 19 Water Pump Removal Installation 1 The water pump cover can be removed by 4 fasteners that mount the cover to the front gear cover 2 Always replace the o ring with new during reassembly 3 The impeller can be removed by holding...

Page 101: ...ssure pump that pumps oil to the oil cooler and then on to the oil storage tank The second pump high pressure is located on the PTO end of the engine crankcase The high pressure pump draws oil in from the oil storage tank and supplies oil to all of the internal engine components The low pressure pump supplies approximately twice the amount of oil to the oil storage tank than what the high pressure...

Page 102: ...4 20 1 Low Pressure Oil Circuit 4 20 2 High Pressure Circuit Page 102 134 ...

Page 103: ... the crankcase sump The remaining vapors are collected at the top of the separator and routed to the air intake flame arrestor where they are drawn into the intake air stream and burned 4 20 4 Low Pressure Pump Removal Installation NOTE The engine must be removed to access the low pressure pump 1 Remove the crankcase bedplate from the lower crankcase 2 Remove the fasteners securing the screen to t...

Page 104: ...ressure pump 1 Remove snap ring Carefully extract rotor cover from crankcase 2 Extract outer and inner rotors from bore Remove timing rotor from shaft 3 Carefuly remove timing key NOTE Always use a new timing key and o rings during pump assembly NOTE Verify snap ring bevel faces outward Page 104 134 ...

Page 105: ...4 20 6 High Pressure Oil Supply Page 105 134 ...

Page 106: ...Page 106 134 ...

Page 107: ... Pack 2 If you are using an older version of Windows please contact our support Plug in the Keyspan Adapter in a free USB Port After a short time windows will start the manager for installing new software like in the following picture Please ignore this window it will disappear later automatically Please click cancel Page 107 134 ...

Page 108: ...t the publisher of the product You confirm by clicking on the button ok After this there should appear the install assistant from the Keyspan Software as in the picture followed Now you have to click next In the next window you confirm the licence with yes In the next window please select the directory where to install the files for the Keyspan Adapter and click next Page 108 134 ...

Page 109: ... the installation depending on the hardware configuration of your PC Note If Windows call you that the program hasn t pass the Windows Logo Test select continue installation If everything has completed you should see this window next site Please click finish to complete the installation Page 109 134 ...

Page 110: ... Please reboot the PC restart the computer Page 110 134 ...

Page 111: ...hing works the Keyspan Adapter has to configure on a Port between 1 4 as shown in the following steps Click on the Windows Start Button and select Programs Then select the entry Keyspan Usb Serial Adapter and click Serial Keyspan Assistant Then the Keyspan USB Serial Assistant window should appear Page 111 134 ...

Page 112: ...n see which port the Keyspan Adapter is using If the Port is between 1 4 you can close the Keyspan Assistant and you have to start the HSR Diagnostic Tool Other case please click on the department submenu Port Mapping Page 112 134 ...

Page 113: ... In the middle of the window there you can select which port should be used Please select a free one between 1 4 After that wait about 30 seconds that the program can change your settings Page 113 134 ...

Page 114: ... When you have chosen a right port please close the Keyspan Assistant and open the HSR Diagnostic tool Page 114 134 ...

Page 115: ... To open the diagnostic manual refer to the diagnostic manual installation In the menu of the HSR Diagnostic Tool you can see a submenu named COM please click on it After that you see the entry COM Port please select this one Page 115 134 ...

Page 116: ...ppeared Please select the same port as you have chosen into the Keyspan Assistant and press the Button Close Now the HSR Diagnostic Tool should work correctly If there are any problems please contact our Administrators Page 116 134 ...

Page 117: ...5 4 Diagnostics 5 4 1 Installation Move the folder software S0 to your hard disk or desktop Page 117 134 ...

Page 118: ...Start the program SERVICE 1010 HSR exe Page 118 134 ...

Page 119: ...ile Not Found After a click on the button OK the following dialogue window will open Selecting the Message File Here you can select the language of your Message file at the present English and Italian The language files are in the same folder like the diagnostic program After that you are asked for the saving path fort he device file This is saved in the folder Datensätze SO Page 119 134 ...

Page 120: ... wiring harness Multipoint diagnostic connector 2 Connect the HSR diagnostic cable with the push pull plug Connecting the diagnostic cable 1 Connecting the diagnostic cable 2 3 Now attach the other side of the diagnostic cable to the serial interface RS232 COM1 of your computer laptop Page 120 134 ...

Page 121: ...Serial interface 4 Switch on the ignition with the lanyard Connecting the lanyard 1 Connecting the lanyard 2 Page 121 134 ...

Page 122: ...e Should there be problems when you start the program for the first time so you could find a solution in chapter Starting the diagnostic program for the first time 6 Click on the button Console Start 1 Afterwards the following window will appear with the current values read out from the ECU Page 122 134 ...

Page 123: ... correspond approximately with the standard values of the non running engine at the ambient temperature about 10 C 50 F It s advisable to set the following parameter in this console RPM SPARK1 BAP SPARK2 MAP TPS INJ1 AIR_T INJ2 ENGINE_T BATT_V Page 123 134 ...

Page 124: ...one of the parameters you have to click on Options in the menu bar and then on Disable All The meanings of the abbreviations are ERCOUNTER ignition counter RPM engine speed BAP atmospherically pressure in mbar and or hPa MAP manifold pressure in mbar and or hPa TARGET_MAP not required KLAMBDA not required INJ1 injection time for cylinder 1 in ms INJ2 injection time for cylinder 1 in ms SPARK1 igni...

Page 125: ...C BATT_V battery voltage in V LAMBDA not required LAMBDA_REF not required IDLE not required GEAR_VALUE not required OTS_SWITCH not required KILL_SWITCH not required DUTY_BOOST not required BLOCK not required FREE not required To abort the diagnosis click the button Page 125 134 ...

Page 126: ...r engine serial number Date date of the last ECU Setup A double click into the field will insert the actual date Calibration Map ID Mapping version number at present the actually version is 11005 Set End Line Values saves the values in the ECU Set Default End Line Parameters reset to default values and saves it in the ECU Read Hour Meter reads the engine total running time Idle CO Adjustment not r...

Page 127: ...trigger and with a double click you have to take over the value for TPS Minimum Bit Value 5 If the bolt has been touch before by the rider the best would be to un screw it until the TPS mini does not move turn the screw clock wise and when the bit start to move then make turn more 6 The idle should be between 1400 1500 rpm if you have 100 rpm and you wish to adjust higher do not forget to reset th...

Page 128: ...he value right of the input field of TPS Minimum Bit Value to transfer the value into the input field 10 Then turn the allen screw until the value increases by 1 In our example above this would be the value of 81 Now the correct idle setting is done Page 128 134 ...

Page 129: ...ton Close you quit the ECU Setup To start the diagnostic you have to click on the button Diagnosi A click on the button Read Diagnostic reads out the error memory from the ECU With the register cards Sensors Actuactors Injection and Ignition you can browse between the individual engine building groups Any error will be indicated with the value ERROR Page 129 134 ...

Page 130: ...5 5 Electrical System Page 130 134 ...

Page 131: ...Page 131 134 ...

Page 132: ...sr benelli com E Mail office hydrospace at 6 2 Directives Hydrospace thus confirms that the construction of the engine corresponds to the following pertinent conditions EU directive about sport boats 94 25 EG with addendum 2003 44 EG USA EPA Federal Register 40 CFR Part 91 USA CARB 13 California Code of Regulation Article 4 7 Spark Ignition Marine Engines ...

Page 133: ...signature Work carried out Motor oil change Oilfilter change Spark plug change Valve play checked Valve play adjusted Date Status Hours of operation Company seal signature Work carried out Motor oil change Oilfilter change Spark plug change Valve play checked Valve play adjusted Page 133 134 ...

Page 134: ...out Motor oil change Oilfilter change Spark plug change Valve play checked Valve play adjusted Date Status Hours of operation Company seal signature Work carried out Motor oil change Oilfilter change Spark plug change Valve play checked Valve play adjusted Page 134 134 ...

Reviews: