22
Grinding tools - Mounting and changing
Always cut mains voltage when working with the grind
-
ing tools. Make a habit of always disconnecting the
mains plug before commencing work.
Start by tilting the machine backwards as per the instruc
-
tions on page 21.
Remember that the grinding tools can be extremely hot
if grinding work has recently been carried out. The tools
can remain hot for some time following use.
The HTC 0 RX™ is equipped with our newly patented
and copyright protected EZchange™ tool system. It con
-
sists of wings with diamond tools. These wings are folded
and pushed into a tool holder where they are locked using a
light blow from a non-rebounding rubber hammer.
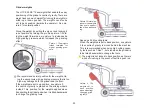
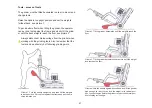
Move the grinding tool slightly tilted forwards down into the
intended slots in the tool holder to mount. Now push the
tool forwards out from the centre of the tool holder, see
picture .
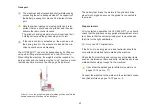
Now lock the tool in the tool holder by administering a few
light blows with a rubber hammer, see picture 2.
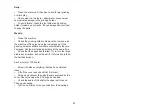
When changing tool, release the tool with a few light blows
using a rubber hammer. Now repeat in reverse direction.
Strike the tool until it loosens and lift it out of its slot in the
tool holder. See picture 3.
Picture.1..When.
mounting.a.grind-
ing.tool,.you.must.
first move the
tool.down.into.the.
slots.in.the.tool.
holder.
Picture.2..Now.
you.can.lock.the.
tool.by.applying.
a.few.light.blows.
to.the.tool.holder.
using.a.rubber.
hammer.
Picture.3..You.can.
apply.a.few.light.
blows.to.release.
the.lock.in.order.
to.remove.a.tool..
You.can.now.lift.it.
up.from.its.slot.
Summary of Contents for 950 RX
Page 1: ...v 3...
Page 2: ......
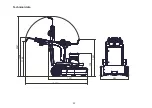
Page 34: ...32 798 1347 1287 2047 2154 1338 1196 985 Technical data...
Page 47: ...45 29 1 2 3 4 5 6 7 8 9 10 11 12 13 14 15 16 17 18 19 20 21 22 23 24 25 26 27 28 30 31...
Page 49: ...47 2 3 4 5 6 7 8 9 10 12 13 14 15 16 17 19 20 21 22 23 1 18 11...
Page 53: ...51 1 2 3 1 4 5 6 7 8 9 10 11 12 13 14 15 3 2 3 2 16...


